En esta sección
Discount
As explained in the ticket modification options, in the sales process, two different types of discounts can be applied: on the total or on a line item, that is, on a particular item. Additionally, discounts can have an associated reason. Below, it will be shown how to configure them.
Reasons for discount
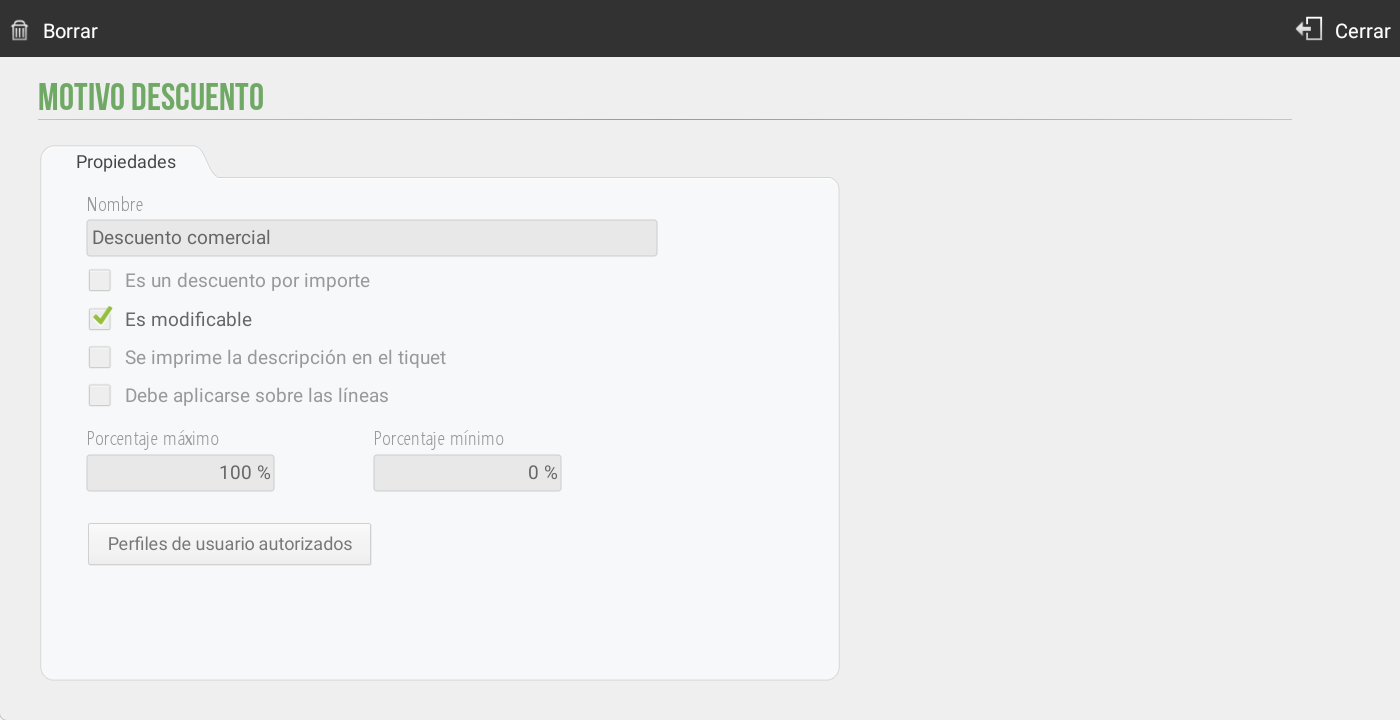
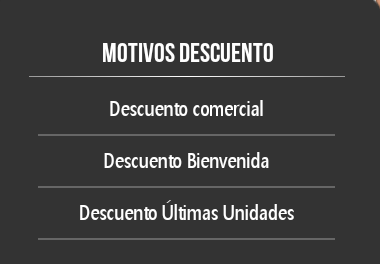
To apply a discount, it is necessary to associate it with a Discount Reason. To create or modify a discount reason, we have to go to Settings and select the option Reasons for discount.

Upon pressing the button, a new screen will open with the Reasons for Discount available. From this screen you can:
Edit an existing reason by clicking on it.
Create New Discount Reasons.
Change the name of the discount reason
Define the type of discount:
For amount.
For percentage (default option).
Configure whether the discount is modifiable or fixed:
By default, the discounts are modifiable.
If it is defined as non-modifiable, it will be necessary to establish the exact amount or percentage that will be applied when selecting this reason.
Determine if the description is printed on the ticket.
If it must be applied on the lines.If this option is active, when selected from the ticket header, it will add the discount to each line of the ticket. By default, it is deactivated and the discount is applied when totaling.
Establish usage limits For the cashier:
To define the maximum and minimum value (as a percentage or amount) that you can apply when the discount is modifiable.
To define what user profilesThis discount reason is available. If the seller does not have this permission active, they will not see this discount reason. By default, unless otherwise specified, the discount reason will be visible to all user profiles.
Discount on the total
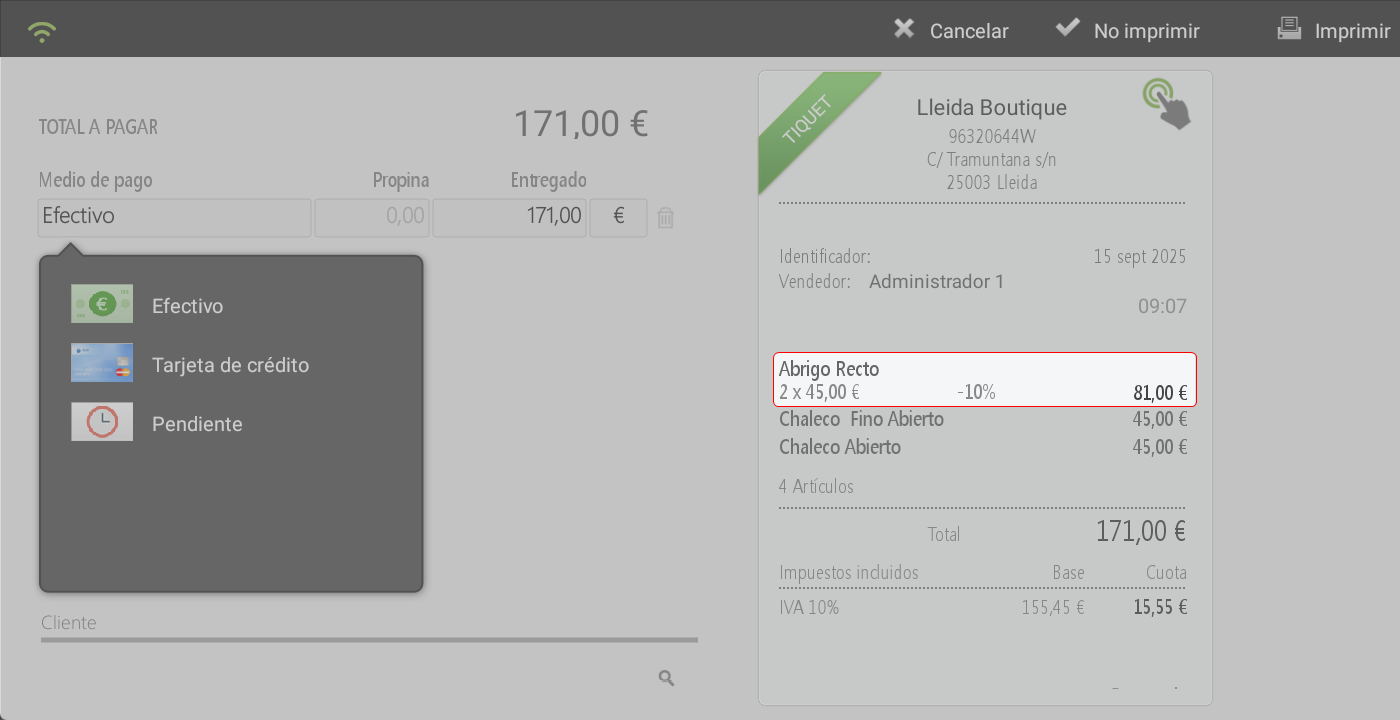
You can select this type of discount by tapping the ticket header on the sales screen or by tapping the ticket on the payment methods screen.
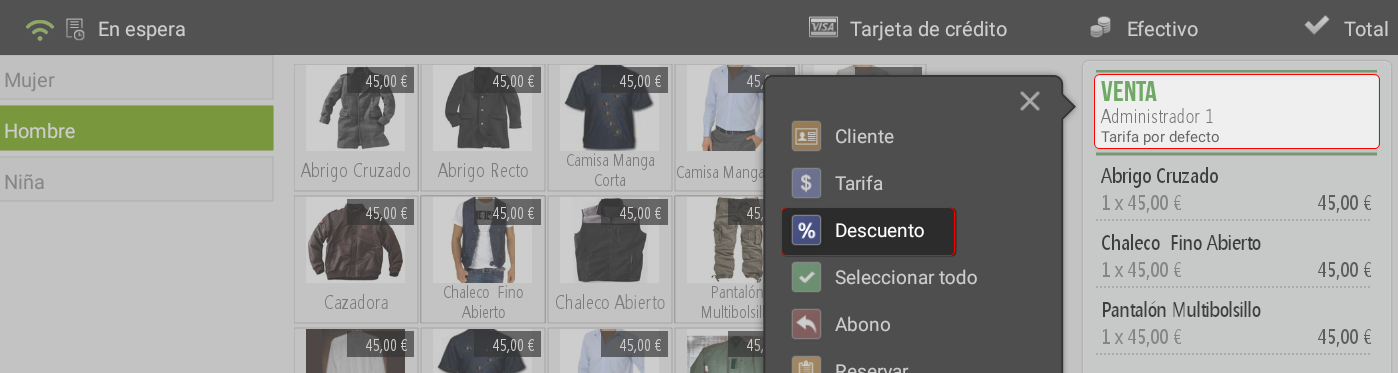
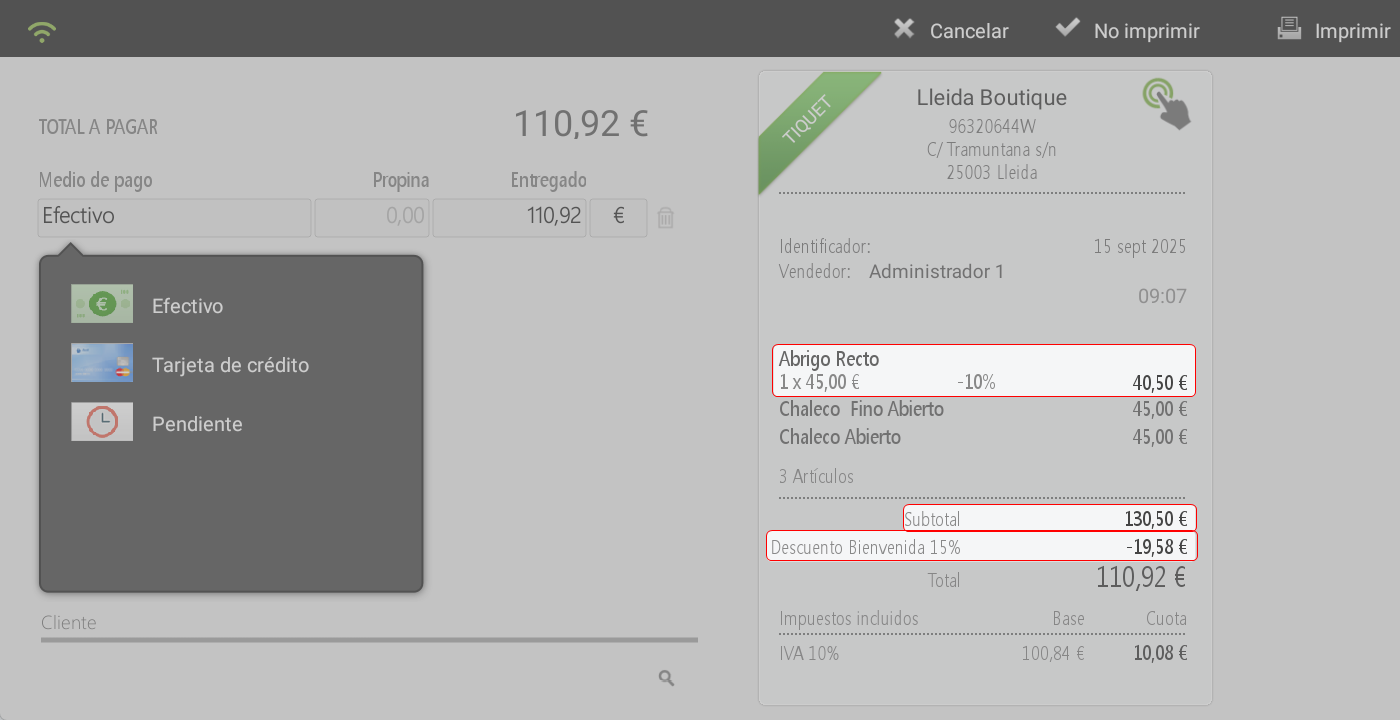
Applying a discount to the total will always involve assigning a discount reason, requiring you to select one from the list of existing discount reasons. Once the discount reason is selected, you must enter the amount to be discounted, either as a percentage or a value, and press Accept. If the discount reason is not modifiable, it will be applied directly without asking.
On the sales screen, you can check the discount that will be applied at the bottom of the receipt.

Only one discount can be applied, either at the header level (on the total) or at the line level (on an item). Therefore, if another discount is to be assigned, it will replace the previous one. However, a discount may have been applied to the total, but an additional discount can be added to one or more items. In this case, the discount on the lines is applied first, and the discount on the total is then applied to the resulting amount, as shown in the following image.
Discount on the product
To apply a discount to the line or item, the same procedure as explained in the previous section must be followed.
The discount will be reflected on the line items, itemized by units, price, discount, and total sales line amount.
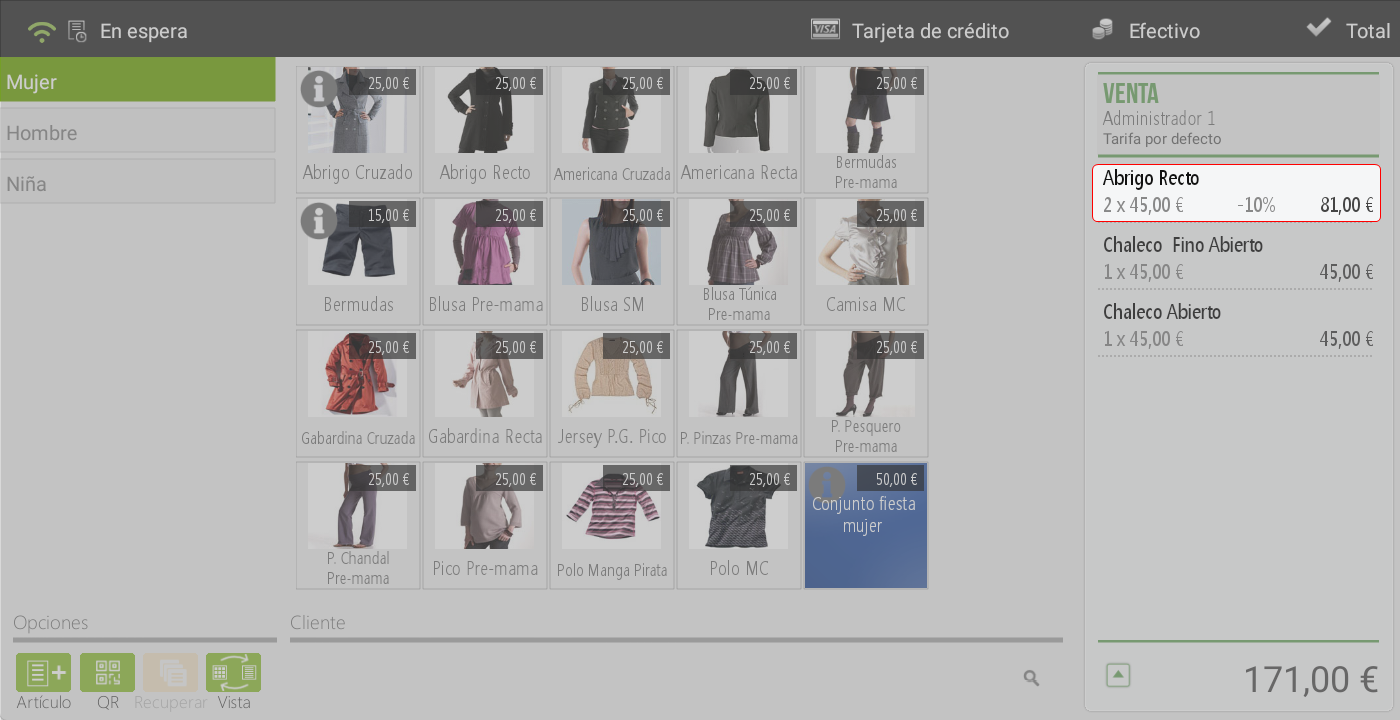
This discount will be reflected both on the sales screen and on the total screen.
AI Assistant
Section summary
AI can generate inaccurate information; verify the results.