En esta sección
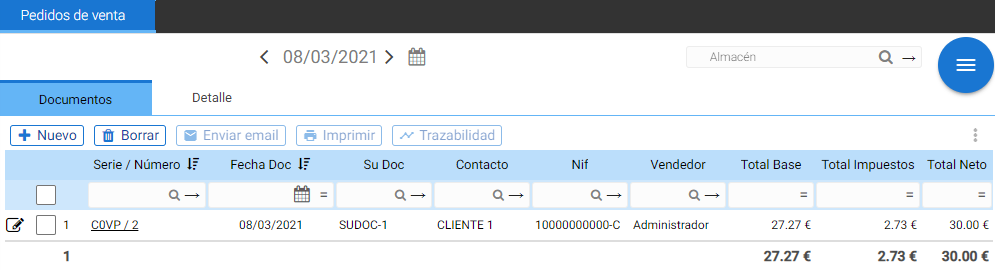
Sales Orders
When requesting a quote, the system automatically generates a sales order. To view the generated orders, you must access the Sales menu and select Sales Orders.
The system itself allows modifying orders, deleting them, or adding new ones directly without requiring an associated budget. Thus, by selecting the [+ New] button above the Orders list, the Sales Order document creation window will open.

The header indicates the client, the seller performing the operation, the type of transaction or billing regime, in addition to the document series and the generation and delivery dates.
Sales orders, in addition to the aforementioned fields, store the related document information in [Your Document] and [Your Document Date].
In the detail section, with the [+ Add] and [Remove] buttons, lines are inserted and modified, indicating the units, price, and discount. You can also search for existing items by reference or description, from their respective fields.
The lines allow you to associate different taxes if you access the three-dot button located after the net column.
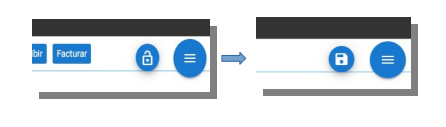
In the top right corner of the screen, a button with a padlock icon will be displayed that allows you to unlock a document that has been finalized. Once selected, it can be edited.
Interactive buttons in sales documents:
Document generation windows have by default additional buttons at the top of the screen; these will allow you to: delete the document, open the document search tool, print it or send it by email, print labels for the items in the detail, or access the traceability of that operation. These same options are found in the document search filter.
Once the document has been saved, new actions related to the Document Type are activated: In the case of sales orders, they can be [Fulfilled], [Invoiced], or [Requested for production]. Additionally, the [Credit] button will be activated.

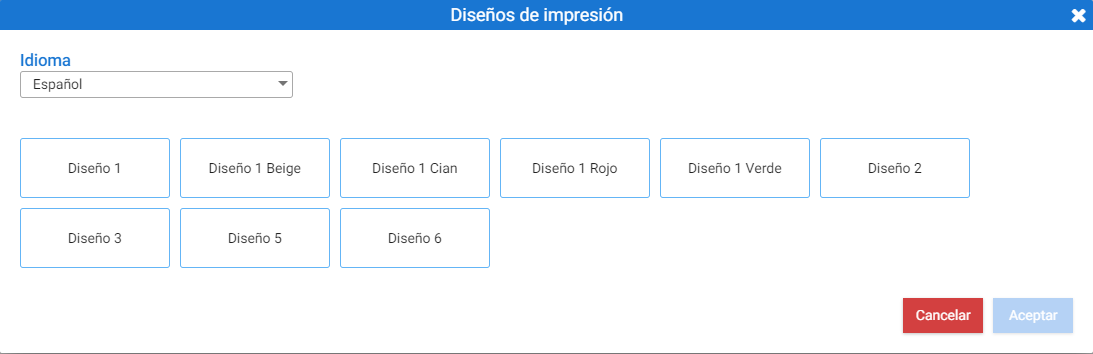
Clicking the [Print] button will display a pop-up screen where you must select the required Document Layout. Upon clicking [Accept], the preview will open, from which you can select a printer or save the document as a PDF.
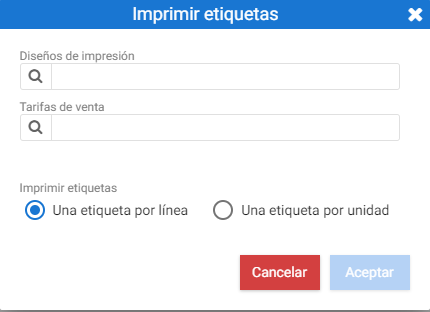
If you wish to [Print labels], the first thing shown is a PopUp with two selectors: one for the label design and another for the selling price. At the bottom of the pop-up screen there are two options for printing the labels: one per line or one per unit.

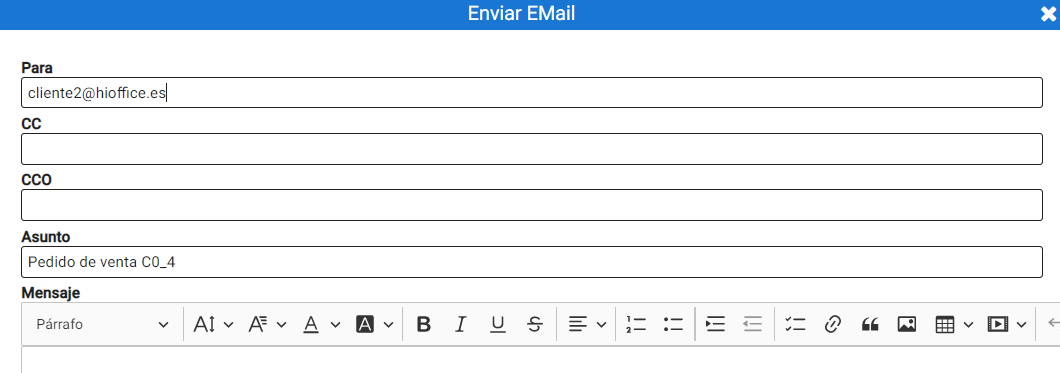
The button of Send Email A box opens with different text fields where you must enter the recipient, the subject, and the body of the email. The document is sent attached with a default design.
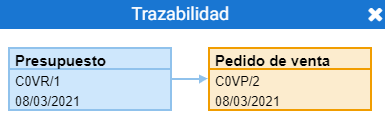
The option of Traceability It allows you to see the cycle a document has gone through, that is, all the documents generated from it.
Serve orders:
To fulfill an order, it can be done from the document itself with the button Serve, from here, you can select several orders to receive them all in a single document. Next, the system will ask you to specify the quantity of items served on each line.
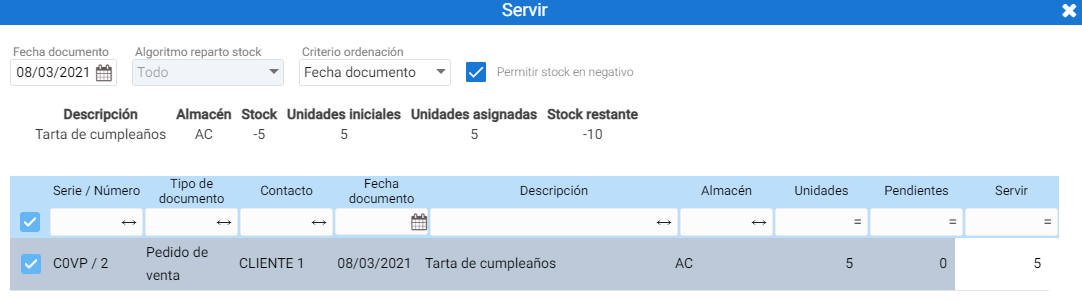
Using the selectors on the left, you can select or deselect one or more lines. When selecting Accept, automatically the order will be moved to a sales delivery note and can be invoiced.
Invoice order:
The [Invoice] tool is the same as the [Serve] tool, but with the exception that an invoice is being generated and the payment methods with which the document will be settled must be specified.
Once the lines and units to be invoiced are indicated, the payment method selection window pops up.
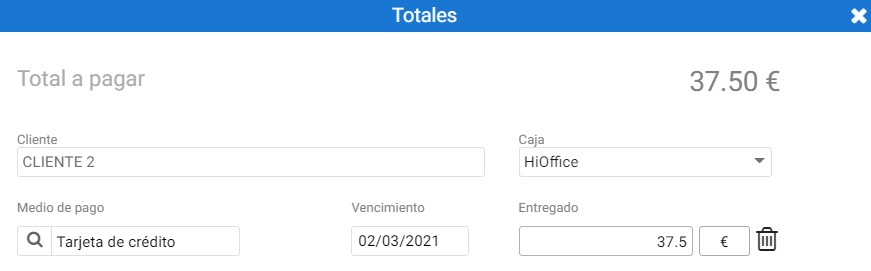
Upon accepting, the invoice is automatically generated.
AI Assistant
Section summary
AI can generate inaccurate information; verify the results.