Items of type Packs
Creating packs allows grouping items or services as if they were a single item for the same price.
Creation and maintenance of packs
To access pack creation, go to the Configuration section and select the Packs option. Here you can create new packs or edit existing ones.
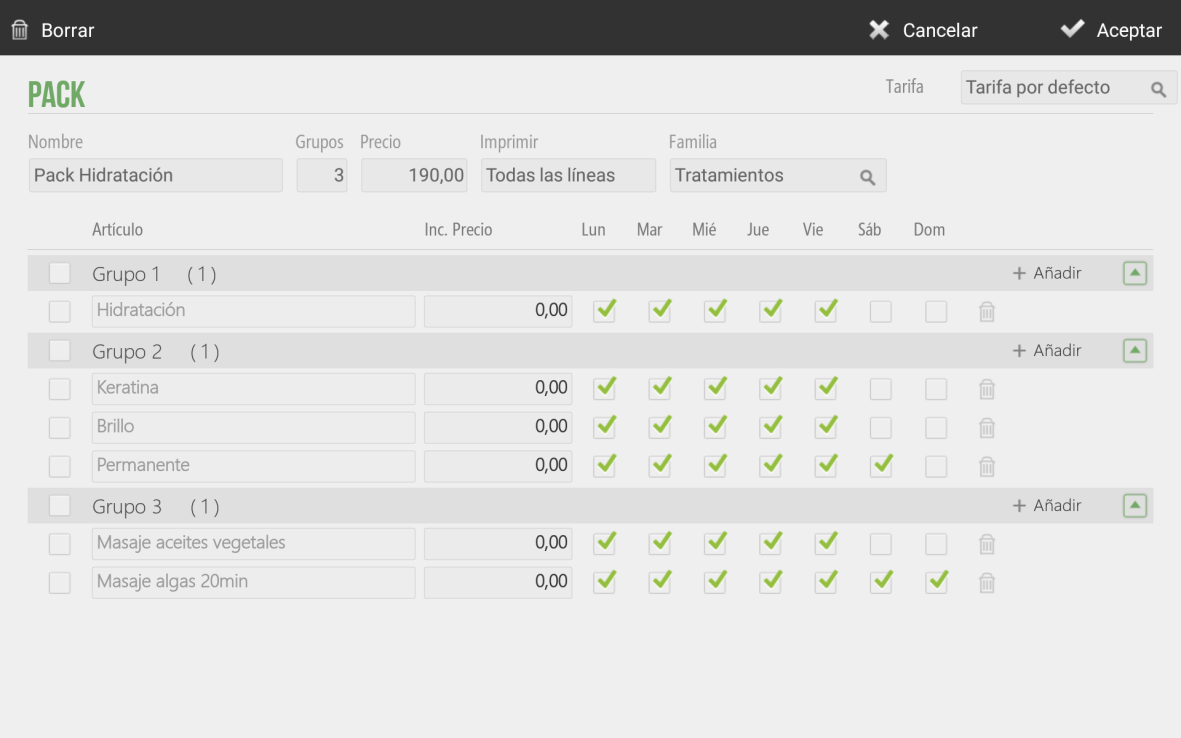
From the general menu options, you can modify the name, the number of groups that make up the pack, the total price of the pack, whether to print the description of the items in each group on the ticket, and the category where the item will be placed.

Each group can contain as many items as it wishes, as well as select which days each item will be available.

Additionally, you can add a supplement or price increase per item, which would be added to the total price of the pack.
Sale of packs
First, you need to have a pack created, as specified in the previous point, and this pack must be assigned to a family.
On the sales screen, select the family that contains the pack and then select the pack from the item list. The items or services that compose it will appear, as well as the items available for each group (items can be configured by days of the week).
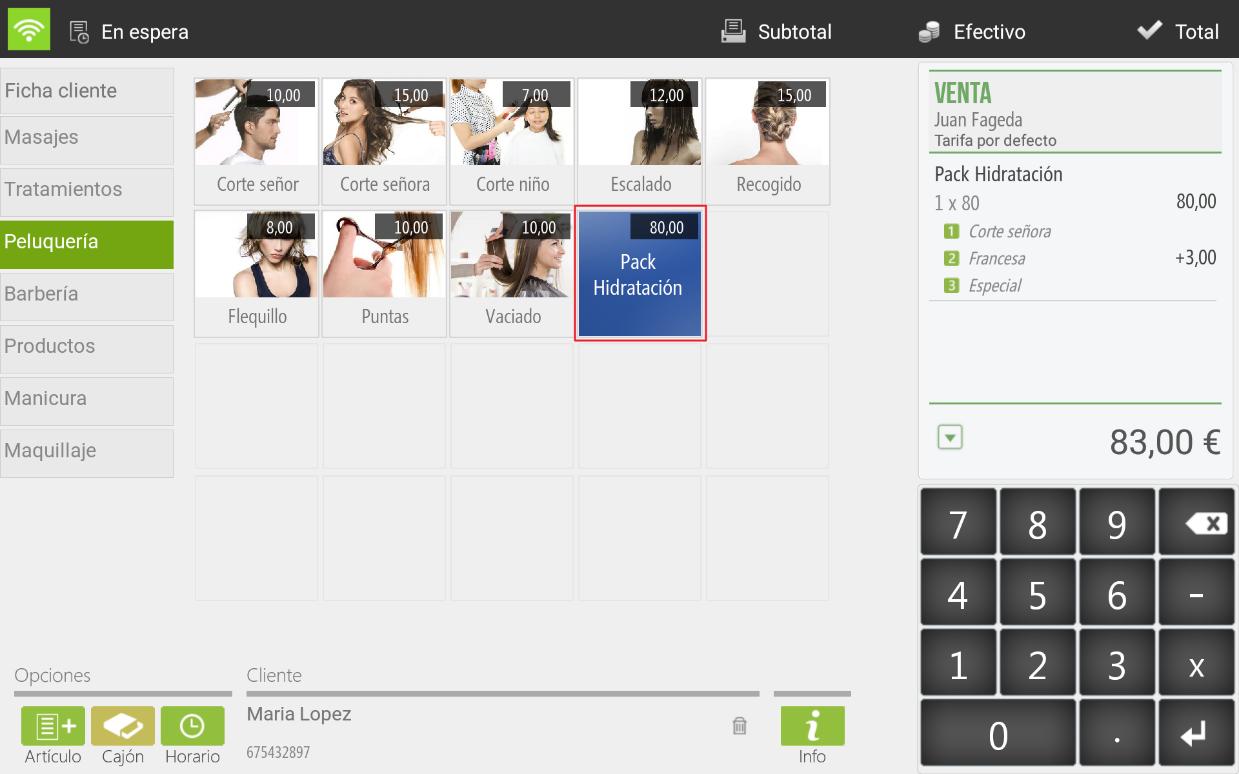
Select the desired items or services from each group within the pack; the program will then direct you to the calendar screen so you can schedule the previously selected services from the pack one by one.
In the pop-up, we see: the service we want to schedule, its duration, the total duration of the package, and the client to whom the package has been sold.
The total duration of the pack will decrease as its services are scheduled.

If you don't want any service from the pack, when scheduling it, you must select the cancel 'X' that appears in the calendar pop-up.
AI Assistant
Section summary
AI can generate inaccurate information; verify the results.