En esta sección
Devices
HioPOS Cloud can work with up to five different external hardware devices. These are: Printer, Cash Drawer, Scanner, Display and Card Reader. They can be configured from the Devices option in the Settings menu.
The following are the main technical specifications for the Device configuration.
Once you have configured each device, press Test to test it and verify that it works correctly.
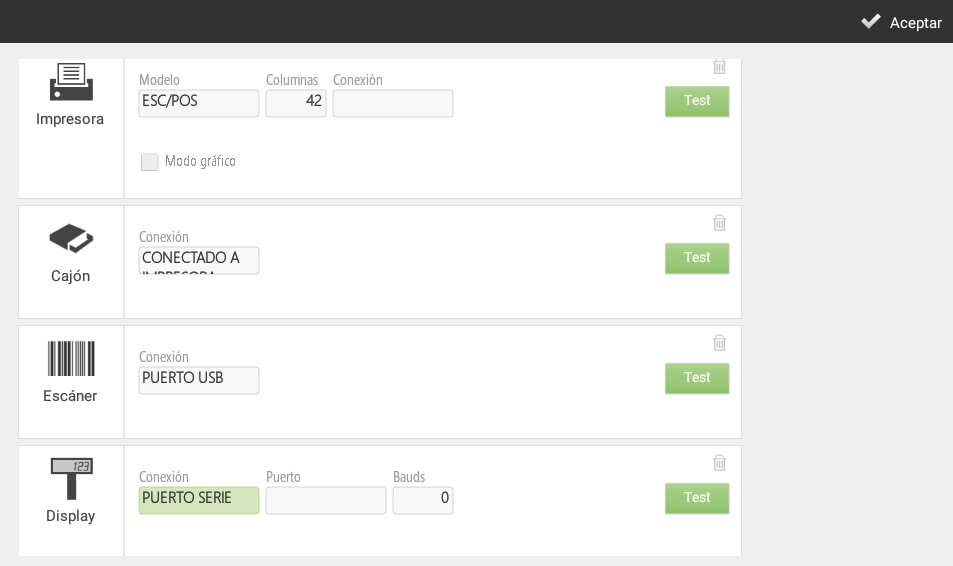
Depending on the device you are configuring and the features of your terminal, you can select from different connections (Local Network, Bluetooth, USB Port, Printer Port, Keyboard Input or Audio Port).
If you wish to modify device settings or add a new device, you can do so in the Devices section of the screen. Configuration.

Printer
The printer we set up here will be the default printer that the terminal will use for printing tickets.
HioPOS Cloud works correctly with most ESC/POS compatible receipt printers. You can also configure the number of columns for the printer. The most common is 42.
Next, we select the type of connection. We can work on a Local Network, with Bluetooth, or with a USB port.

If the printer is Ethernet, select Local Network and enter its IP address. By default, the port should be 9100.
If the printer is Wifi, we will select Local Network in Connection. In this case, it must be taken into account that both the printer and the point-of-sale terminal must be connected to the same Wifi network. We will enter the IP address and port of the printer. We click Test to check its operation

When selecting the Bluetooth Connection, we must take into account that the printer must be connected from the beginning with the Android operating system. To do this, go to the Android settings section and in the Bluetooth subsection, select the printer. Once correctly connected, we will return to HioPOS Cloud and select the Device that will already be automatically suggested to us. We press Test to verify its operation.

If we select the USB Port connection type, we need to have the printer connected to the USB port of the point-of-sale terminal or tablet. In the box Device We select the port that HioPOS Cloud will already suggest by default. We click Test to verify its operation.
Also, we will be able to connect the HIOPOS printers, which are characterized by making sounds when printing the sales ticket.
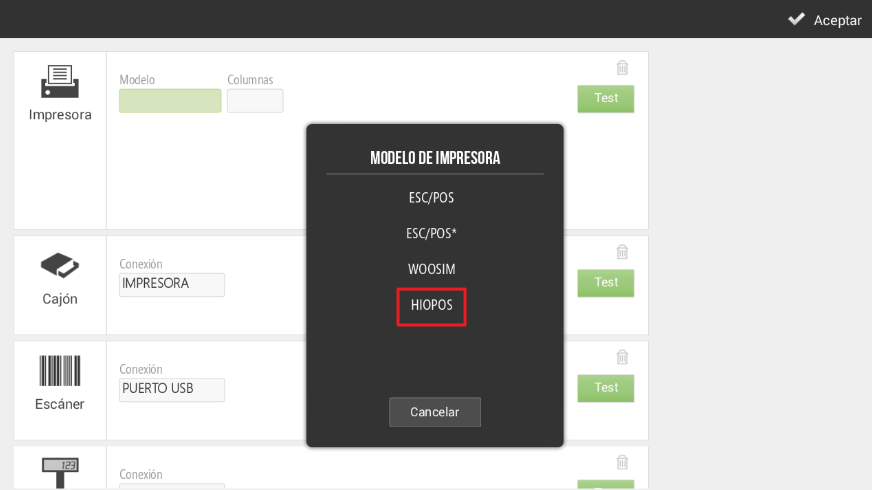
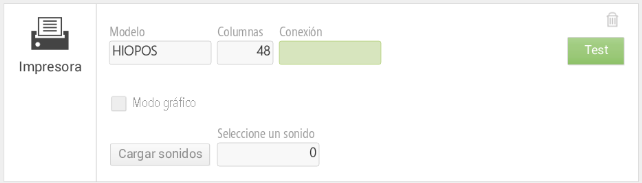
By default, a series of sounds are provided, for example sound number 1, which says “Your ticket, please.”
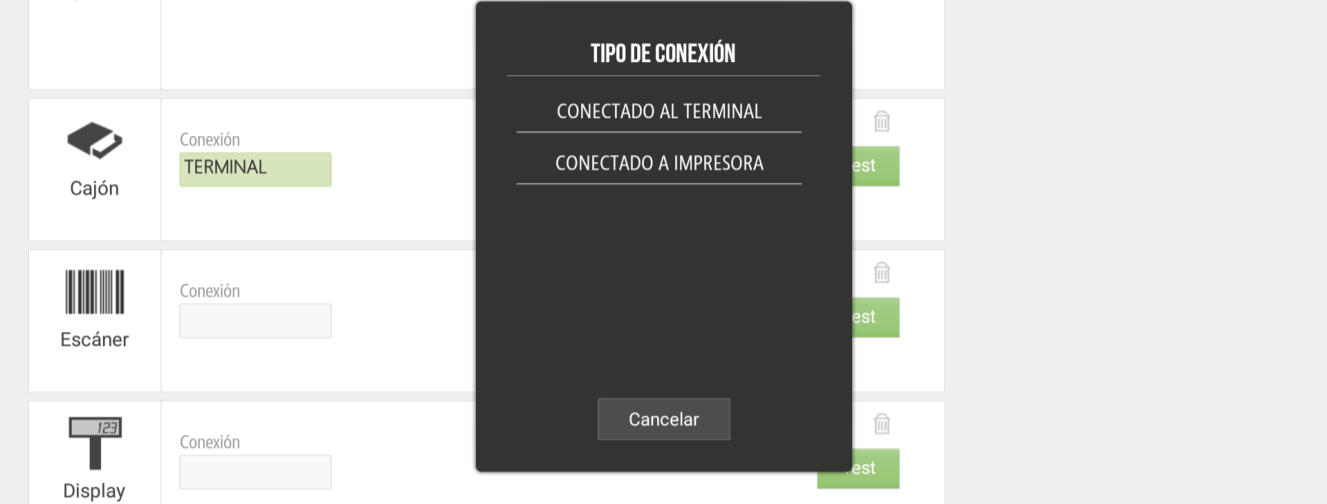
Cash drawer
The configuration of the cash drawer can be done by connecting it to the printer or to the terminal.
Scanner
The scanner, or barcode reader, can be used in three distinct modes: via Bluetooth, via USB Port, or via Keyboard Input.
Selecting the Bluetooth Connection We must bear in mind that the scanner must be connected from the outset with the Android operating system. To do this, go to the Android settings section and in the Bluetooth sub-section, select the scanner. Once correctly connected, we will return to HioPOS Cloud and select the Device that will already be automatically suggested to us. We click Test to verify its operation.

If we select the USB Port connection type, we need to have the scanner connected to the USB port of the point-of-sale terminal. In the field Device We select the port that HioPOS Cloud will already suggest by default. We click Test to verify its operation.
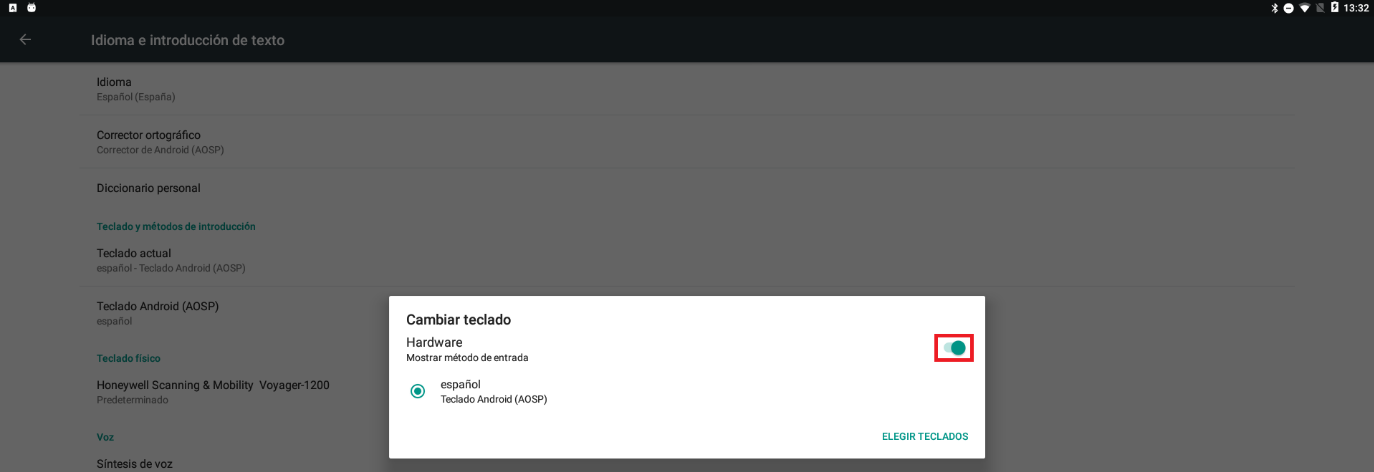
In this case, we need to go to Settings on the Android device, in the section of Language e Text introduction, Current keyboard and select (activate) the option Hardware: Show input method as shown in the following image. This is necessary for the Android keyboard to appear in the application.

Keyboard entry does not require any device connected to the point of sale. Simply type the product's barcode on the numeric keypad of the sales screen, then press Enter. HioPOS Cloud will add the item to the sales receipt.
Display
We will select the client viewer model, as well as the type of configuration it has.

If the terminal has a second screen, the display is not necessary as the ticket is visible on the customer's screen.
Magnetic stripe reader
On a tablet, the magnetic stripe reader operates via keyboard simulation. Connect the device to the USB port and select the Connection. Press Test to verify its functionality.

Label printer
The label printer we set up here will be the printer the terminal uses for label printing. HioPOS Cloud works correctly with most EPL or ZPL compatible label printers. The connection can be made via local network, Bluetooth, USB port, or Serial port.

AI Assistant
Section summary
AI can generate inaccurate information; verify the results.