En esta sección
Settings
Hioffice Alert Management
General
Alerts in HiOffice allow the user to automatically and on a schedule monitor the most relevant business events, enabling notification of incidents, deviations, or situations that require attention, without the need for constant manual review.
To do this, pre-configured rules must be specified, and the system continuously monitors the information and generates alerts when certain conditions are met.
The alert system in Hioffice is configurable in any table block or record list, enabling constant monitoring of multiple data.
Additionally, these alerts can be received through different channels, facilitating a quick and effective response. In this way, alert management becomes a proactive tool that improves operational control, reduces risks, and optimizes user decision-making.
Where can we set up an Alert?
Configuring an alert is possible in any table-type block through the 3 dots in the top right corner of the block.
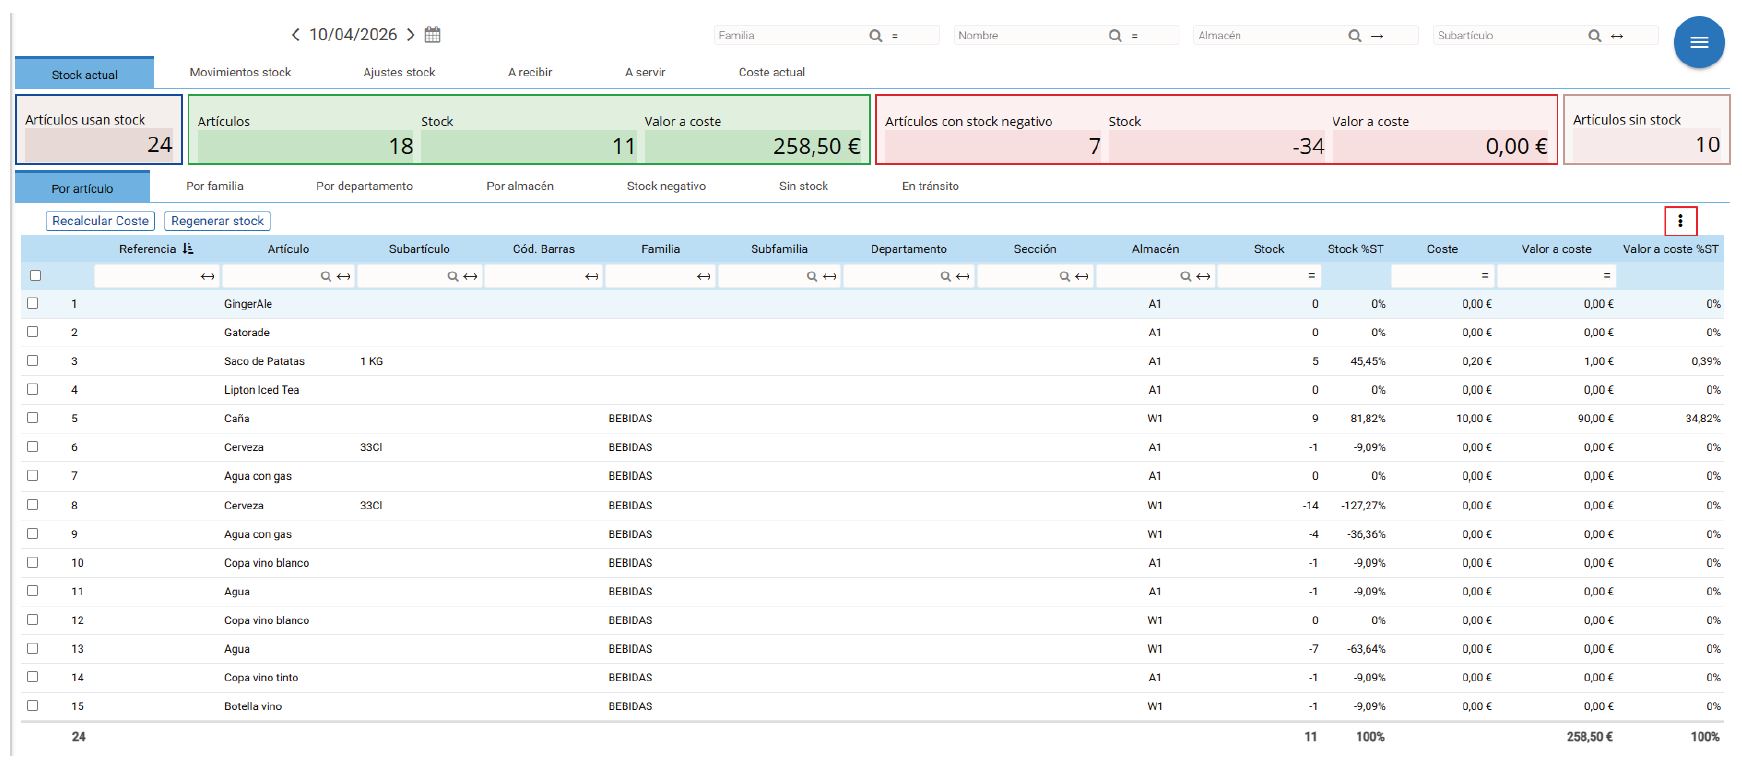
Upon clicking, the configuration of the internal menu for the block in question is displayed, and we see that there is an action called "Create Alert".

With this, we configure the Alert based on the block we are currently in. In this regard, multiple alerts can be created, either for a single block or for multiple blocks.
Keep in mind that this functionality only applies to table-type blocks.
How can we set up an Alert?
To correctly configure an Alert in a table block, it must have the "show filters" property enabled in the block's configuration. Otherwise, it is not possible to apply rules by filtering by the attributes of the list displayed by the block.

Alerts are created using filters and operators configured in the attributes, acting as logical rules to filter records that meet the applied condition, and thus enabling the generation of an alert email for the user.
In the example we show below, we have configured a filter on the Stock attribute where Stock is greater than or equal to 25.

This will be the rule used when creating the alert; in this regard, when an item has 25 units in stock or exceeds 25 units in stock, it will become a record that meets our condition and about which we want to be notified.
Creation of Alerts
Once our conditions have been configured in the attribute filters, from the three dots in the upper right corner of the block, we click on “Create Alert”.
Immediately, a screen called "Alert Systems" is displayed, where it is possible to configure the following parameters. The details are below:
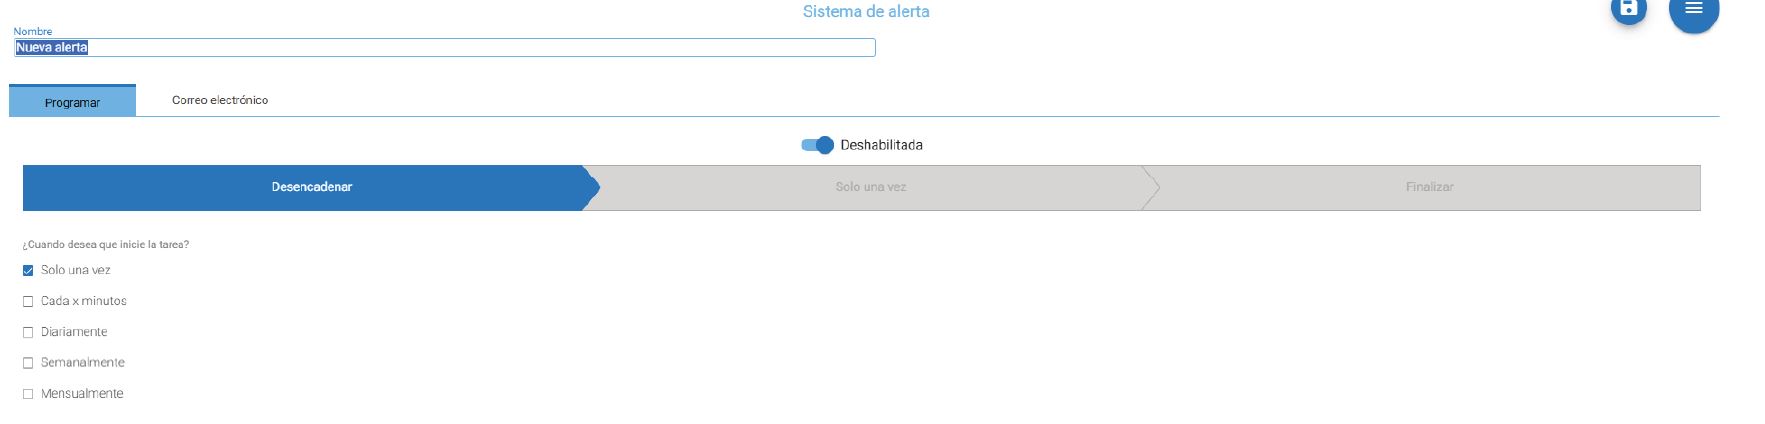
Upper part
Name: Field where you define the alert identifier (for example: “Alert - Stock Equal / Greater Than 25 units”). It is important to define clear names for alerts in order to ensure a good understanding of it.
Eyelashes
- To program: Here you configure when the alert runs.
- Email: allows defining the sending of email notifications (configured in another step).
Switch "Disabled": Indicates whether the alert is active or not.
To program
Configuration flow (central bar)
Shows the alert creation phases:
- Unleash → define when the alert runs.
- Just once the selected execution type, it is automatically modified based on the selected configuration in 'Trigger'.
- Finish → final configuration step, step to initiate this automatic task, and validation of its execution
Sending frequency settings for alert notifications
This is where you decide the interval at which the alert should be triggered. In other words, let's imagine we have a record that meets our rule; that being said, depending on the execution, it will notify us X times about this record that meets our rule.
- Just once: The alert will run only once at the defined time.
- Every x minutes: It runs recurrently at a certain interval.
- Daily: It runs once a day.
- Weekly: It runs once a week.
- Monthly: It runs once a month.
Upon clicking on those settings, we advance in the configuration flow.
- Only onceThis takes us directly to the final step; no further configuration is required, and it will only apply once. In other words, if a record meets our condition, it will only notify us once.
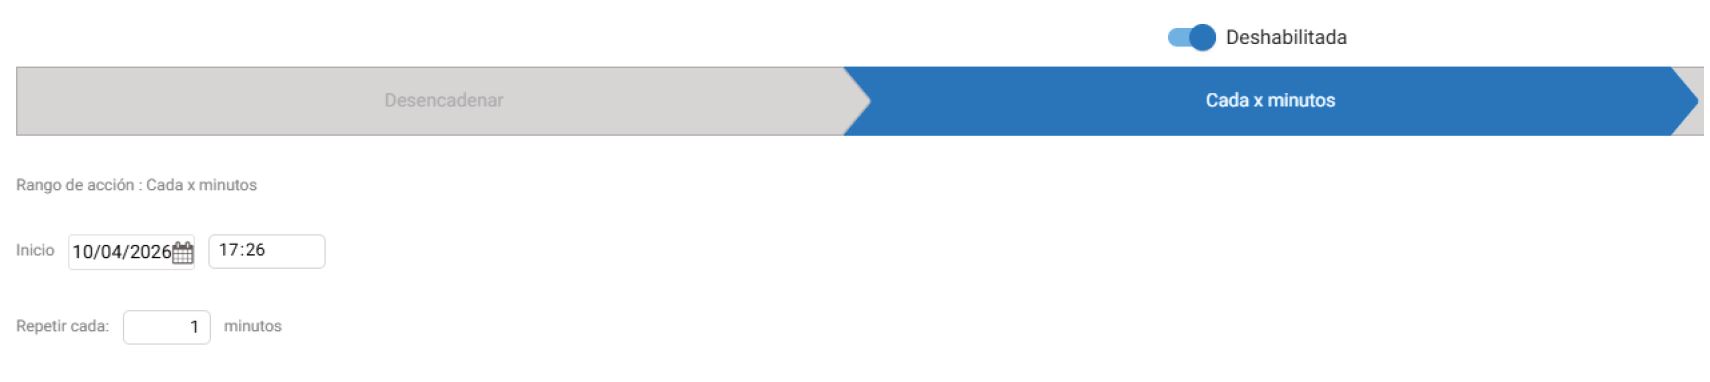
- Every x minutes: Upon choosing this option, we can observe that it suggests a Start time for this Alert and its repetition in minutes. Meaning, if a record meets our condition, it will notify us only every X minutes until that record no longer meets our condition.
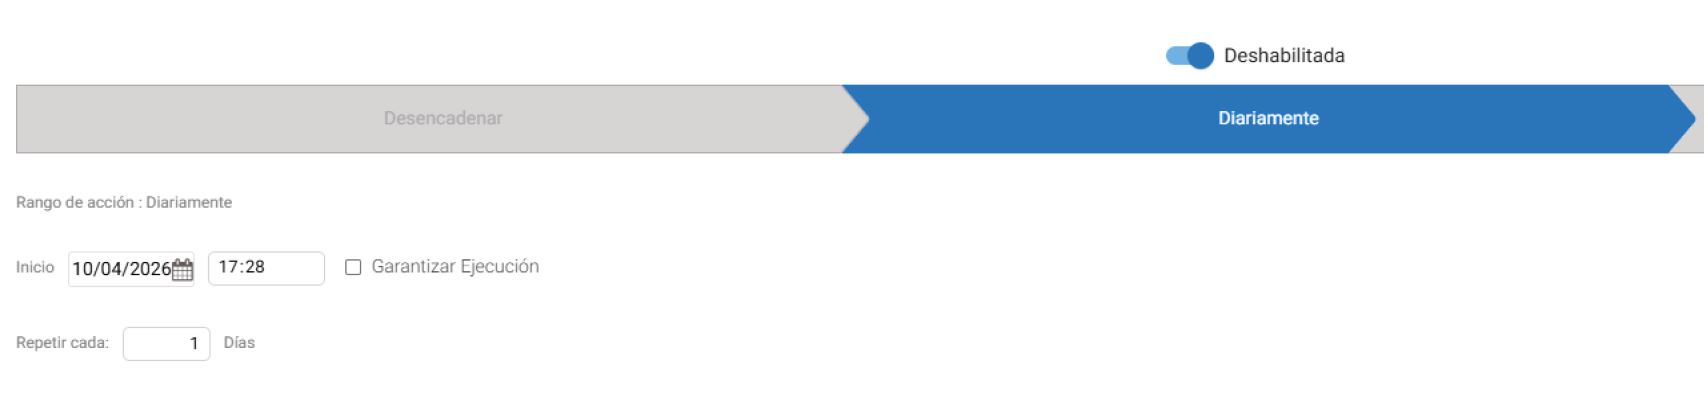
- DailyBy choosing this option, we can observe that it proposes the Start Time for this Alert and its repetition in days. Additionally, there is an extra checkbox to guarantee the execution of this Alert. In other words, if a record meets our condition, it will notify us until that record no longer meets our condition.
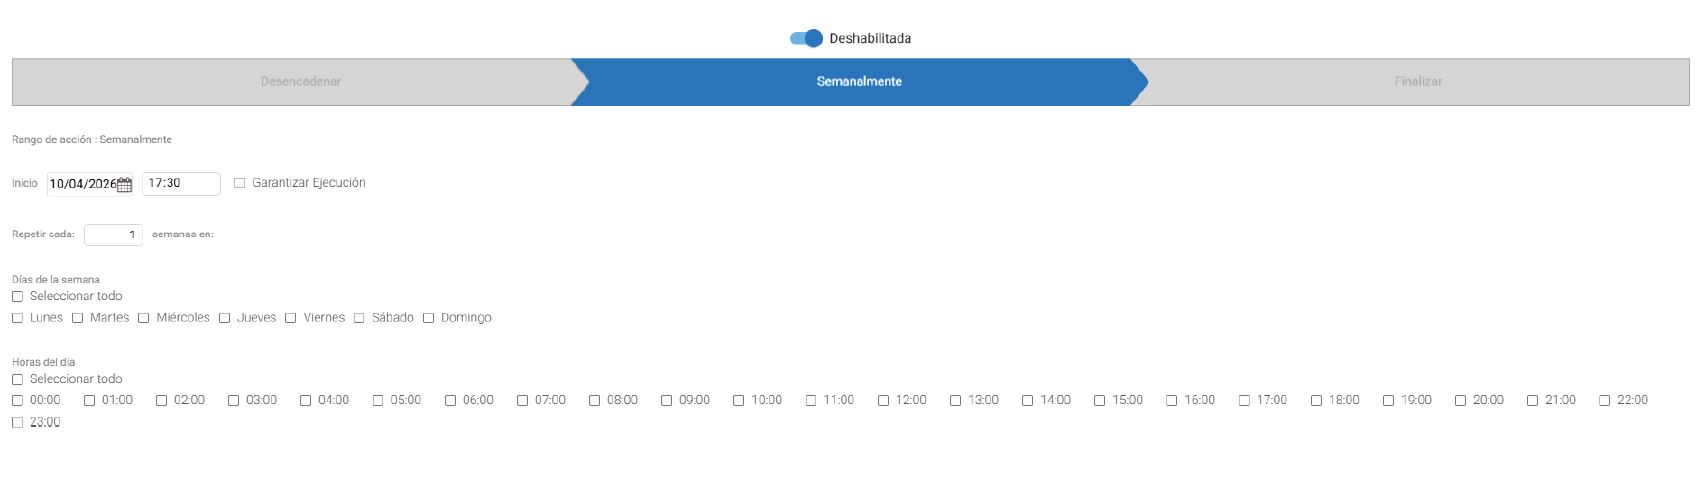
- WeeklyBy selecting this option, we can see that it offers us the Start time for this Alert and its repetition in weeks. It also allows us to choose which day we want it to run and at what time. Additionally, there is a checkbox to guarantee the execution of this Alert. In other words, if a record meets our condition, it will notify us until that record no longer meets our condition.
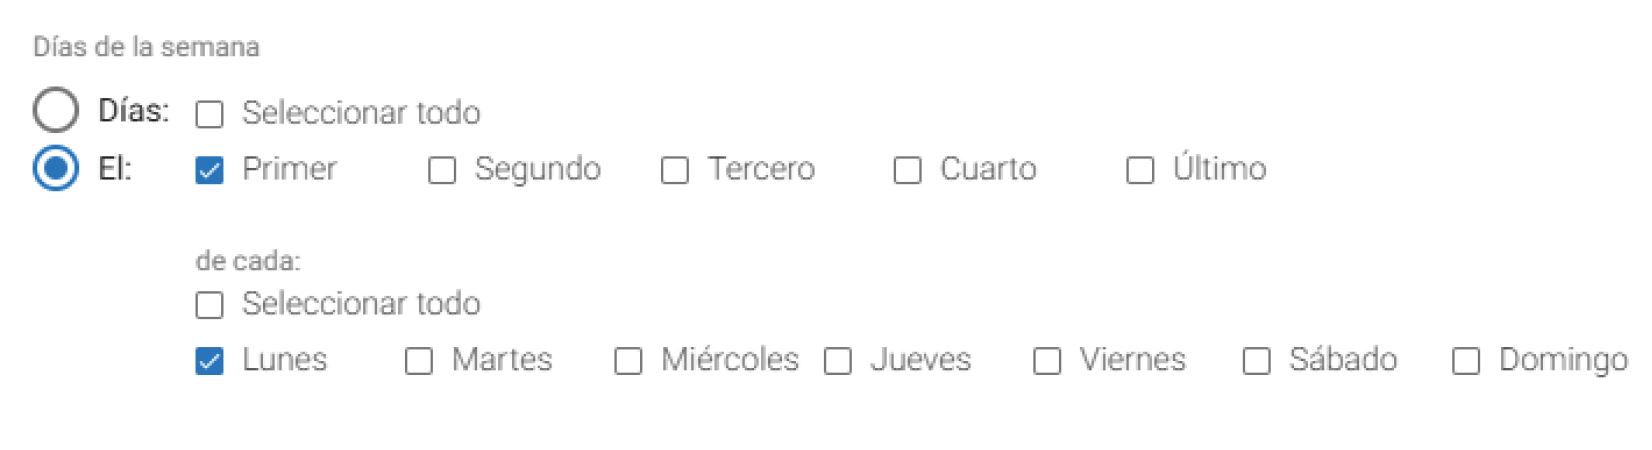
- MonthlyBy choosing this option, we can observe that it suggests the start time for this Alert and the months in which we want this Alert to run. Additionally, there are 2 settings regarding which days of the month. In other words, if a record meets our condition, it will notify us until that record no longer meets our condition.
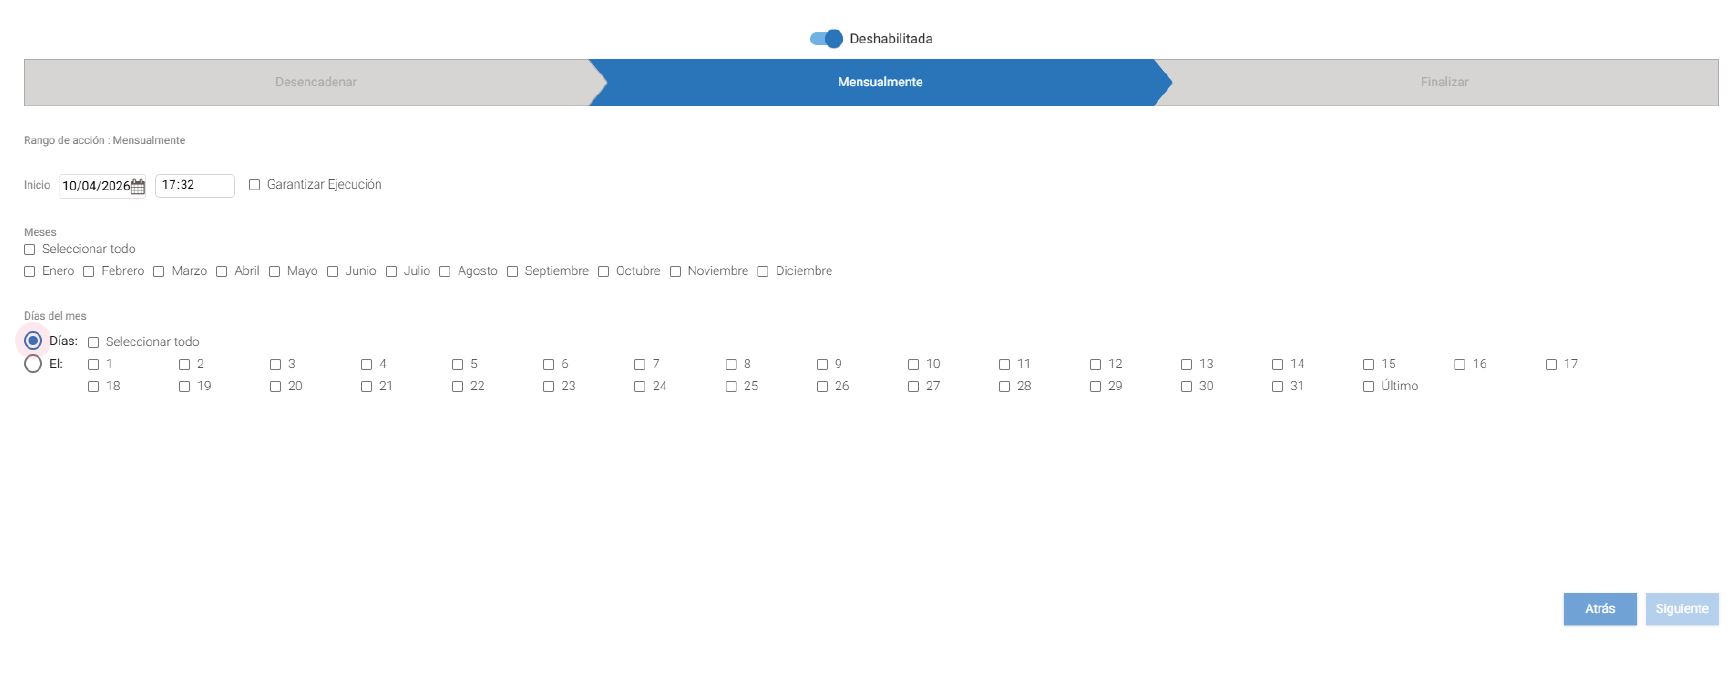
○ Choosing the “Day” directly.

○ Choosing “TheFirst Monday of each month.
Configuration completion
On this last screen, we can adjust the frequency of this alert.
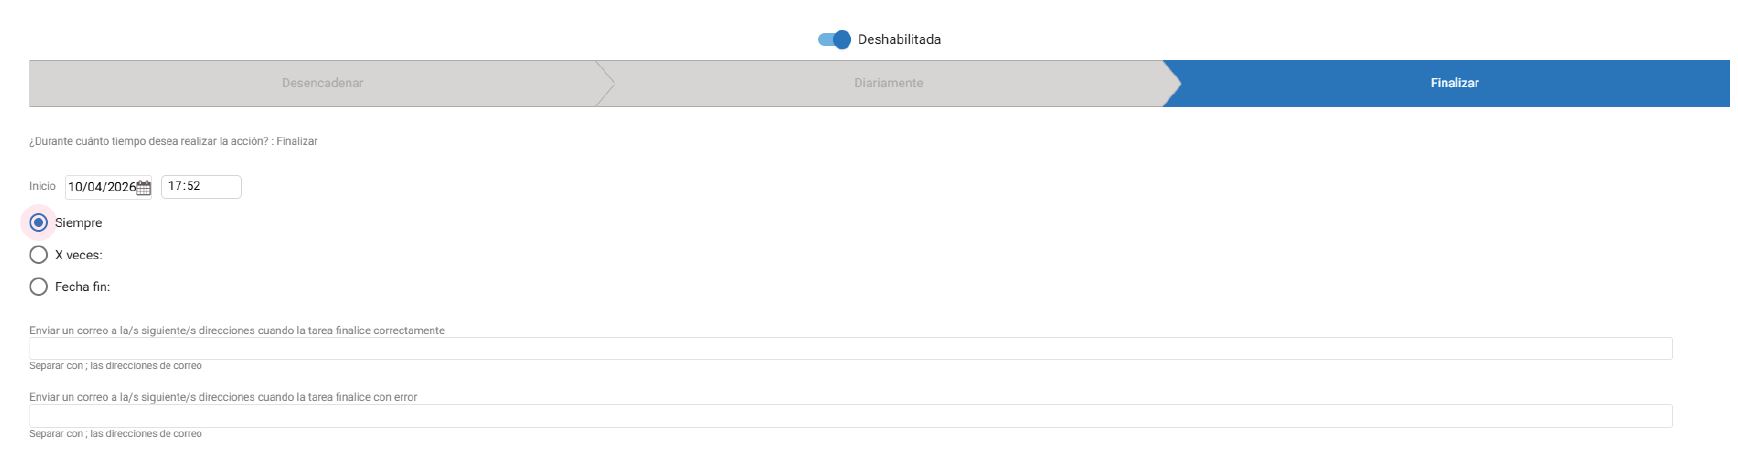
- Start (date and time): Define the exact moment when the alert will start running for the first time.
- Always: The task will always be executed following the established intervals.
Note: Protection is in place if the task is executed and fails to run correctly x times; in this regard, upon failing to run correctly x times, the task is disabled.
- X timesThe task will run X times and will be deactivated once all executions are complete.
- End date: Define an end date when the task is disabled. This means the task will be active until a specific date.
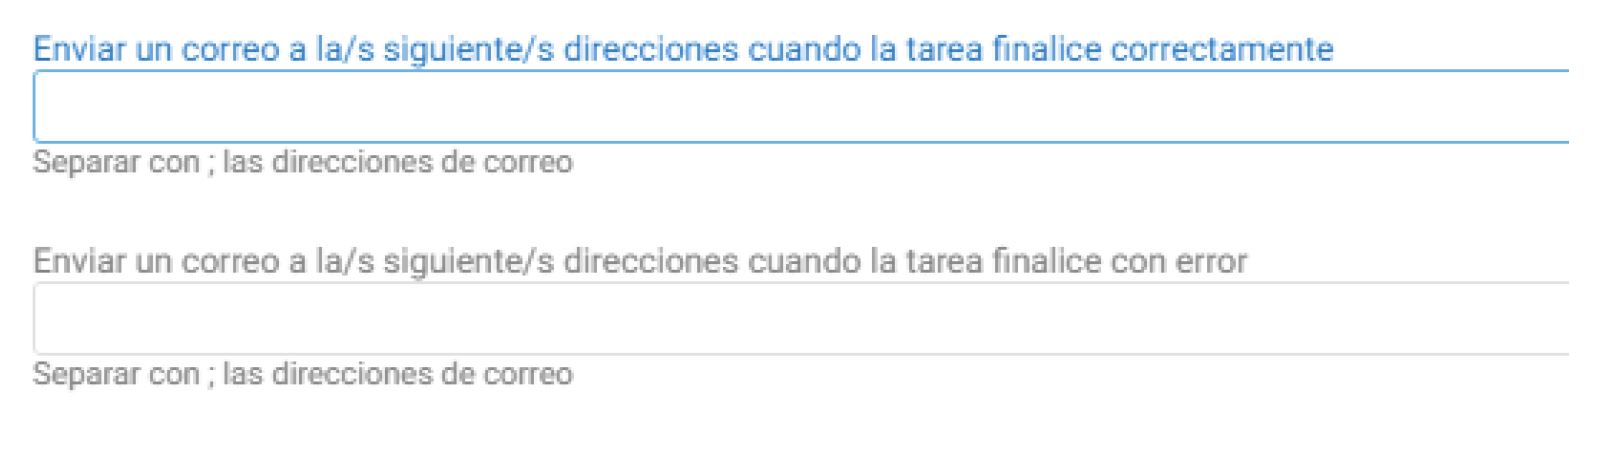
Additionally, there are two extra configurations for controlling this automated task; whether it has finished successfully or with an error, you can configure one or more notification emails.
In this section, we can define which employees will receive this Alert.
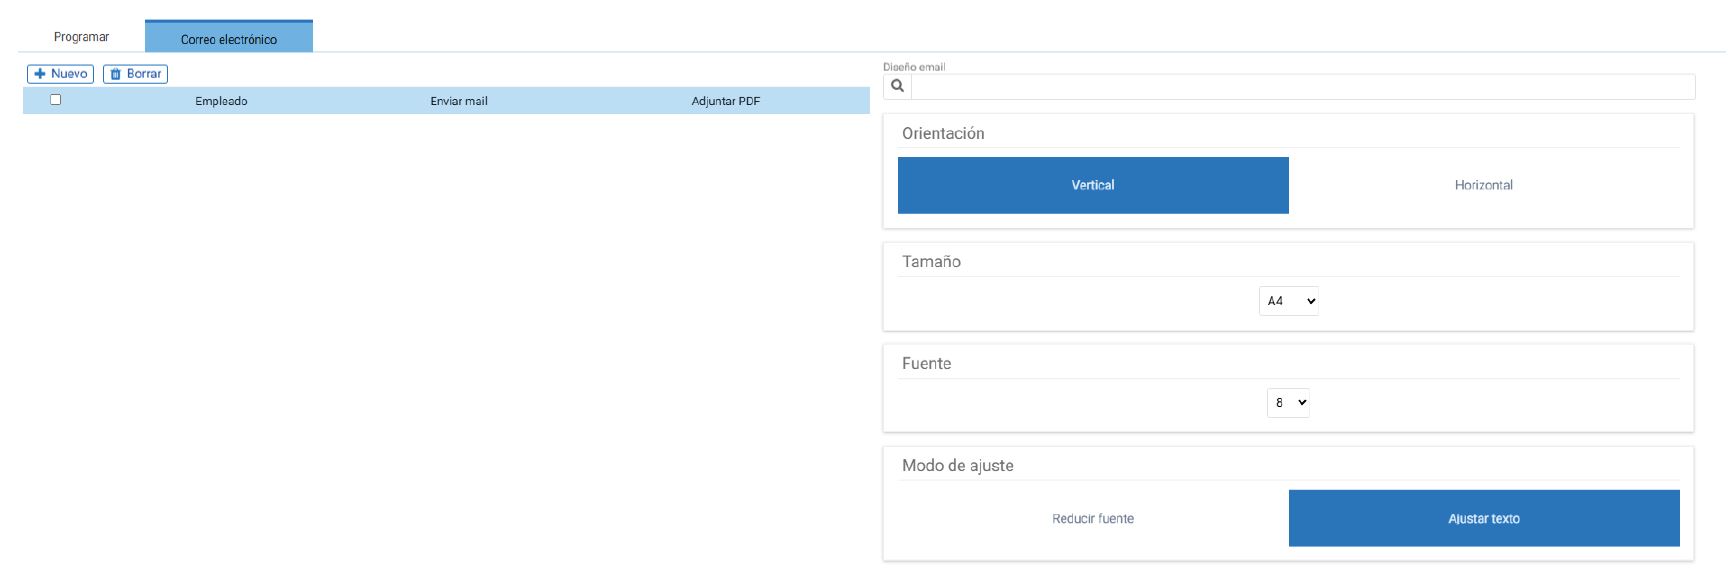
As we can see, on the left side we can add employees. To do this, it is important that these employees are not fictitious and have a real email address configured.
Once an employee is added, we can choose whether to send them only an email notification, or a PDF of the records that meet the condition, or both.

On the right side of this screen, we can define which email design we want to use and certain settings regarding the PDF.
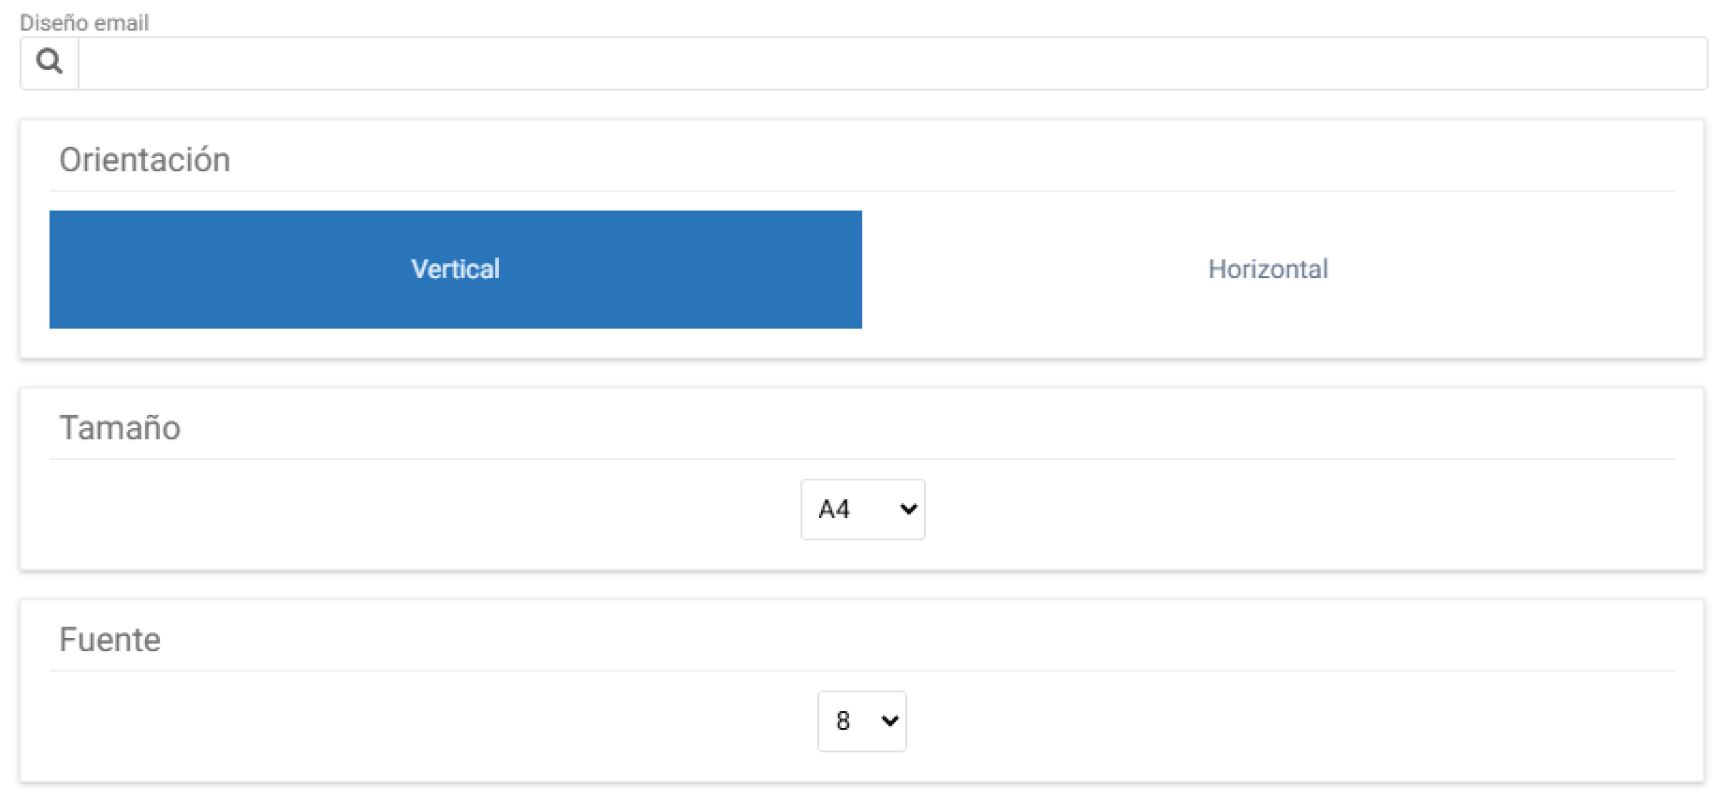

Once all the configuration is complete, it must be saved using the top right button on the screen, and with that, our task will be active according to our criteria.
To check which automatic alert tasks we have, we can consult them via 2 options:
- If the client has contracted the hioffice bridge module: From Bridge → Tasks → Task list.
- If bridge is not contracted, it is possible to create a dashboard that points to the TASKS data source and filters by the alerts.


Use case
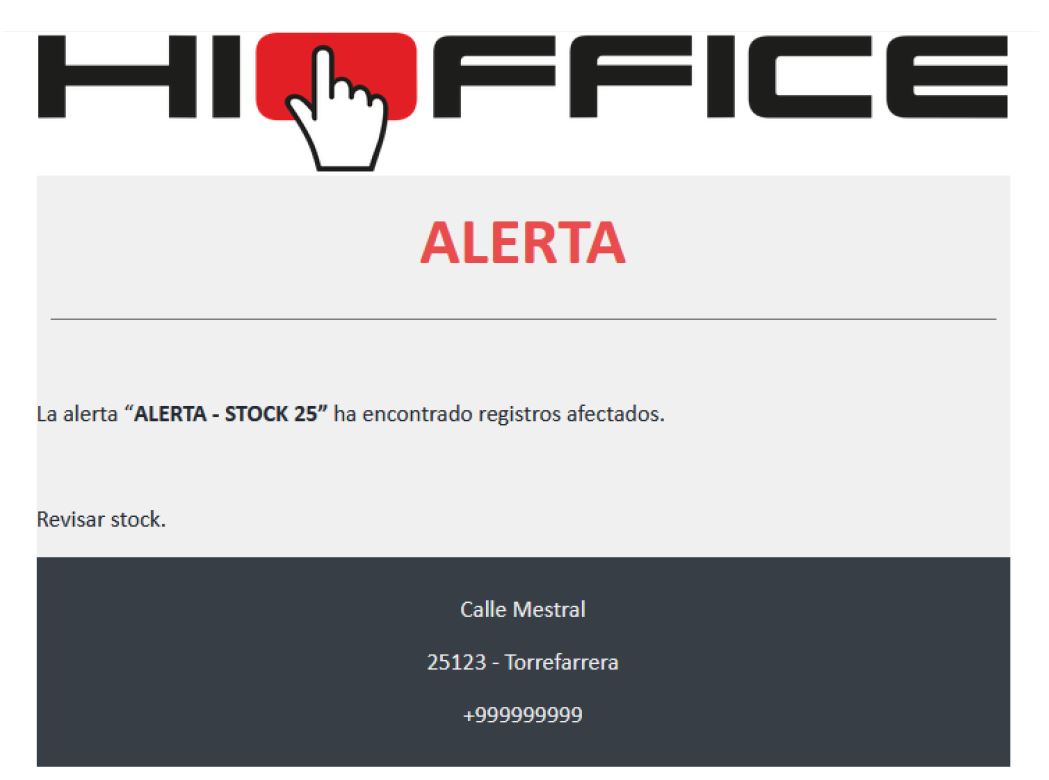
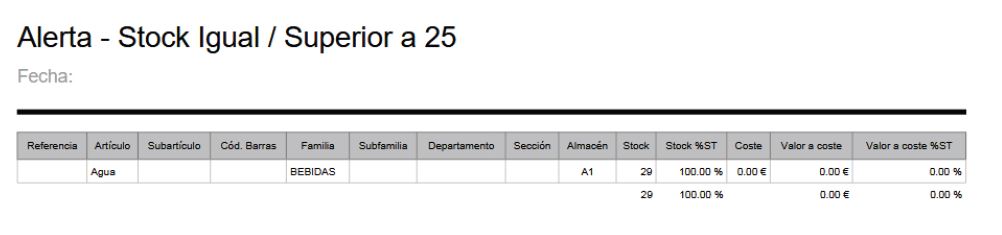
We configured an alert "Alert - Stock Equal to or Greater Than 25 units" to notify us when there are records that meet this condition.
Example: email regarding successful or unsuccessful task execution; additionally, if there are logs, it also indicates it.
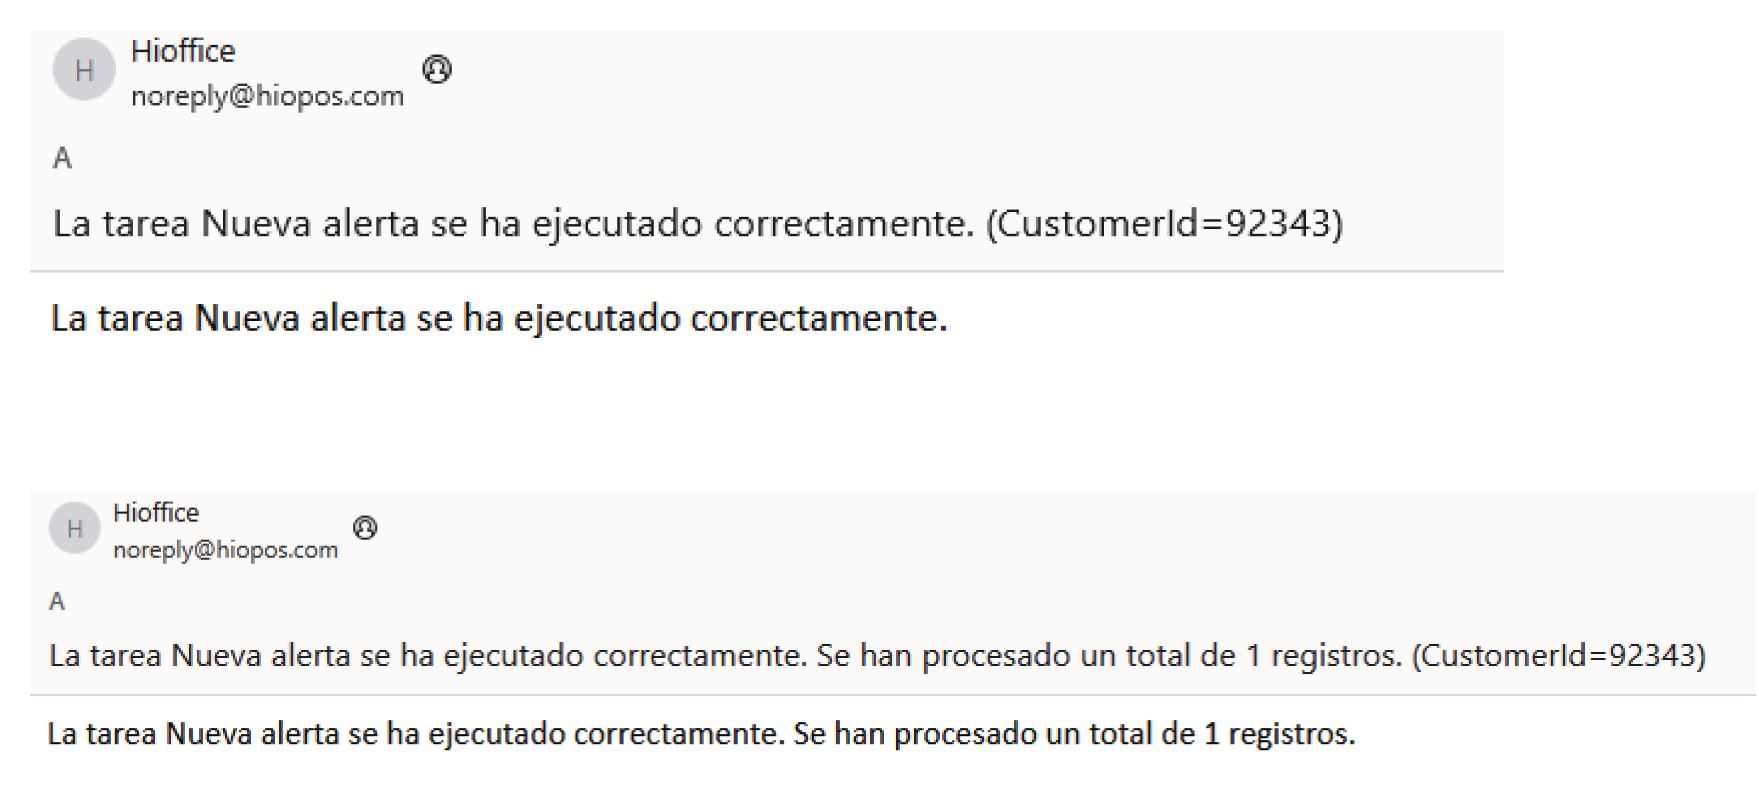
Example of Alert, when a personalized Email is sent with the attached PDF.
Attached:

NoteTo use this email notification sending feature, you must have your own SMTP server configured in the corporate email settings for managing email sending.
AI Assistant
Section summary
AI can generate inaccurate information; verify the results.