En esta sección
Quick Start
Launch of the booking system with HIOPOS
The implementation of the booking system with HIOPOS consists of 7 simple steps, designed so that the user can start managing reservations efficiently, quickly, and adapted to the needs of their establishment. Below, we detail the first three key steps:
Definition of the reservation management model
Before starting the technical configuration, it is essential that the user is clear about how they wish to manage bookings. There are two main forms of organization:
- Occupancy per diner:
- Occupancy by table:
In this mode, a maximum number of people allowed per turn and day of the week is defined. Once that limit is reached, no more reservations are allowed. Reservations are received without an assigned table, and the administrator themselves must manually assign them to an available table.
This model allows you to define an occupancy range for each room and table (minimum and maximum number of diners per table). The system automatically checks availability and optimally assigns a table to each reservation.
TIP: For users who have not previously managed reservations, it is recommended to use the Table Occupancy model, as it automates table assignment and facilitates daily management.
Booking schedule settings
In this step, the hours during which the establishment accepts reservations are defined, either from its website or from external channels connected to the system. To do this, you must choose between two configuration formats:
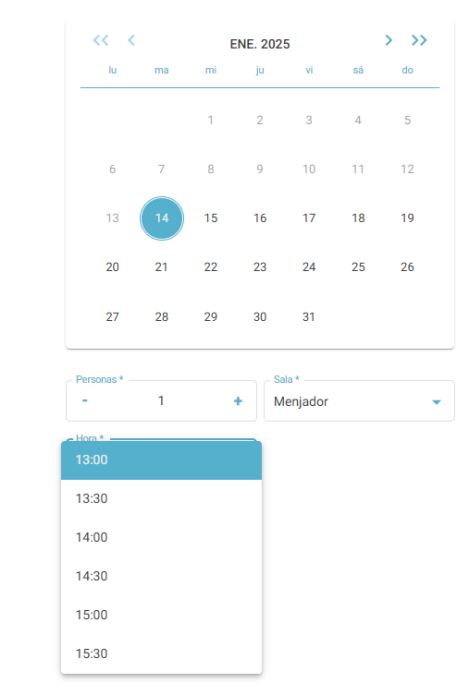
- Range of hours:
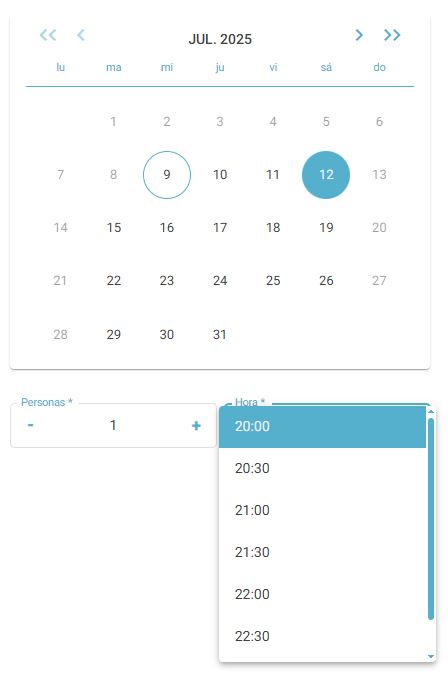
It allows defining a wide time slot (for example, from 1:00 to 3:30 PM) where the customer can choose from different time slots. This format is ideal when the aim is not to turn tables over within the same slot. The number of options the customer will see will depend on the field Reservation interval, which determines how often options are offered within the range (for example, every 30 minutes).
The "Reservation Interval" field is located at the top of the screen below the Occupancy setting.

Example: For meals, I can have one shift called "Meal" with a time range from 1:00 PM to 3:30 PM, and allow intermediate times to be chosen for the Start Time and End Time.

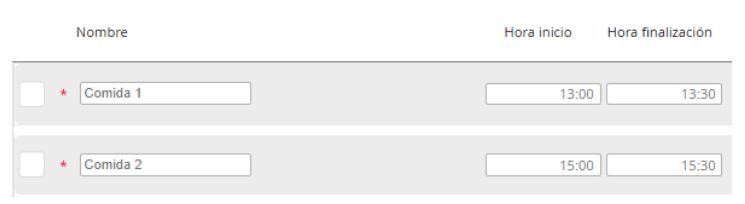
- Specific time:
- Turn 1: Meal 1 (1:00 PM – 1:05 PM)
- Turn 2: Food 2 (3:00 PM – 3:05 PM)
This format limits customer options to specific times. For example, if you only want to allow bookings at 13:00 and 15:00, two slots must be configured with very restricted timeframes, such as:
So, the calendar will only show those two options.
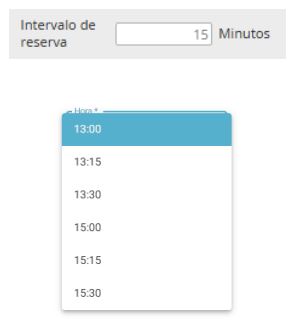
The fact of working with a fixed time does not prevent defining small slots for each shift (e.g., from 13:00 to 13:30) and indicating a booking interval (e.g., 15 minutes), which will allow offering several options within that range.
Reservation duration settings
Each turn must have assigned a average duration, which represents how long a reservation is estimated to last. This duration is crucial for the system to properly manage table availability.

For example:
- In breakfast shifts, a longer duration can be defined (e.g., 1h 45m).
- For meals, a standard duration of 1h 30m or 2h could be used.
In configurations with specific time, defining too long a duration can prevent the system from allowing tables to be turned in different shifts.
For example, if a slot starts at 13:00 and the next one at 15:00, a 2-hour duration allows for managing two consecutive reservations per table.

If a longer duration is set, only one reservation per table can be accepted for that time slot.

Important: A poorly configured duration can limit the number of bookings accepted per shift.
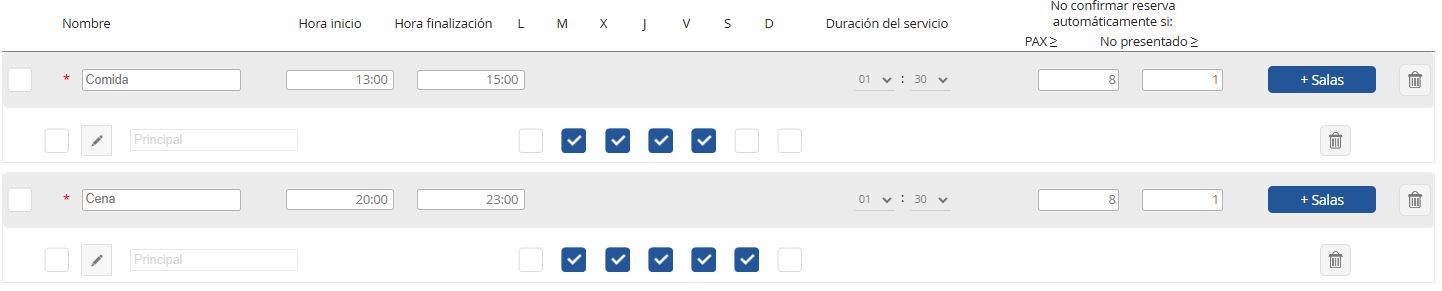
Turn-based room activation (only for table occupancy)
In case of using the model of Occupancy by table, it is necessary to define Which rooms will be active for each turn. To do this, in each shift's configuration, you must click on the button Plus rooms, where you can select the rooms that will be available during that time slot.

This action is mandatory for the system to take into account the tables in each room for the automatic assignment of reservations. If no room is selected, the system will not be able to offer availability for that shift.
Example of use:
If the restaurant has two rooms (Indoor and Terrace), it can be defined that:
- During meal times, only the Interior room is available.
- Both rooms should be available during the dinner shift
Configuration of enabled days of the week for bookings
In this step, it is defined What days of the week are available to accept reservations and which shifts will be available in each. The configuration varies depending on the type of occupancy chosen. Example of desired configuration:
- From Tuesday to Friday: Lunches and Dinners
- Saturdays: Dinners only
- Mondays and Sundays: Closed
- In Busy modePortion per diner:
- In Table Occupancy Mode:
The maximum number of people allowed per shift and per day must be entered. If the value is greater than zero, the shift becomes active for that day. If left at zero, the shift will not be available.

It must be manually activated each shift per day of the week by checking the corresponding box.
Result:
Activation of email sending
The HIOPOS booking system allows to send automatic email notifications To customers. In this section, the following key functions are configured:
- Booking confirmation:
- Booking reminder:
Enabled by default. The customer receives an automatic email whenever they make a reservation or when the administrator manually enters it.
It is recommended to activate this option so that the client receives a notification before their booking. You only need to set how many hours before the event the reminder should be sent (for example, 2 or 24 hours before).
TIP: This function is very useful to reduce the cases of no-shows (customers who do not show up for their reservation)
SMTP Configuration
To ensure that all emails (confirmations, reminders, cancellations, etc.) reach the end customer correctly, it is essential to configure a Own SMTP in the user's database.
This ensures:
- Greater reliability in email delivery.
- Messages should not be marked as spam.
- Let notifications arrive with the restaurant's name and address, offering a more professional image.
Recommendation: If the client does not have their own SMTP, you can help them configure one using external services like Gmail, Outlook, or dedicated servers.
Link Configuration with Google
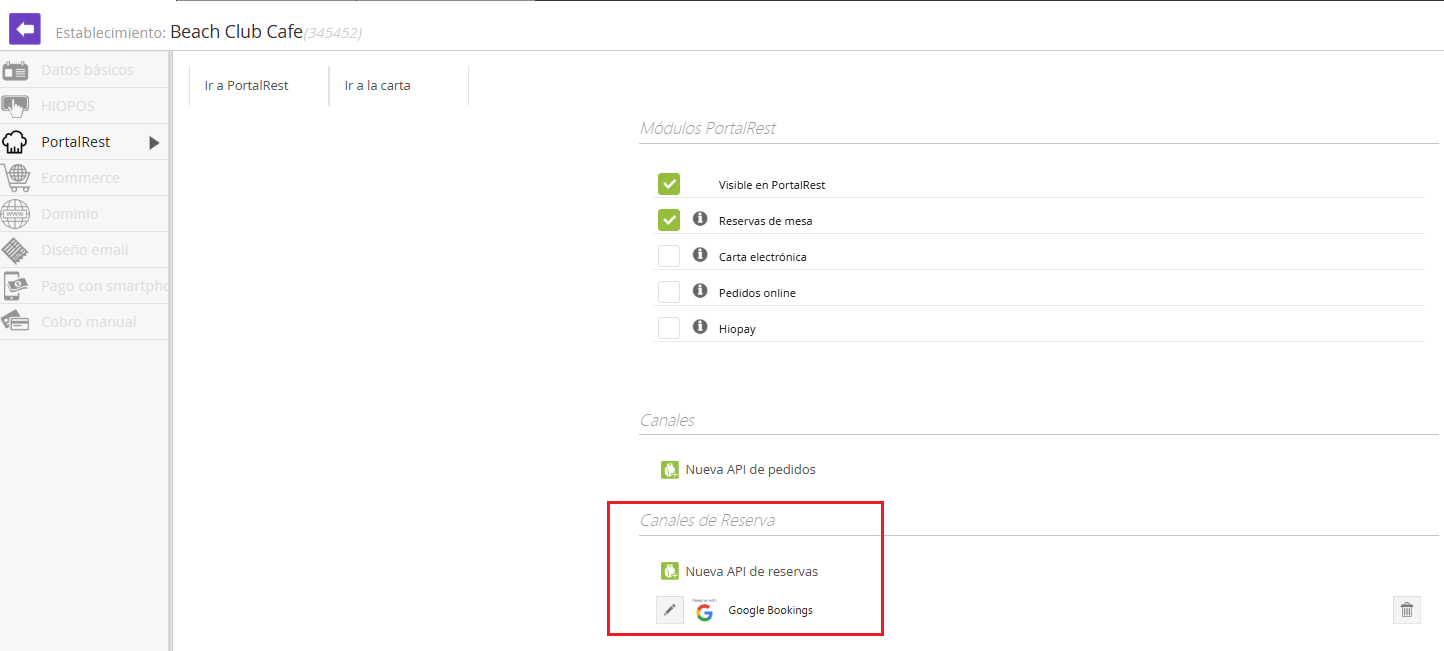
Once the internal aspects of the system are configured, it is highly recommended Activate the integration with Google Bookings, allowing customers to make reservations directly from Google Search or from Google Maps.
This option is located in:
CloudLicense → PortalRest → Booking Channels
From this section, you can easily activate the connection with Google. This integration allows the establishment to start receiving bookings immediately, which generates a immediate impact and demonstrates the added value of the PortalRest booking system.
Recommendation: Activating this integration from the start guarantees online visibility and increases the likelihood of receiving bookings, especially from new customers who discover the restaurant through Google searches.
Frequently asked questions
There is a configuration option to automatically send an email for group bookings. Here, you can define the number of PAX from which this email will be sent. This option is available in Settings / General.

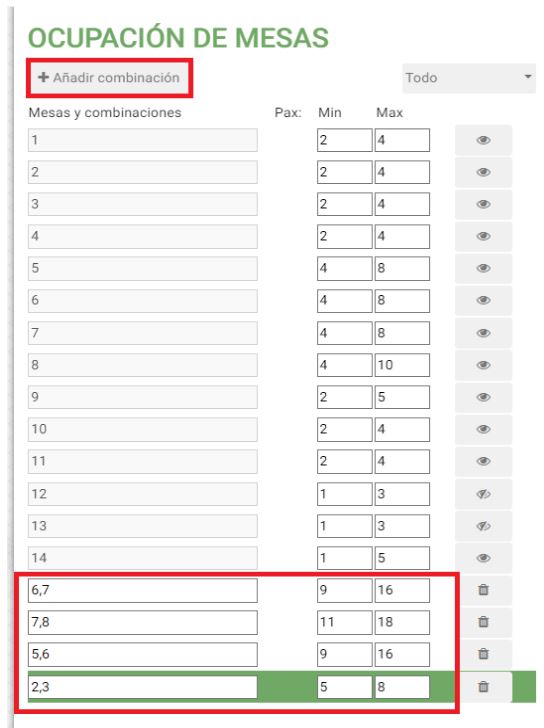
For tables to be automatically assigned upon receipt, it is necessary to configure the 'Occupation BY TABLE' type. This option is available in the Shifts configuration.
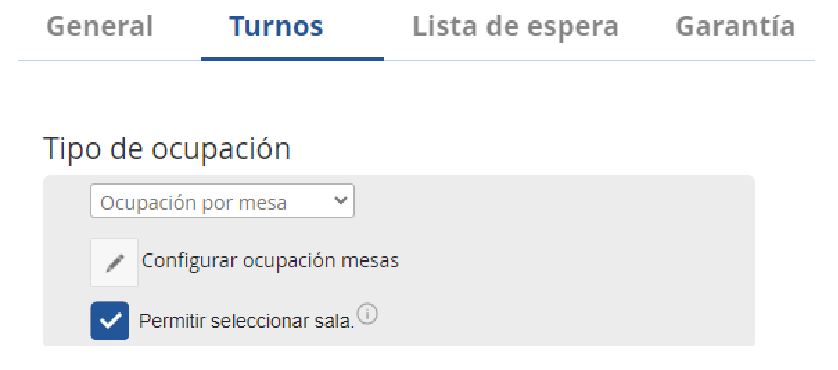
Once this option is active, it will be necessary to define the minimum and maximum Pax for the tables for this auto-assignment to be correct. This setting will be accessible from the image's edit pencil.
Here it is also possible to allow the customer the option to select a room, and to decide which rooms will be available in the booking process.
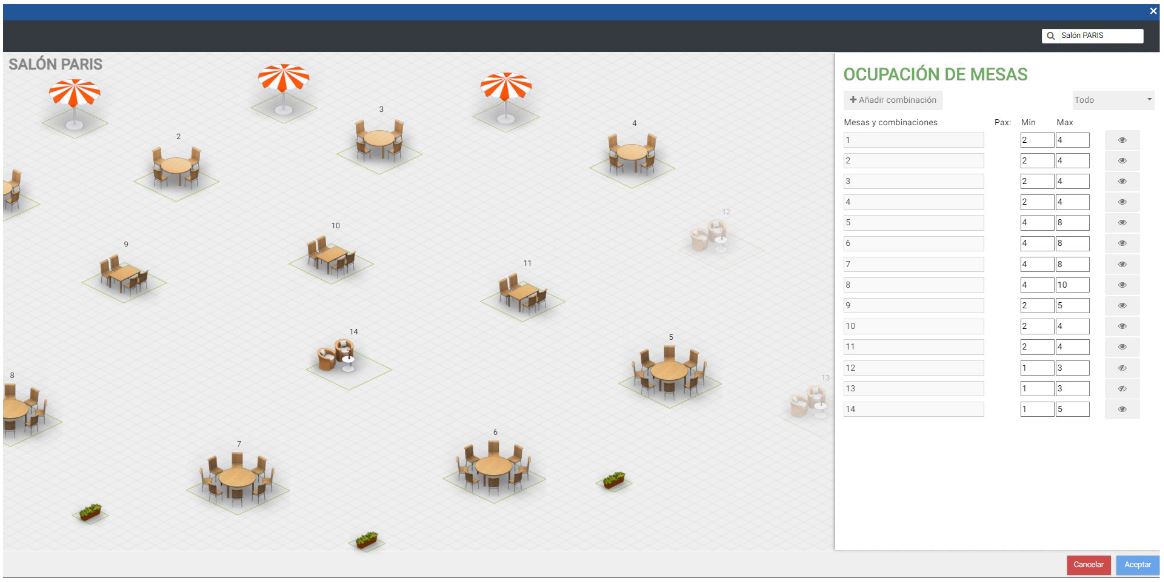
Additionally, we will be able to create new table combinations that will allow accommodating group reservations with the option to join tables and automatically assign tables to these reservations.
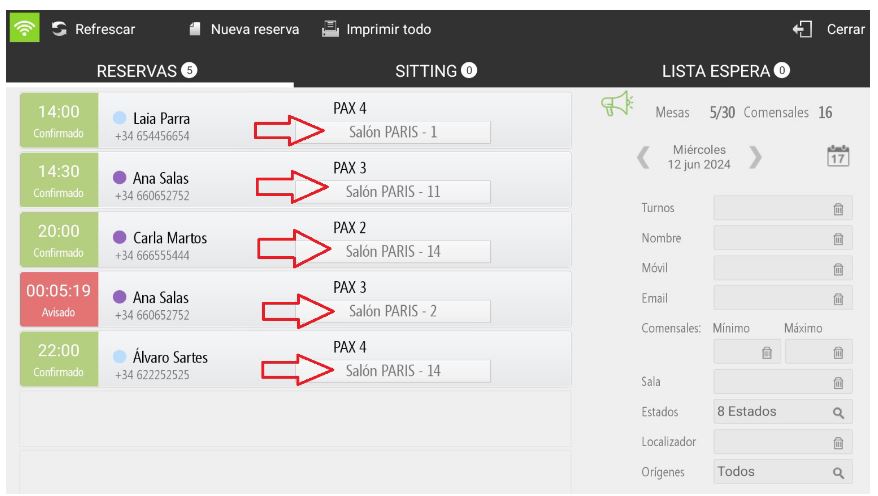
When creating or receiving reservations from any source, reservations will be automatically assigned based on the PAX of the reservation.
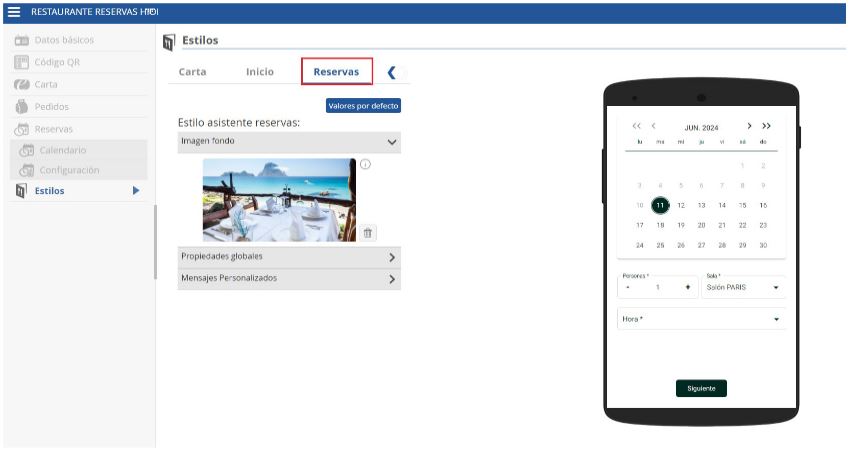
In the Styles settings, a new option is included for booking configuration.
Here it is possible to define a background image, the colors to create a reservation system with the company's corporate colors, and even personalized messages for cases of unavailability or a text to display on the reservation management screen for the end customer.
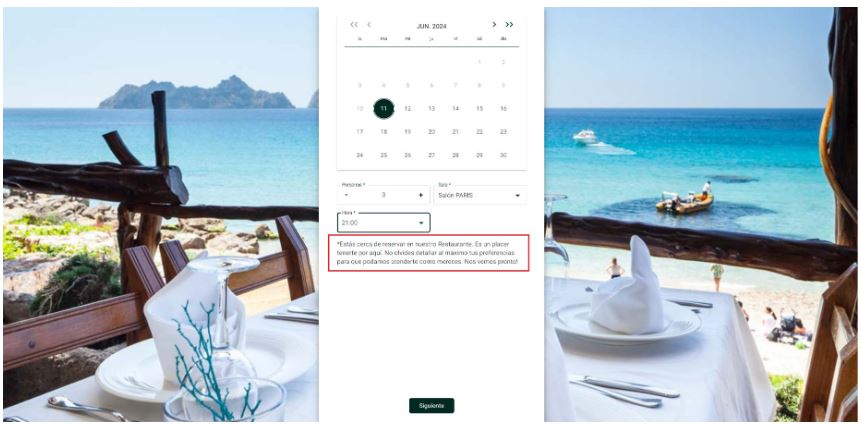
Below, an example with a background image and text to display during the booking process.
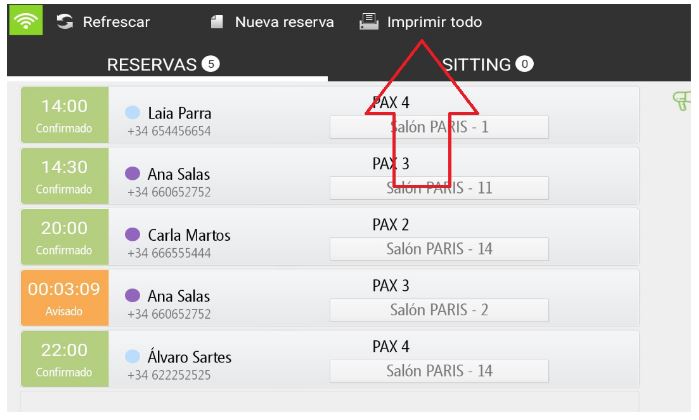
Yes, from the reservation list, there is the option to print the list.
AI Assistant
Section summary
AI can generate inaccurate information; verify the results.