New articles
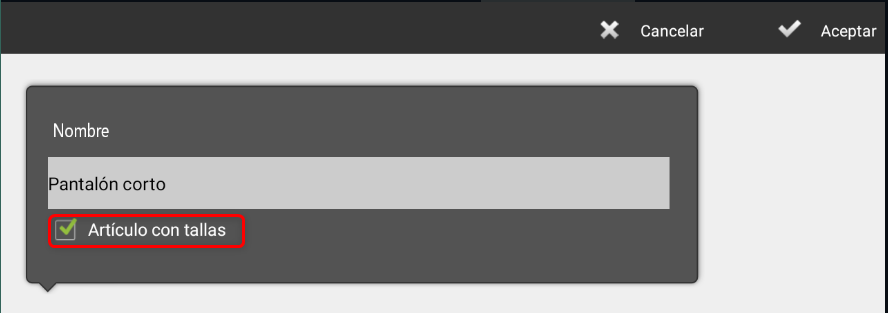
Upon pressing New article The creation screen opens. First, it is necessary to assign a name To the article
In case the item needs to be managed with sizes and colors, the checkbox must be activated Item with sizes, located at the bottom.
TIP: The sizes and colors of the item can be added in two ways:
Selecting them from a previously defined table of sizes and colors.
Incorporating them manually, when the item does not have all the options in the table.
To view the size charts, simply click on the magnifying glass icon.

In the Administration > Configuration > Articles menu, you will find the options to add new articles, modify them, and adjust their properties.
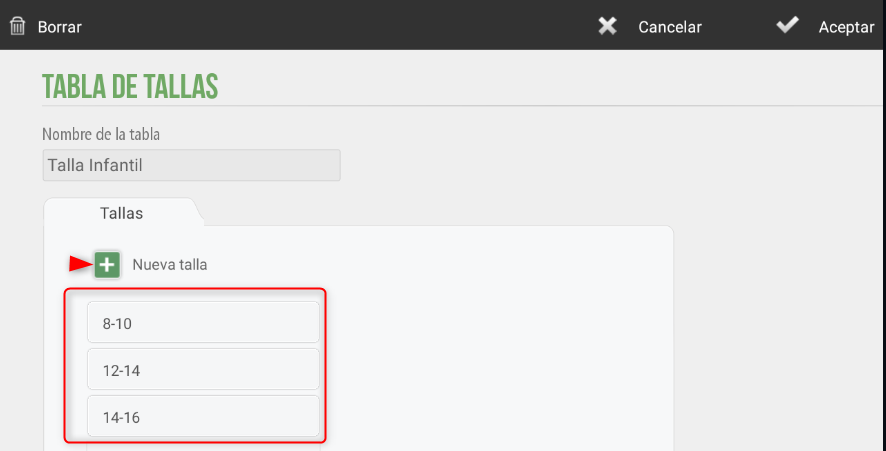
Size
On the new screen, the available tables and the following options are displayed:
Create a New table.
Deselect, (visible only when the article already has a table assigned).
Import size charts from previous versions (this option might duplicate existing tables).
To create a new configuration, select the option New table.
The table will be identified with a name.
By clicking New size, the screen displaying the list of previously created sizes will be accessed, with the option to create more sizes if needed.
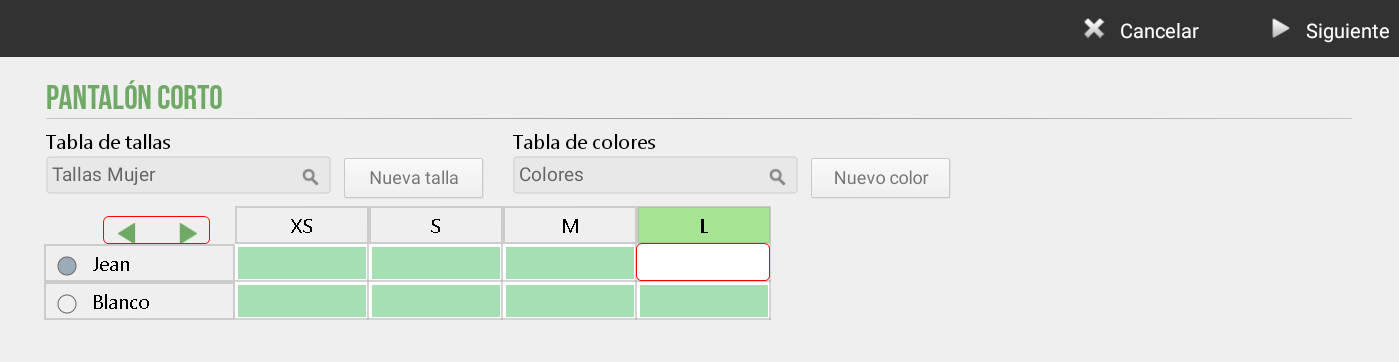
Color
By default, each article is created with a Color identified with the name Only.
To define the colors of an item, the same procedure previously described for the creation of sizes must be followed:
Adding a Color Chart, o
Incorporating a New Color.
In addition, it is possible to assign a identifier button, which allows each color to be visually related to its corresponding reference.
Once all Sizes and Colors have been added to the item, they can be edited to sort and/or discard any S&C combination.
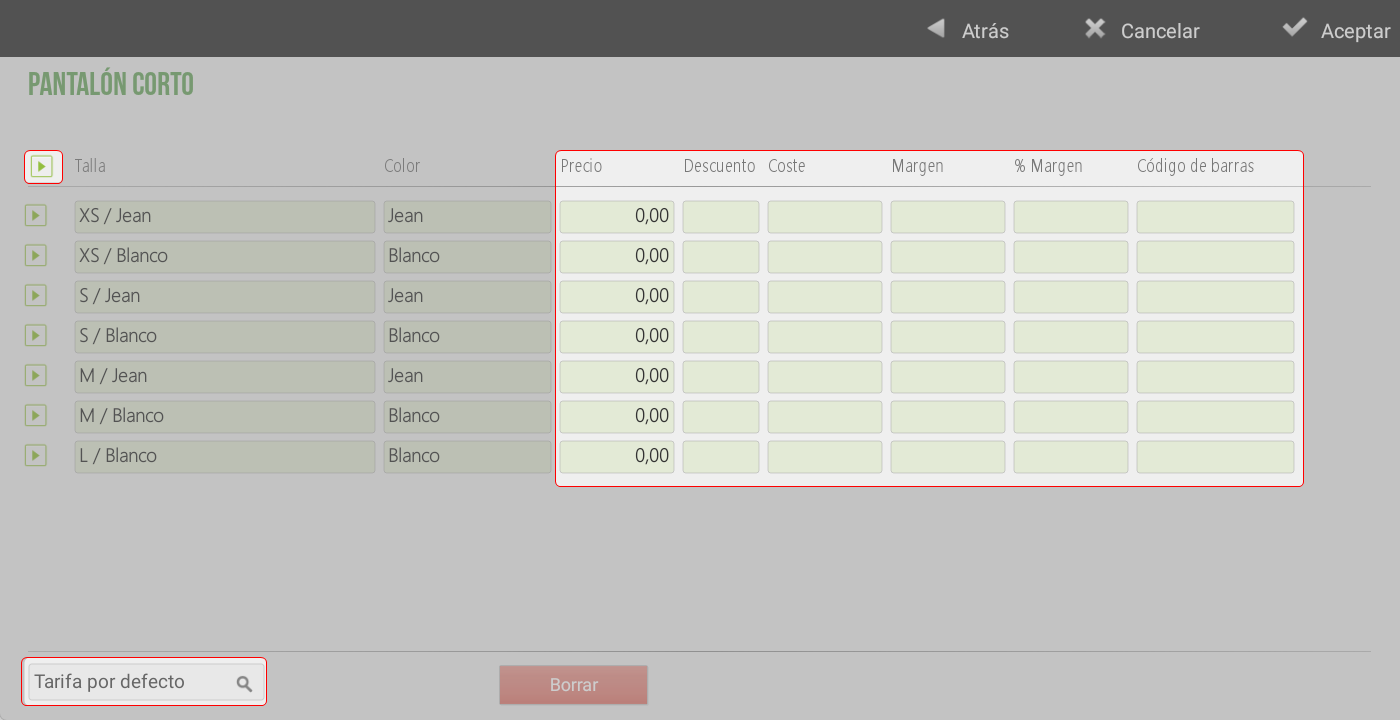
On the next screen, you will define the Price, Cost, and Barcode of the item. You can multi-select to change several at once. If you wish to apply the same configuration to all of them, you must click the selection box at the top of the table. Selected items are highlighted in green.
At the bottom of the screen, you can assign and/or change the rate of the items.
Article from gallery
The option Gallery offers article databases with pre-configured images in HioPOS Cloud. These can be used both during the installation and setup process, as well as for editing articles. Additionally, it allows adding images to created articles that do not have one. HioPOS Cloud includes a wide variety of pre-defined businesses, which facilitates and streamlines article creation.
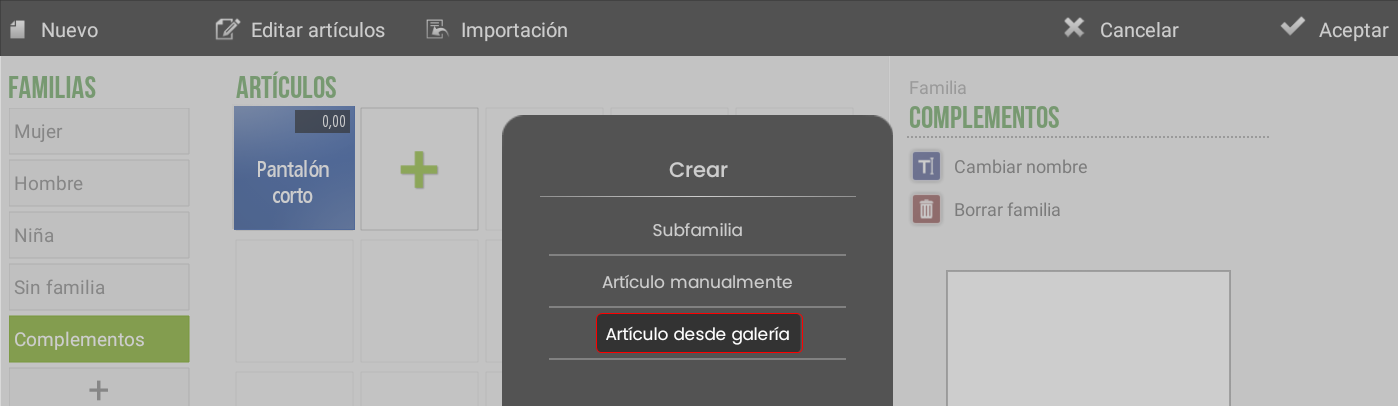
For the creation of a Article from gallery The business type and family will be selected. This option allows creating several items at once by selecting them on the screen; these will be marked with a check and will be displayed as a list in the side panel, which provides a better view of all selected items.
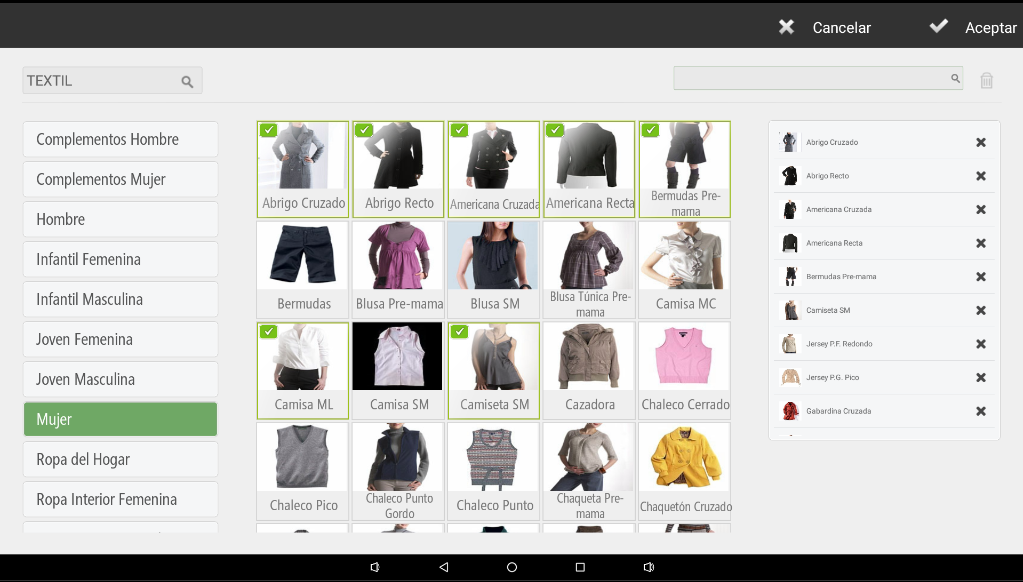
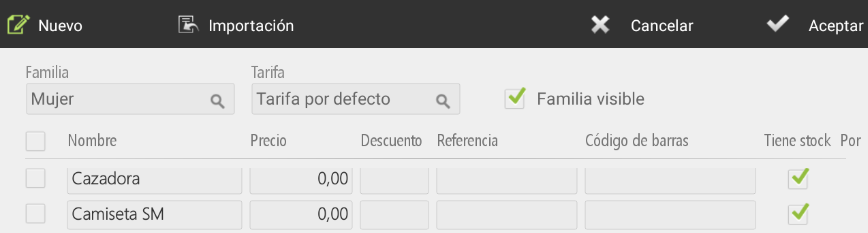
Upon pressing Accept, a new screen will open to define the properties of the created items: modify name, add price, reference, barcode, etc.
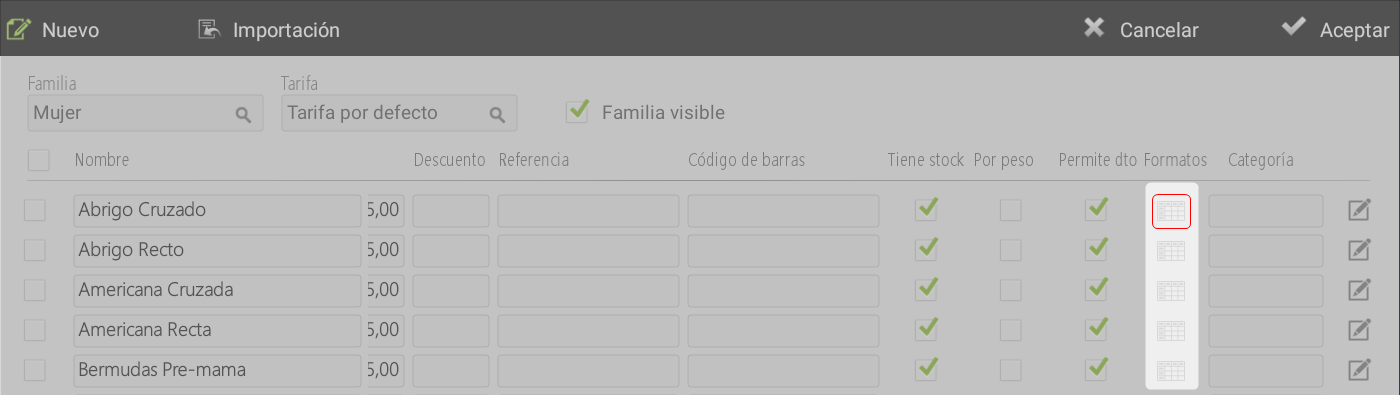
To add Size and Color For the articles, you must click the icon 'table that is located in the column Formats and follow the steps described in the previous sections for Size and Color. The icon is shown highlighted on items that have size and color, and in gray if they do not.
AI Assistant
Section summary
AI can generate inaccurate information; verify the results.