En esta sección
Suppliers
To access the supplier maintenance screen, you have to select the Suppliers button.

Once selected, you access a screen displaying a list of all the providers registered in the system. From this screen, new providers can be created or existing ones deleted. To create a new provider, the button must be selected [New].

On the main screen, you must specify the supplier's basic information. Also, you can deactivate the supplier if it is an expired contact.

Contact details:
On the Contact Details tab, various fields are available to enter more information about the supplier, such as the address, the trade name, or the email.

Billing details:
In Billing Data, it is possible to determine the type of tax document, the currency, and the minimum amount this provider works with. Additionally, the Billing Regime is defined in the Transaction Type field. By completing the IBAN and SWIFT fields, the banking details that will be used for the payment of your invoices will be saved, along with the default payment day information.

Delivery Details:
The Delivery Data settings are used to control the days of the week this supplier makes deliveries:

Payment terms:
In the Payment Conditions section, you can add information about the payment conditions that apply to this supplier. To add a payment condition to each type, you must select the magnifying glass.

Upon selecting it, the payment conditions configured in the database will automatically appear. You can select an existing one or create a new one using the New button.
Rates:
On the Rates tab, the purchase rate associated with that supplier is added.

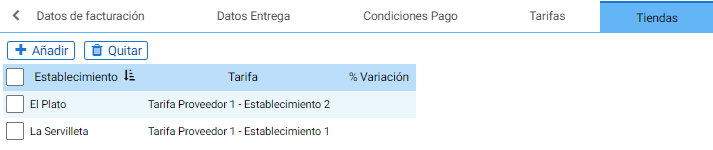
Stores:
Sometimes it is necessary to be able to filter the Supplier and rate that will be visible in HiOffice according to the Establishment assigned to the employee accessing the ERP.
The Stores tab on the Supplier record allows assigning a purchase rate for this supplier, visible only when accessed by users of the establishment indicated in the Establishment field.
Example: In the following image, employees of the establishment "El Plato" will only be able to purchase items included in the rate "Supplier Rate 1 - Establishment 2".
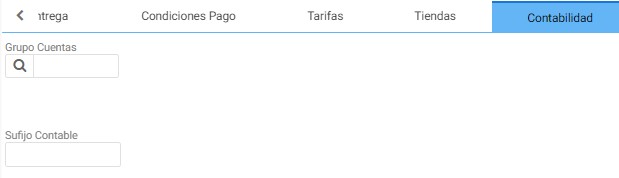
Accounting:
The assignment of the Account Group and the Accounting Suffix to which this vendor belongs for the transactions that have it assigned.
Purchase rates
Upon entering Purchase Rates, the first thing you see is the search filter where you can create or delete Rates.

By clicking [New] A configuration screen opens where the name must be indicated (in the Purchase Rate field) and whether it will include taxes. Additionally, purchase prices for items can be added manually from the Items tab, or the prices of those already in the rate can be viewed from the table.

AI Assistant
Section summary
AI can generate inaccurate information; verify the results.