En esta sección
Calendar screen
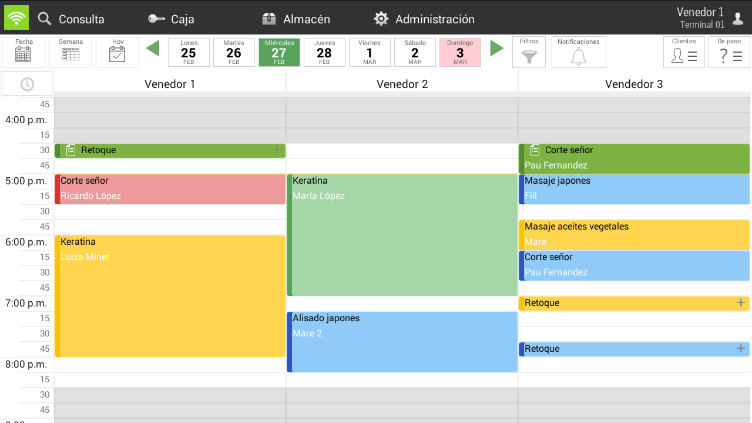
The calendar screen in HioPOS Cloud is the main functionality of the point of sale for hair and beauty salons, as they need this screen to keep a record of appointments completed or pending.
In it, a calendar appears, defaulting to today's date, with all configured vendors and scheduled services, showing their corresponding status, by hour and vendor.
On this screen, we can observe the gray cells, which correspond to non-working hours, and the white cells, which correspond to working hours. We configure it in Settings, Shifts. The yellow line that appears on the calendar tells us what time it is.
The following points detail all the possibilities for scheduling and selling a service.
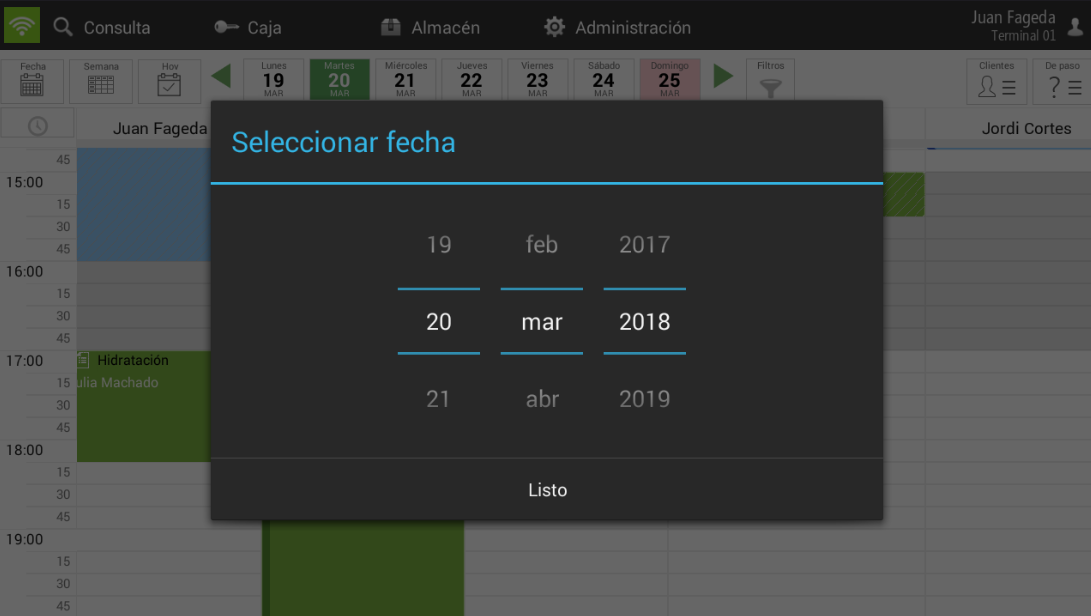
Date Button
The Date button lets you select any date more quickly.

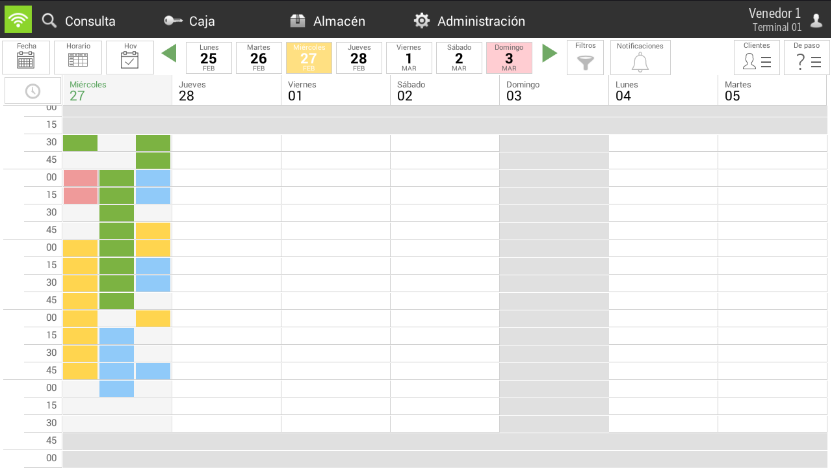
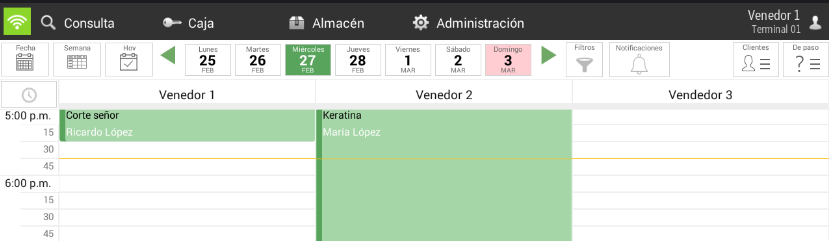
Weekly view (Week button)
The Week button allows us to view our schedule in a weekly table, where the events for the next 7 days from the selected day are displayed. It is a graphical format, as shown below:

The filters in this mode are different. By selecting on the button of Filters, the following options will appear, where you can choose which vendors you want to display, as well as whether to show canceled appointments (in red) or no-shows (in black).

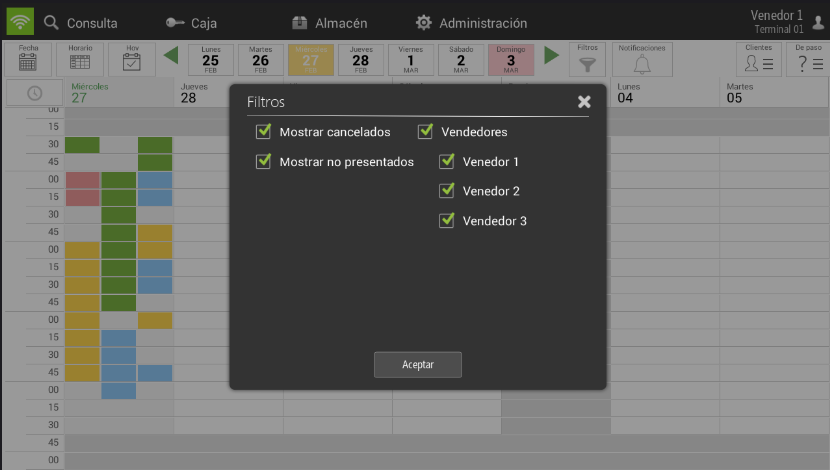
Once we are in the weekly agenda view, we can click on the different time slots to see a pop-up with information about the various services to be performed. Additionally, it allows you to create a new appointment from the +.
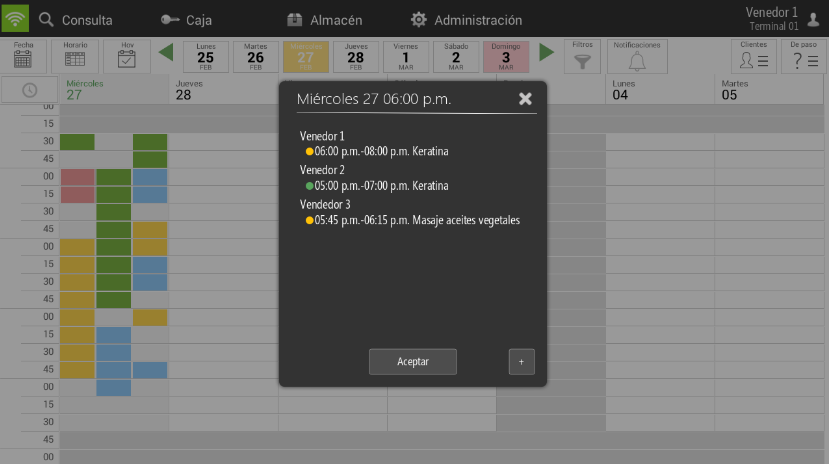
On the graphic display screen, we can observe the different states:
- Green: Service completed and invoiced
- Red: Service canceled
- Azul: Scheduled service, pending to start
- Yellow: Service in progress
- Black: Customer no-show
Button Today
This button allows you to return to today's date if you are on another date.

Calendar Bar
This bar shows the 7 days of the week (from Monday to Sunday) and allows you to select any of them. Using the green arrows at the ends, you can change weeks, and you can also do so by swiping your finger from side to side.

Filters
This option allows you to filter by the different statuses of the services already planned on the calendar, but it also has the option to filter by employee group.
Clicking on Filters will open a new pop-up to filter among the different available states and vendor groups.

Customers
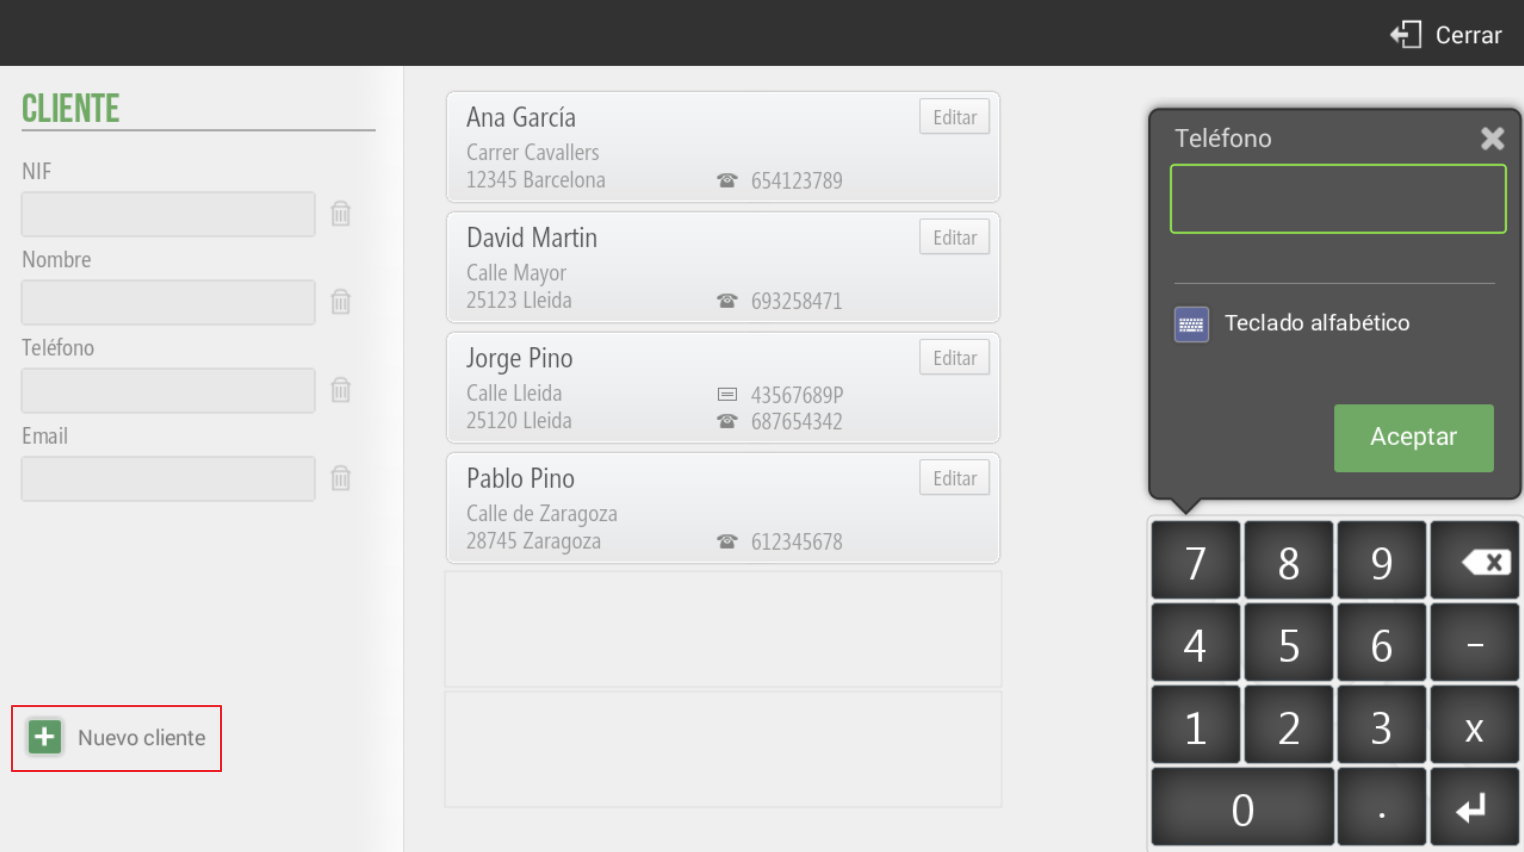
This button is one of the options the program has to start planning a service.

Clicking this button will open the existing clients screen, and you will also be able to create a new one by selecting New. You can search among the different clients using Phone Number, NIF, Name, or Email.
Sales screen for items and/or services
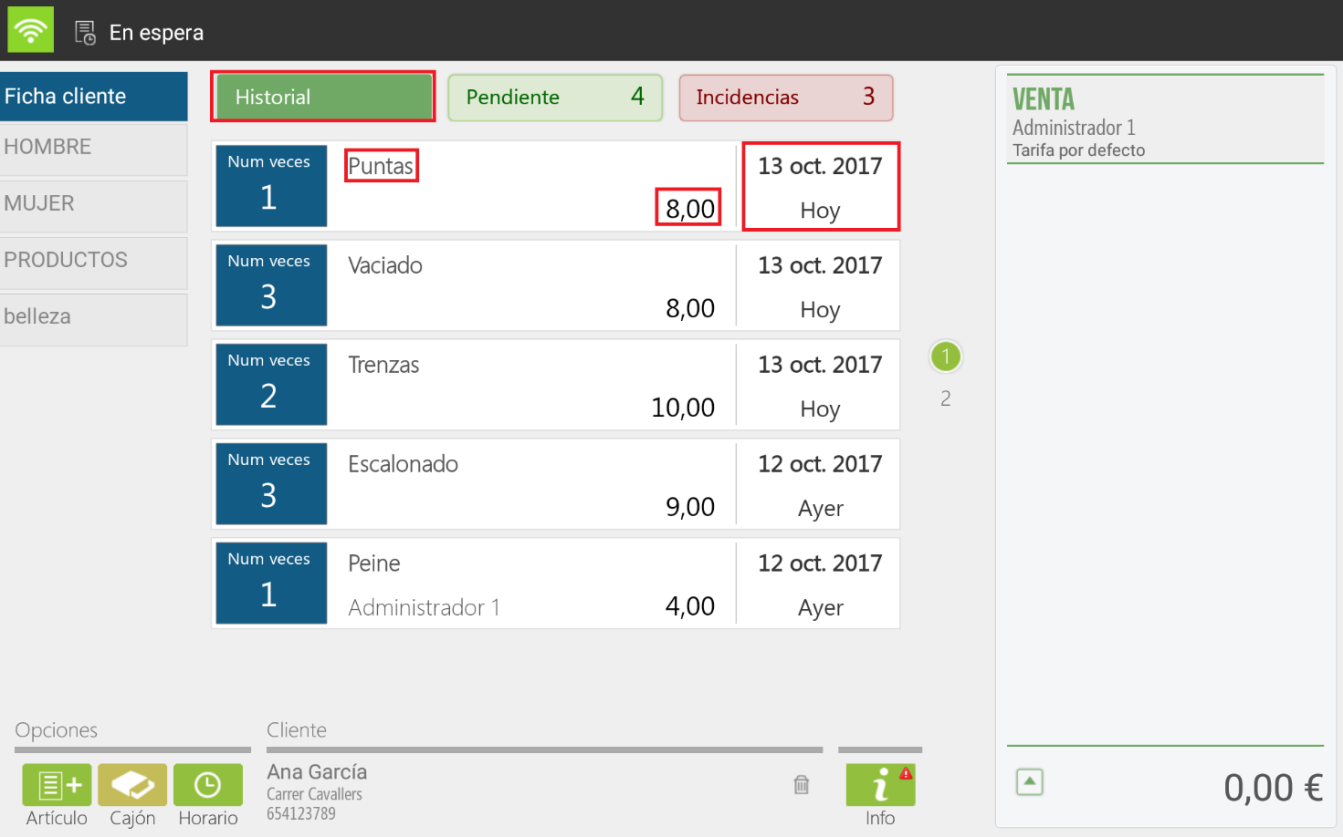
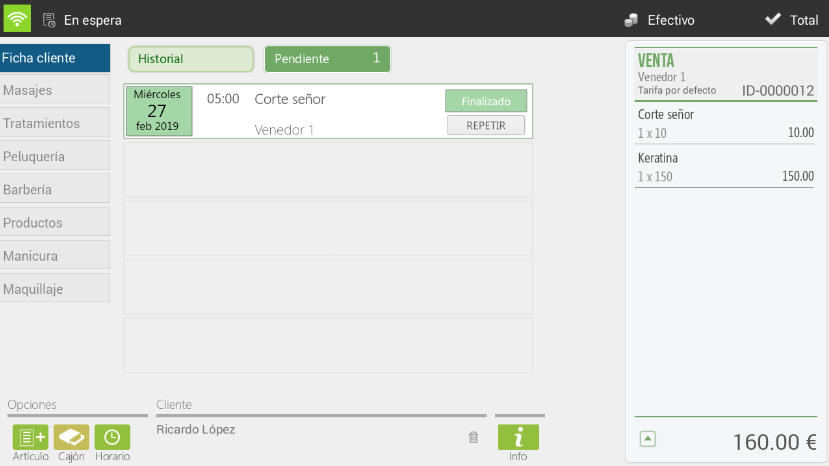
On the left side of the sales screen, we first find the customer record where we can observe three different modules:
-Customer History: We will find the services previously performed by the client, as well as the products purchased. We will see the number of times each service was performed, the name of the service, the cost of the service (even if the price has changed over time, the latest price will always appear), and the last day this service was performed.
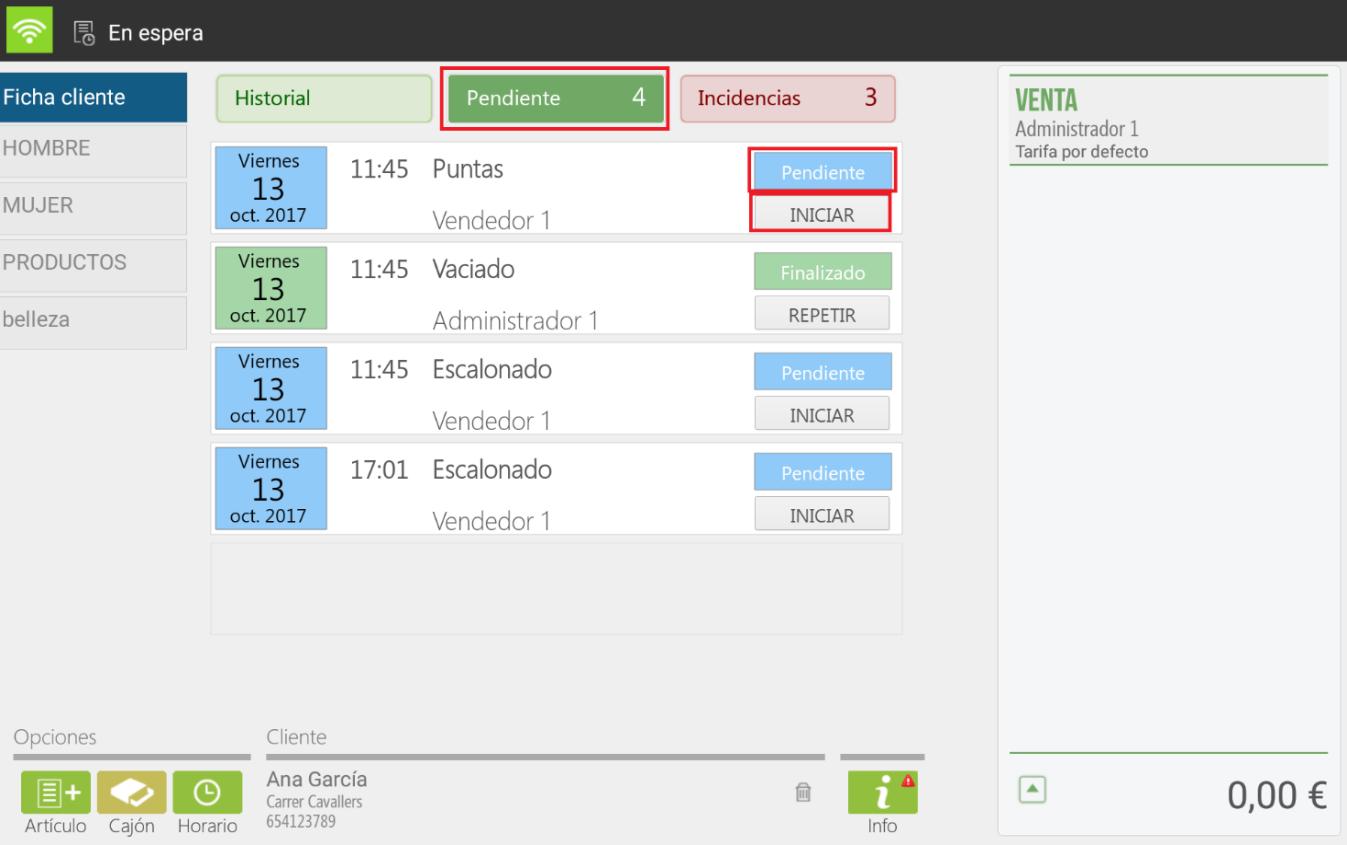
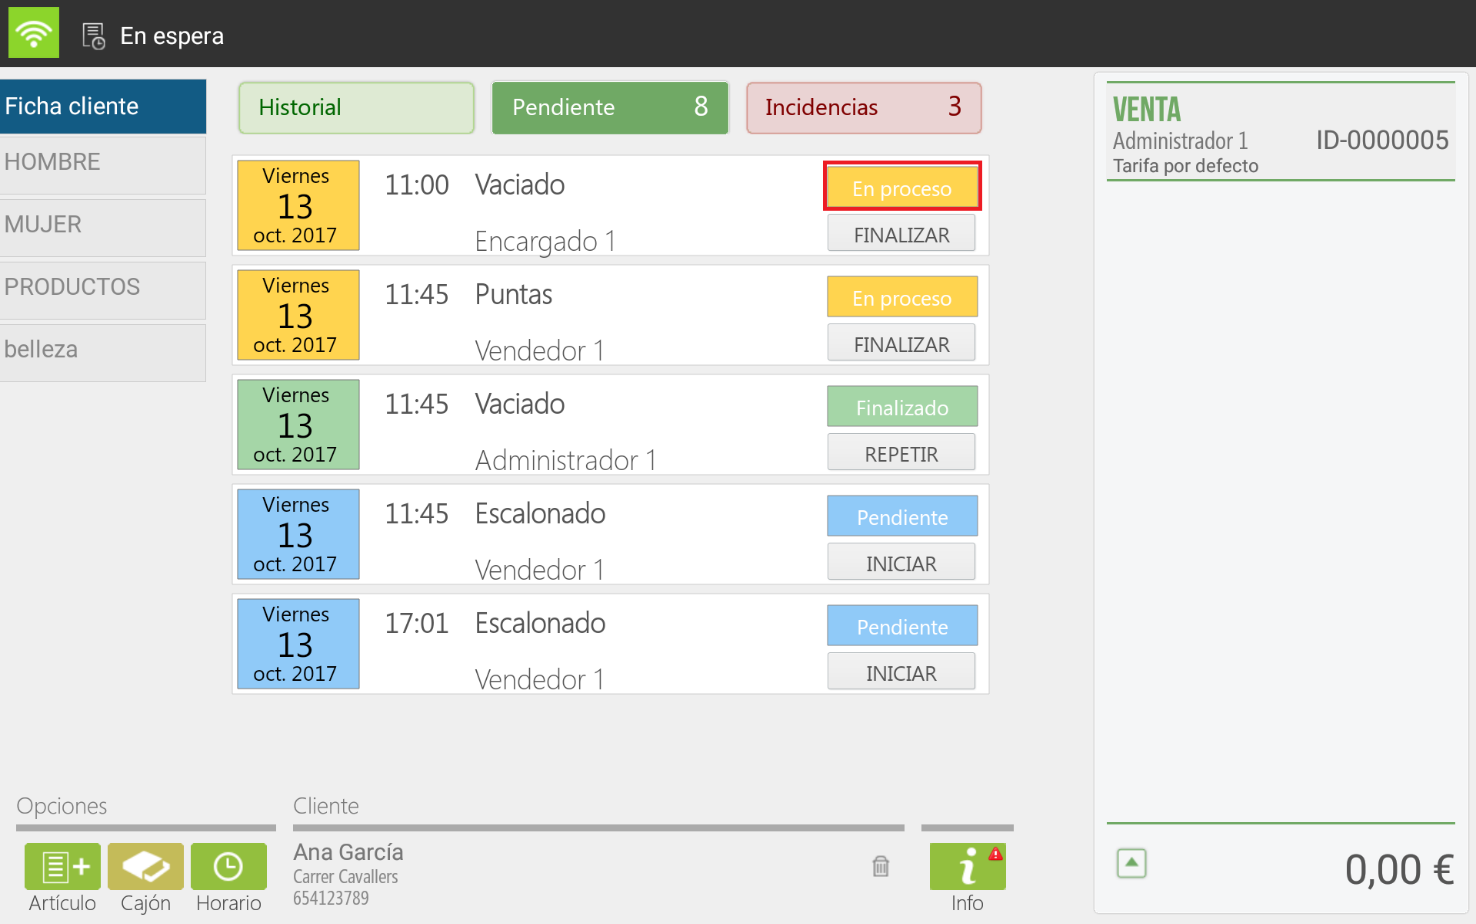
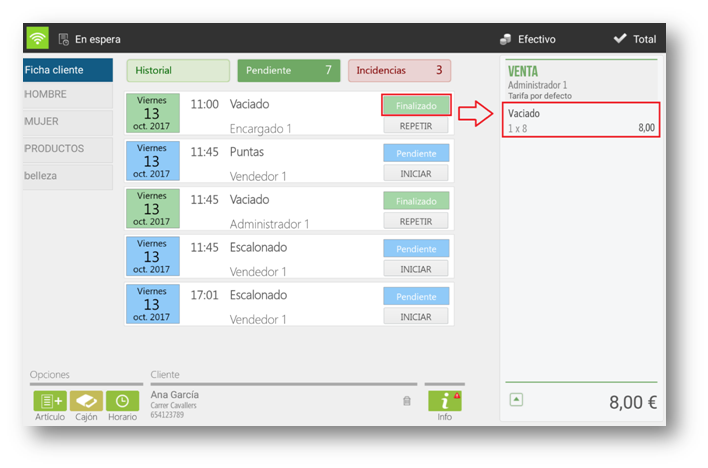
- Client's pending services: The pending services to be performed will appear. We will be able to see the time and day of the service, the name of the service, and the employee who will perform it. When the service begins, you will have to select on START (will always be linked to Pending), and the status will automatically change to In process. Once it's finished, we will click on InProcess and it will automatically change to Finished and It will also appear on the right-margin ticket, therefore, this service will be available for billing.
The same would happen with the other services pending completion. In the following images, you can see the process:
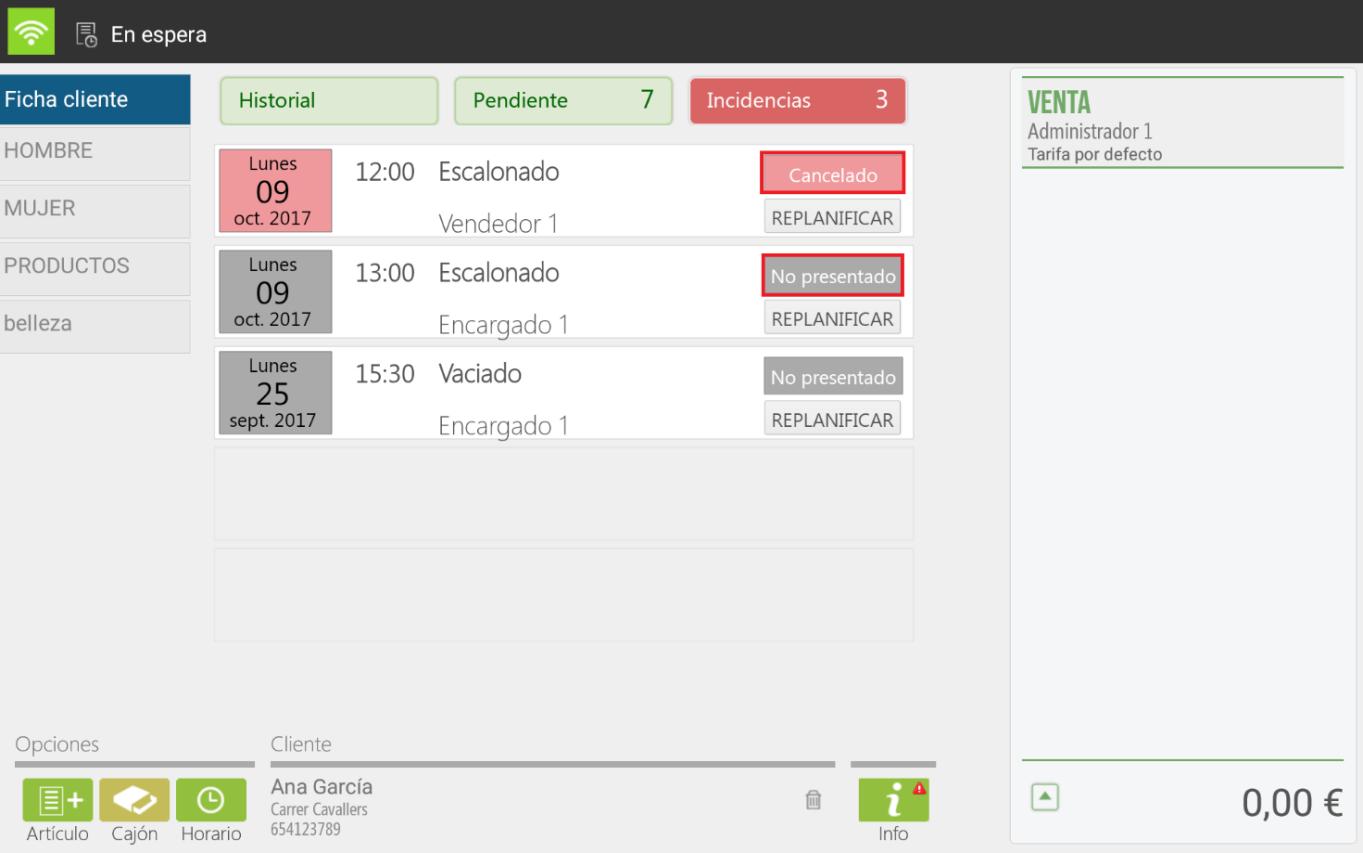
- Customer Incidents: we will view cancelled appointments or those where the customer was a no-show, with the option to reschedule the appointment.
If a client with no outstanding service were selected, only the other two modules would appear: history and issues.
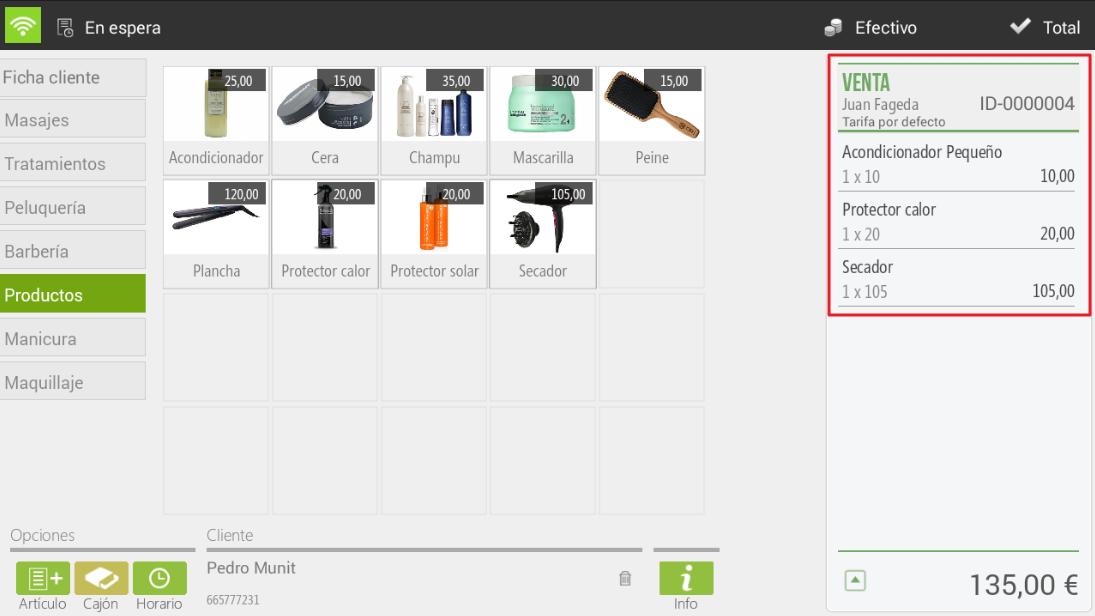
On the other hand, families are displayed with their respective items and services. The order in which families and items appear can be modified from the option Articles from the Configuration, performing a long-press The parent family is to change its order. If a subfamily exists, a folder would appear next to the articles.
If a service is selected, it will automatically redirect you to the calendar screen, where you can then select the time and the employee you wish to assign for that service.

If this client has already received a service at the establishment, the last employee who attended this client will automatically be highlighted in yellow.
On the other hand, if we select an item, it is automatically transferred to the ticket that appears on the right side of the screen.
Following the different functionalities of this screen, in the bottom left, we can perform a direct search for items, open the drawer, or go directly to the calendar screen, as shown in the following image.

Also, there is the option to change the selected client, allowing for easy viewing of their profile. If services or items have been previously selected and you wish to change clients, they will remain with the client they were previously associated with.

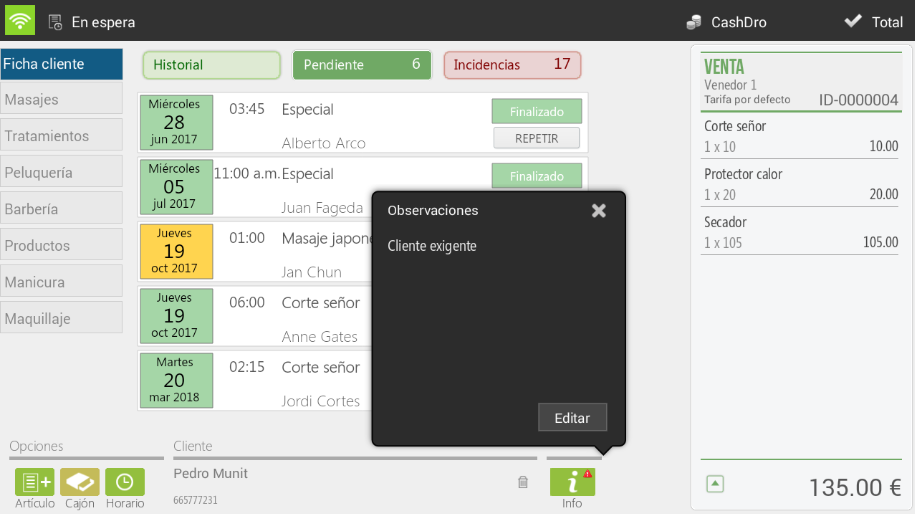
Finally, we will have a very interesting feature that will allow us to configure observations for clients using the "i" icon.

In this way, we will be able to configure comments for each client to remember what treatment was performed on a specific day or the type of client they are.
Manage sales
HIOPOS now includes the functionality to handle sales for another client. This functionality will allow us to total two services from two different clients on a single ticket. Let's look at an example:
At our hair salon or beauty center, Ricardo López comes with his daughter María López and both receive a service. When totaling the bill, Ricardo will pay for the service provided to María López.
First of all, the services must be completed.
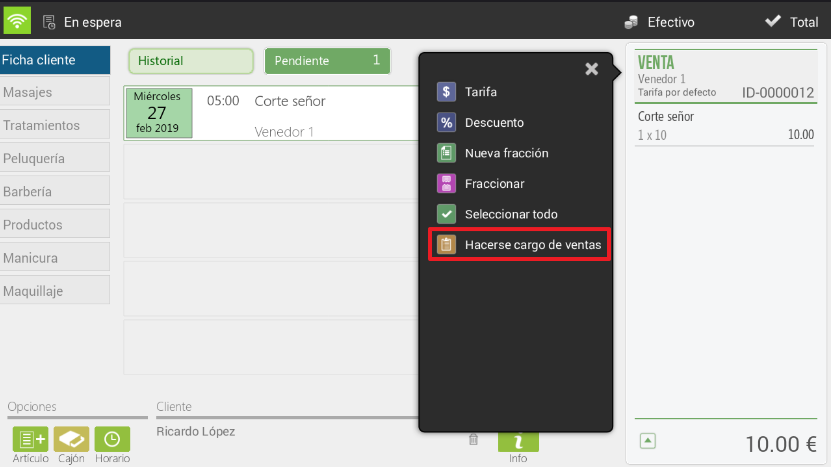
Once the services are completed, we will need to enter Ricardo López's service and access the options in the ticket header.
Next, we will handle the sales for your daughter, María López. We will need to move María López's services to Ricardo López's ticket, who will total both sales on a single ticket.
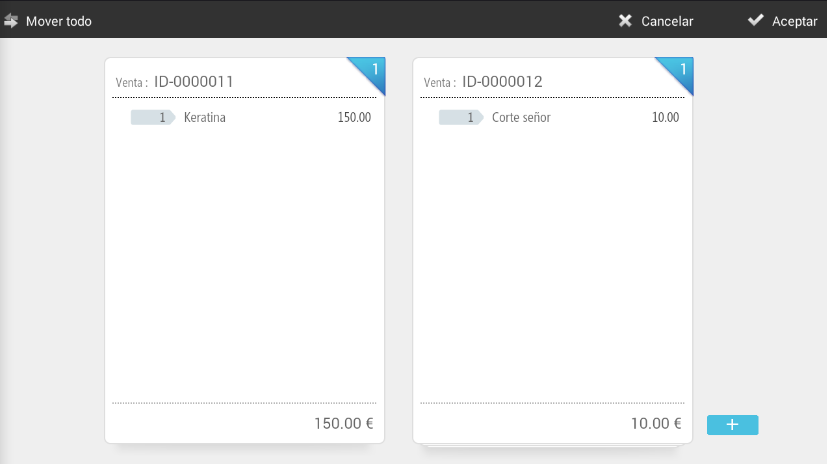
Once this step is completed, we will now have María López's service on Ricardo López's ticket.
It should be noted that, statistically, it is on record that each service was performed for different clients, so the sales per client will not be altered by having totaled two services from two clients on the same sales ticket.
Establish a service
To book a service, simply select a cell on the calendar, taking into account the date, time, and employee.
This process is the same as selecting the client previously, but in this case, we have already selected the date and time.
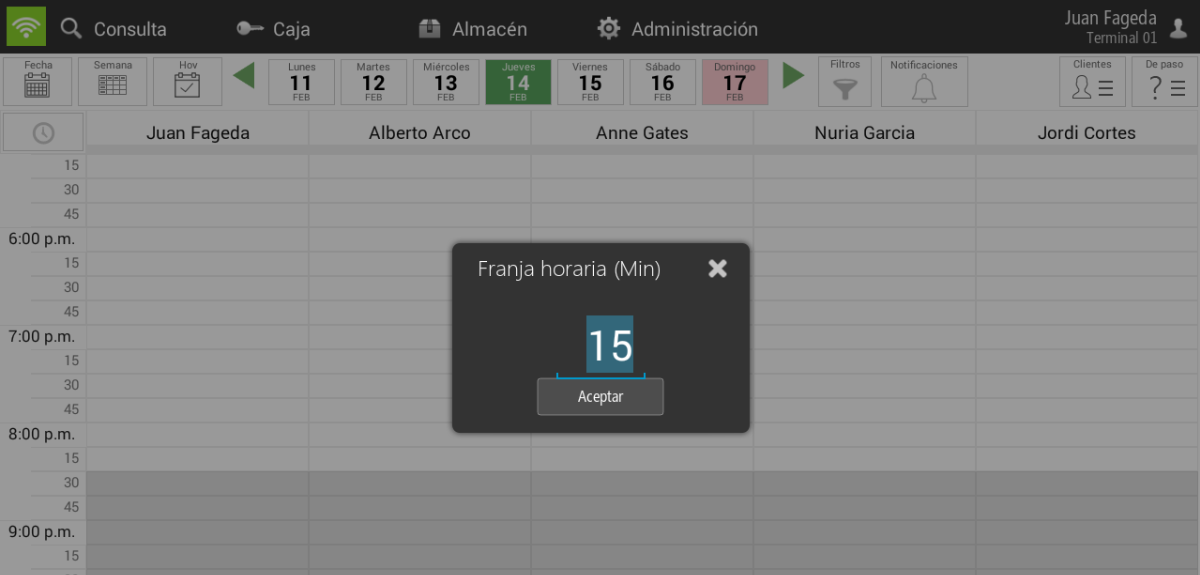
Time zone configuration
With this option, we can configure the calendar's time slot and adjust its display to our convenience. This way, if we have short-duration services, we can configure a small time slot to better visualize the services on the calendar.

Walk-in Customer
From the sales screen, we can access making a sale to a walk-in customer. Walk-in customers are those who, as their name suggests, are just passing through and therefore we don't have them registered as customers since they receive the service sporadically. In the top right corner, we can select "Walk-in Customer" and then select the service and/or product.

Then, if we select an item, it will be added directly to the ticket; whereas if we select a service, if we do not work with a sales team, we will have to choose the salesperson who will perform that service. This service will be automatically added to the calendar once completed.

Service Statements
On the calendar screen, we have 6 service statuses, each with its different options:
The tip
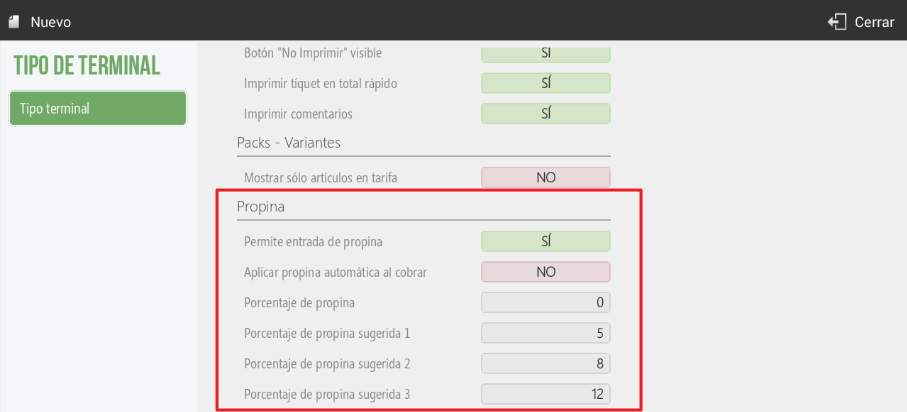
The tip is an amount that is freely modified at the end of the sale, so the tip amount is not subject to a percentage or value of the sale.
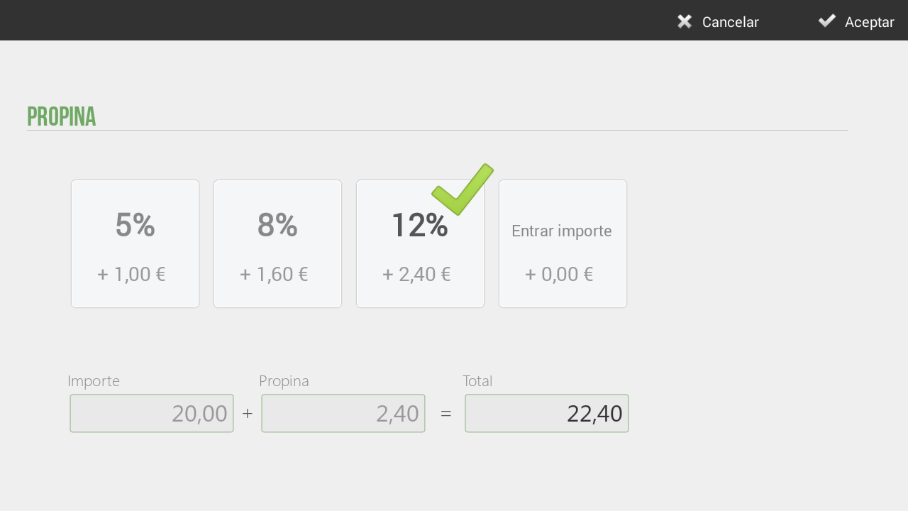
To enter the tip, we need to be on the payment method selection screen, once the ticket has already been totaled. We select the box Tip alongside the selected payment method, and a new window will open with the suggested tip percentages, including the corresponding amount, and with the option to enter a custom amount.
AI Assistant
Section summary
AI can generate inaccurate information; verify the results.