En esta sección
Customer app
As of version 11, there is a new module for all those customers who want to go a step further in HIOPOS customer loyalty.
This module will allow customers to build loyalty from anywhere, via a QR code or a URL. It even offers the possibility that the the customer can register from the printed ticket itself, and the sale is associated with the customer so they can take advantage of the business's promotions. Once registered, they will be added as customers to the database. Furthermore, it can be configured to automatically associate a customer card of the type the business decides with them, without user interaction.
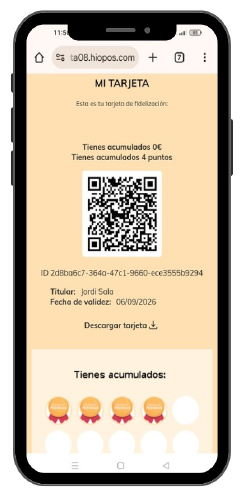
From this client interface, they will be able to access their purchase information made at the store as well as active promotions. This digital card will also display accumulated points and the available balance accumulated on their card.
Activation of the module in CloudLicense
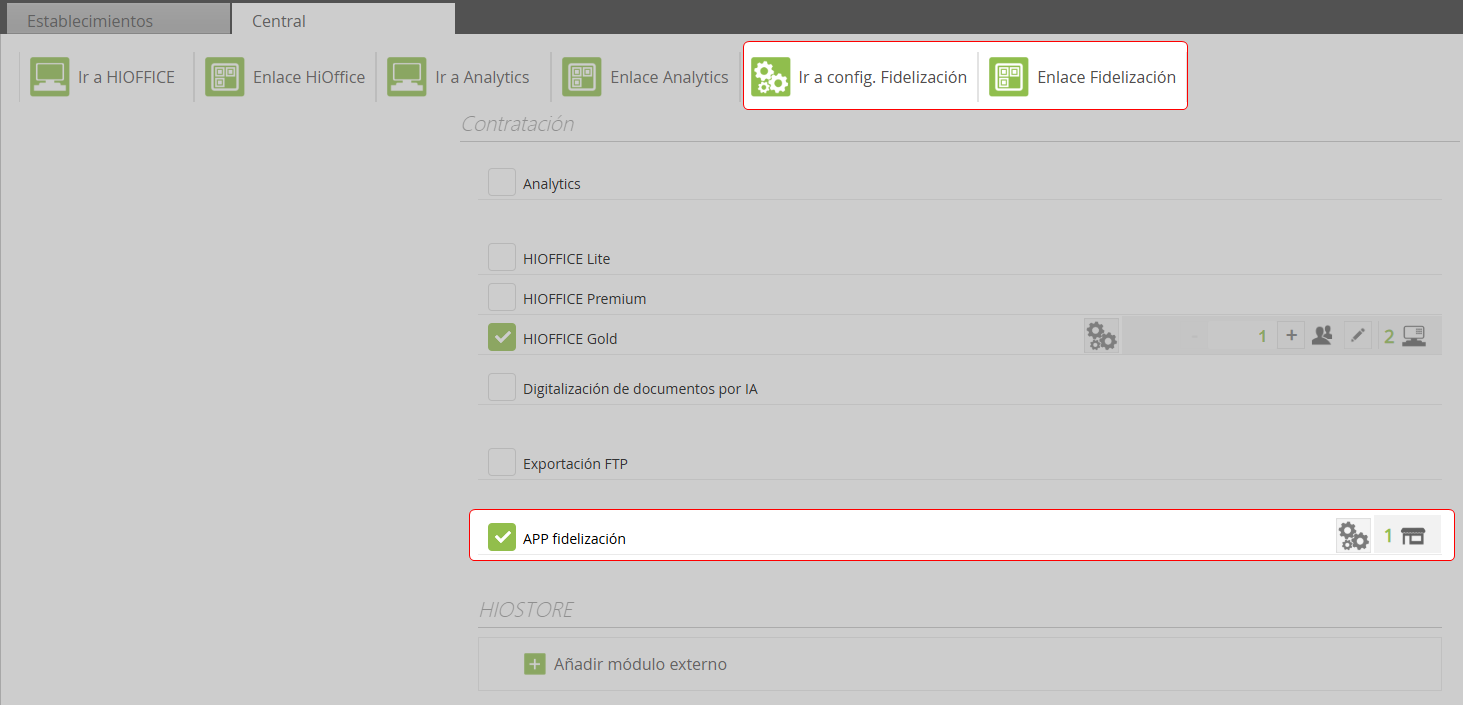
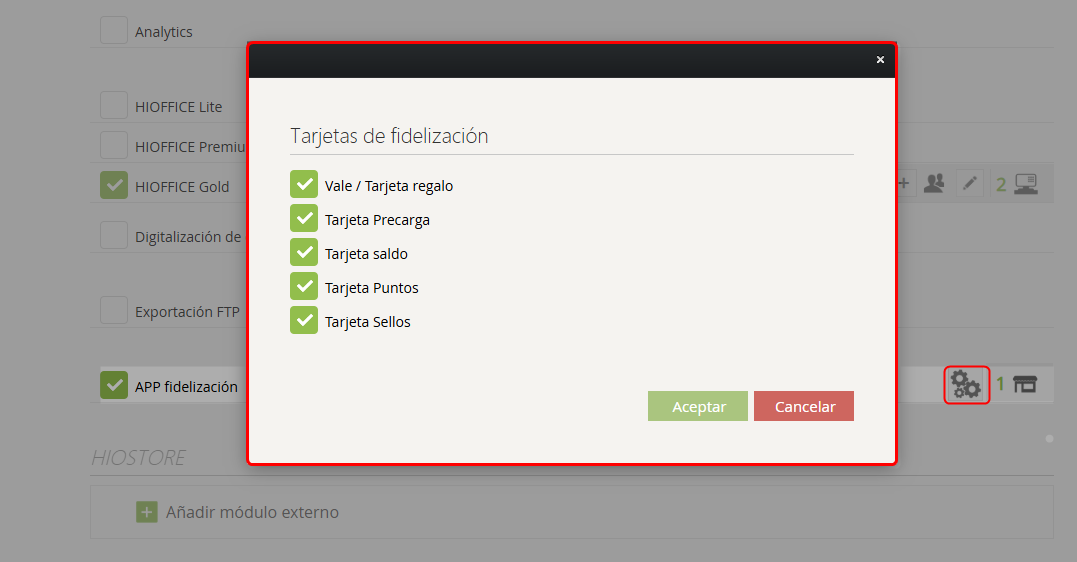
To activate this module, you must activate the "Loyalty App", available in the Customer Center section in CloudLicense. Through the icon of configuration (wheel), the user will be able to select and define the types of cards that will be available for viewing in the application. Once the module has been contracted, new options become available in the client.
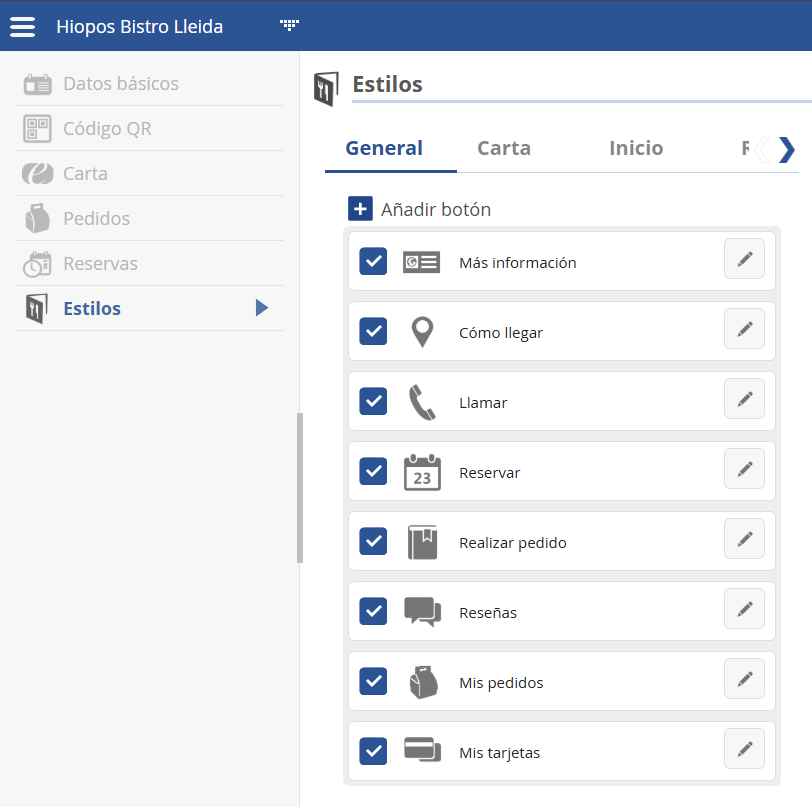
At the top of the screen, within the tab Configuration, the user will be able to:
To create and manage the different screenss that make up the client application, to define the display stylesn for each type of card.
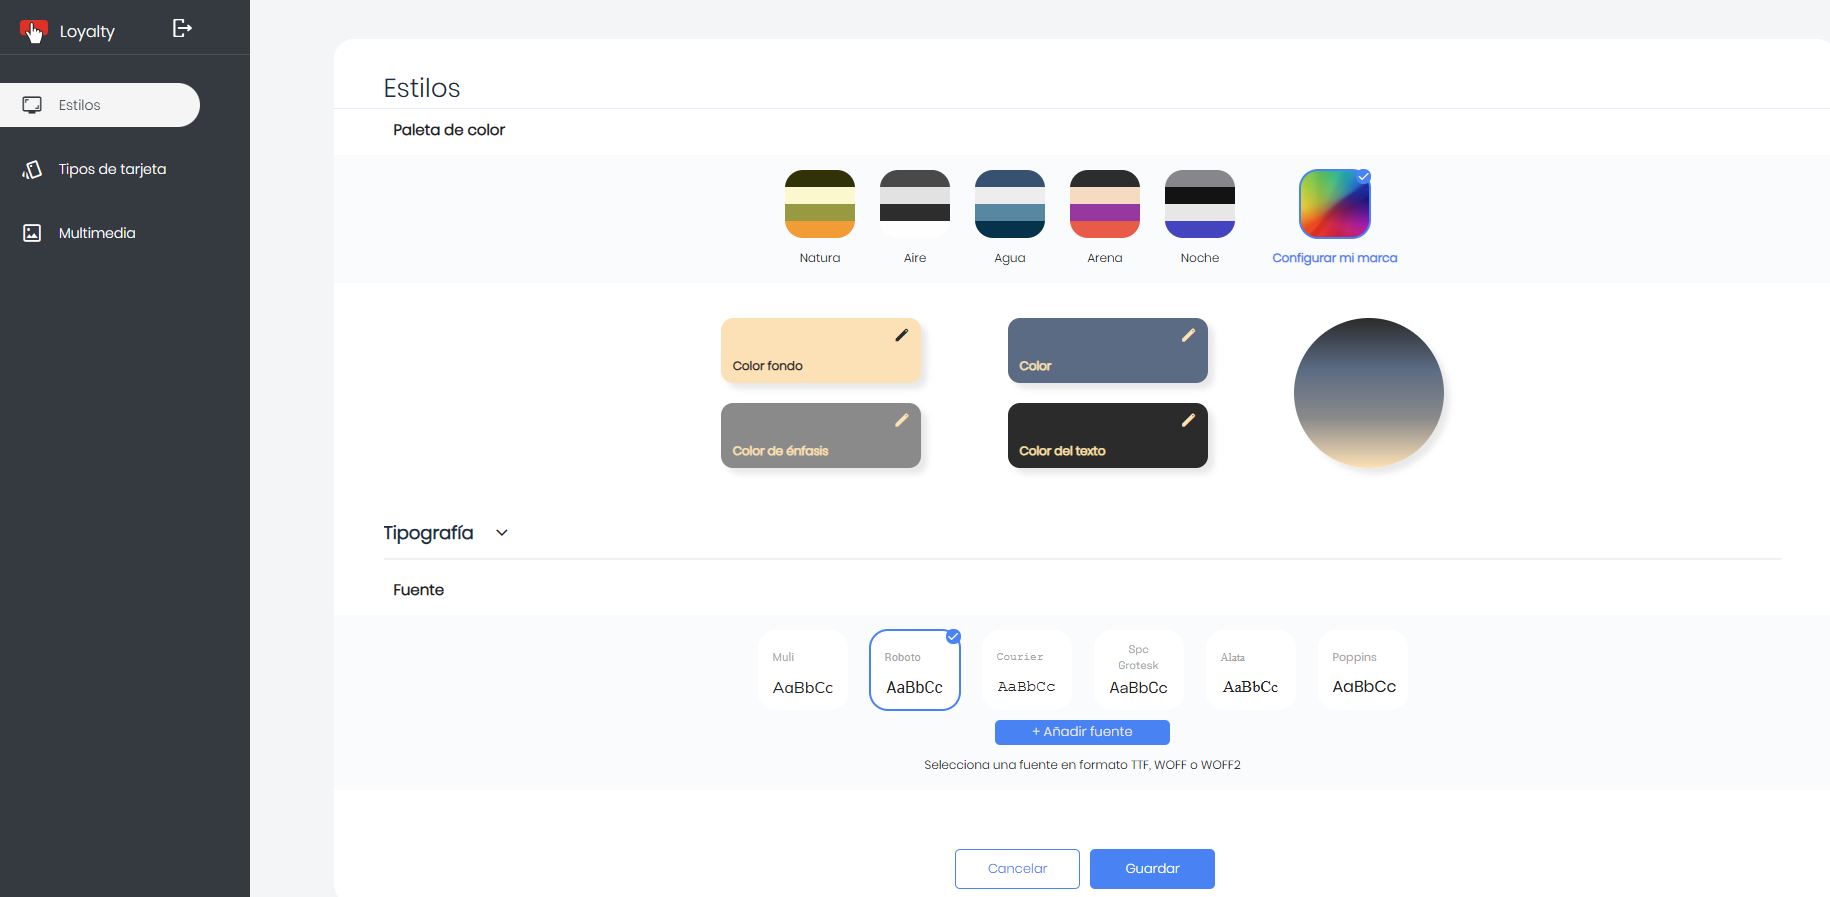
On the tab Styles, it will be possible , establishing the customize the visual appearance of the appcorporate color palette that The application will be shown and custom fonts added to adapt the design to the business's identity.
- In Multimedia You can view and add the images that will be displayed in the application.
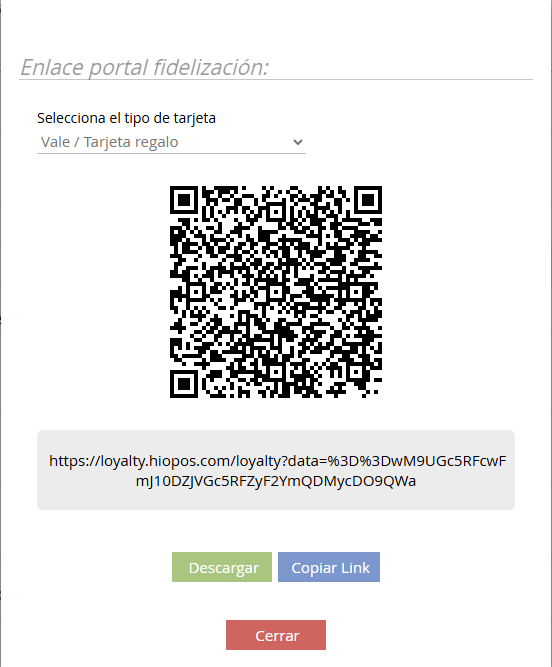
- Eyelash Loyalty Link: Where the QR code will be displayed for download, and the link with the URL to provide access to the client app.
In the section Settings of CloudLicense The various available configuration options are described in detail.
Configuration in Hioffice
Once the loyalty application is activated, if you want an associated card to be automatically generated when a customer registers independently, it is necessary to access Hioffice and follow the steps as indicated below:
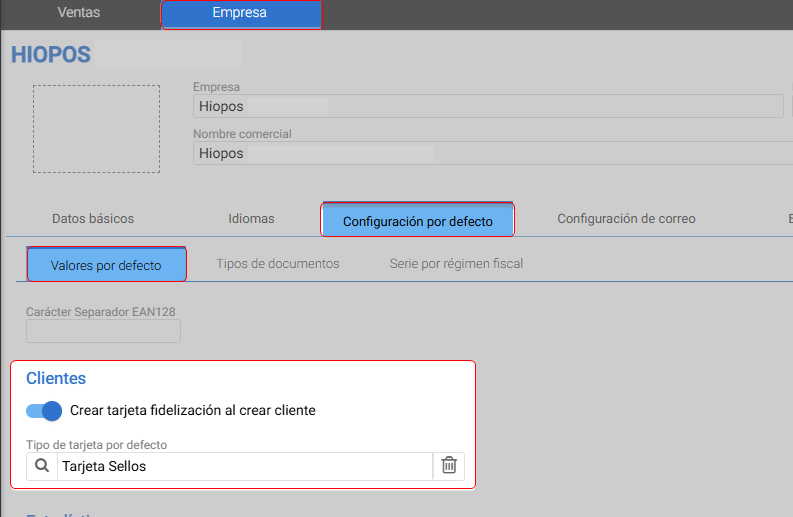
In Hioffice, enter the default Configuration of the Company. In the Clients section, there is this option indicated in the image to activate the option. Create loyalty card when creating customer, if you want to automatically associate a card when creating a client, and then select the default card type that will be generated when a new client registers.
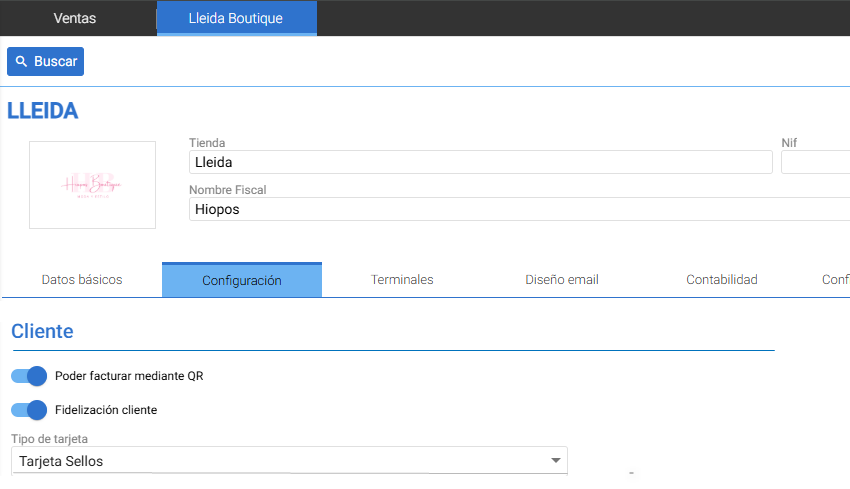
Both in Hiopos as in Hioffice, in the configuration of the Establishment, you will be able to define the card that will be automatically created when you sign up as a customer.
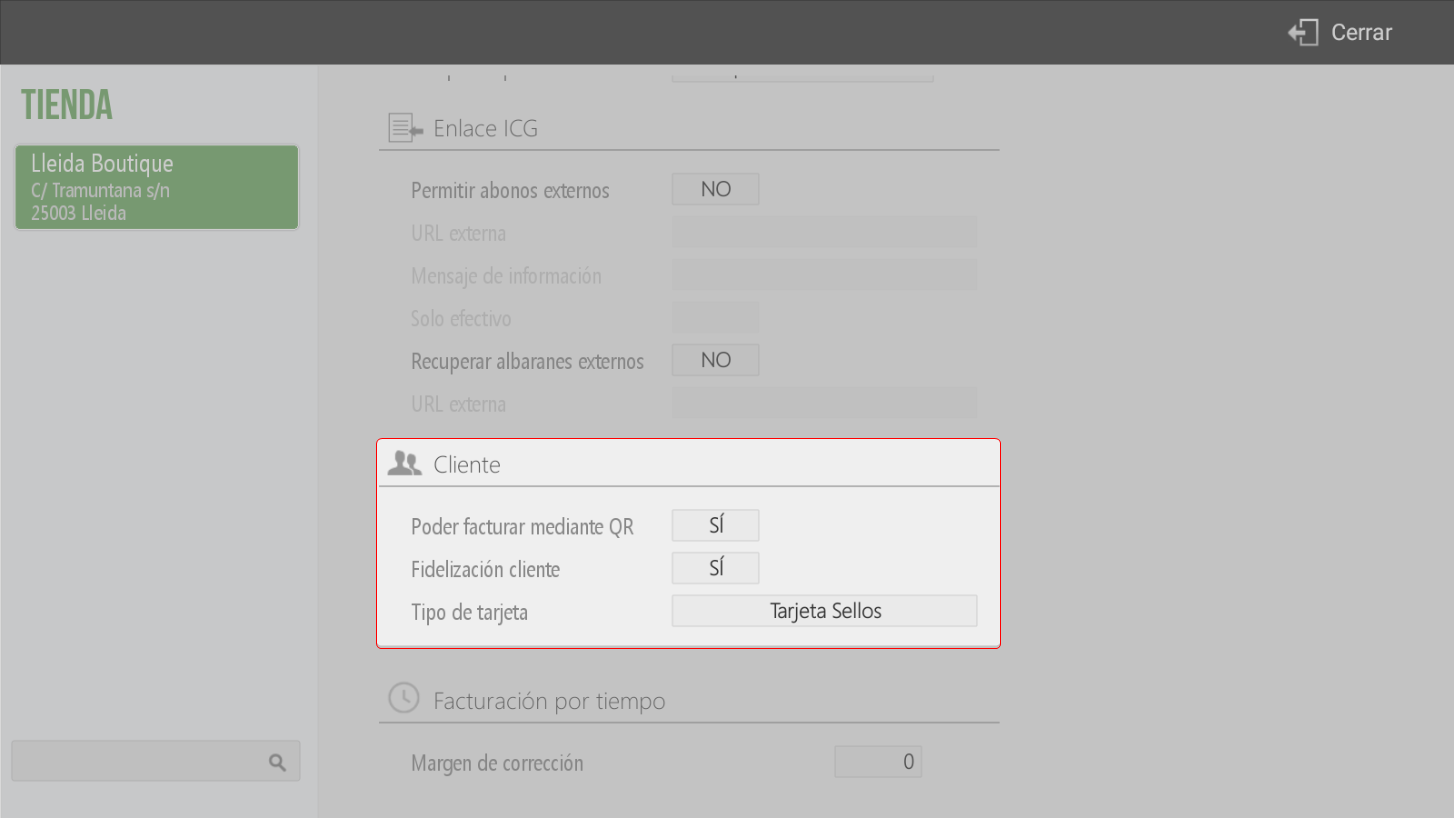
With these Establishment options active, there is the option to have a QR code on the Multifunction printed ticket. When the QR code on the ticket is read, it will give the customer the option to:
Invoice Creation: Ticket self-invoicing can be managed.
Sign Up: You can register in the customer database and automatically associate that ticket to take advantage of the store's promotions.
Configuration in CloudLicense
To access the settings of the loyalty app. This link takes us to a form where we will need the Administrator credentials for the target database.
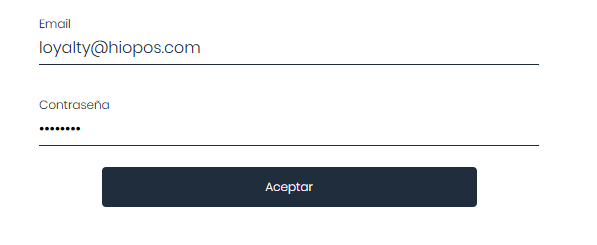
To do this, we will use the company's administrator email and password, we can Extract from the fields marked below:
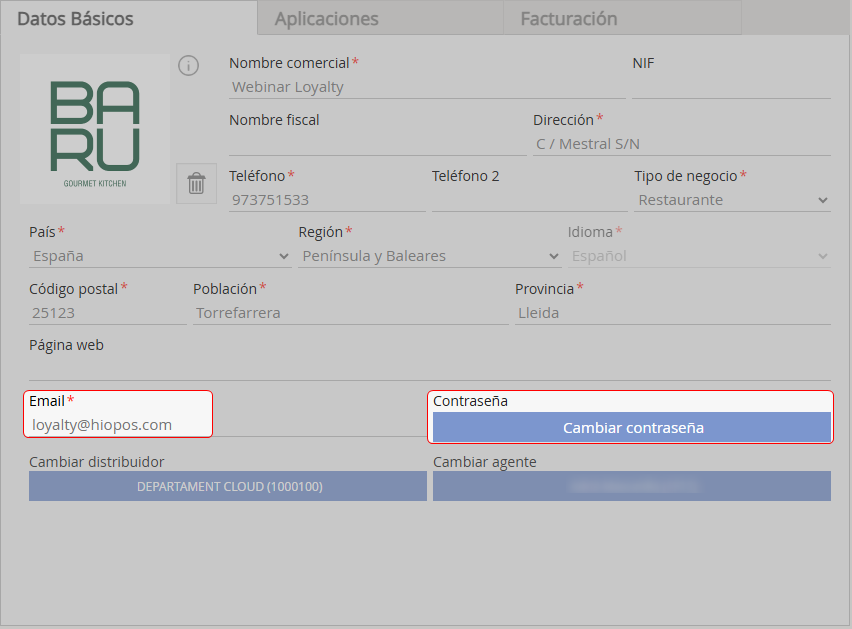
From this environment, you can modify the visual style of the loyalty space, allowing you to visually adapt the page customers will see to match the corporate aesthetic.
Additionally, it provides access to the different screens with which customers will interact. To to edit them, we will go to the section of «Types of card»:

Using the page icon You will be able to customize the texts of: ‘Privacy Policy, Cookie Policy and Commercial Communications.
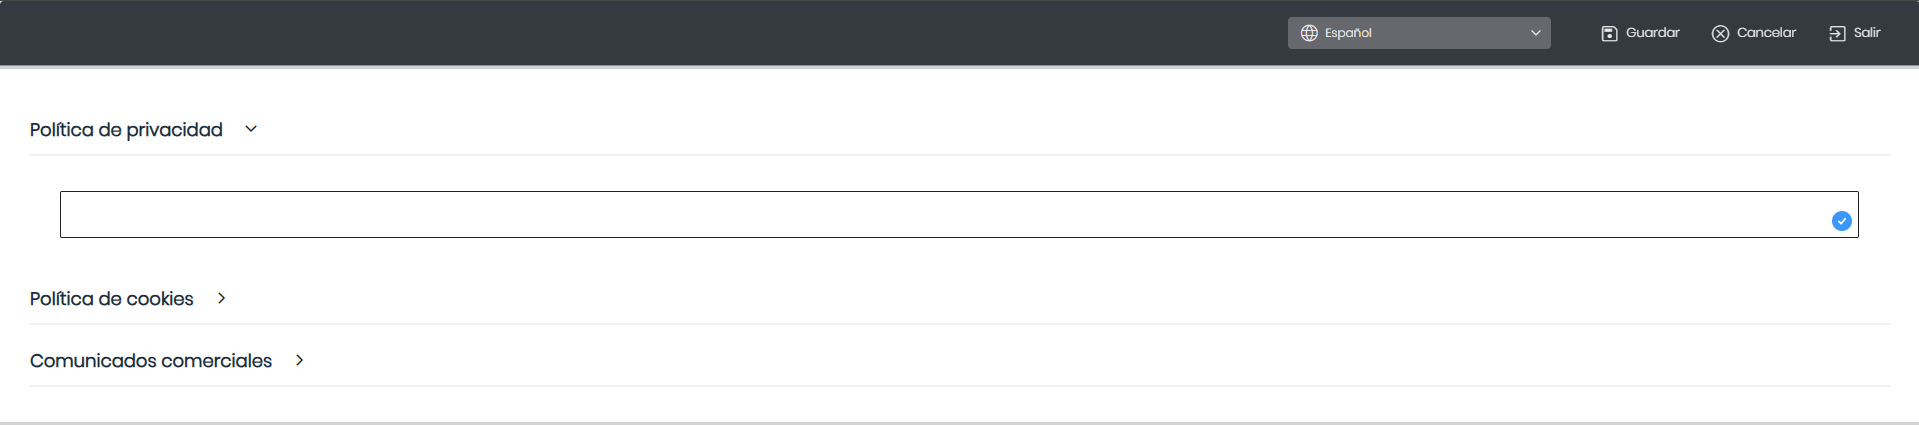
TIP: If campaigns and promotions are to be carried out, the texts for ' must be enabledCommercial Communicationsso that in the registration form the client gives their consent to receive them.
Using the pencil From each screen's edit, we access its editing.
In the top:
Elements: allows adding image elements and image gallery.
PC/Smartphone Tabs: allows you to preview the page in both smartphone and PC formats to validate that the changes are responsive and do not negatively affect the display on any device.
Languages: if the business supports multiple languages, you can select the language for the configuration.
Hidden Elements: some blocks may be hidden depending on the PC or Smartphone view type. Pressing the button will show all blocks, even if they are not visible in this view.
Buttons: Save, Cancel and Exit.

Buttons: Save, Cancel and Exit.
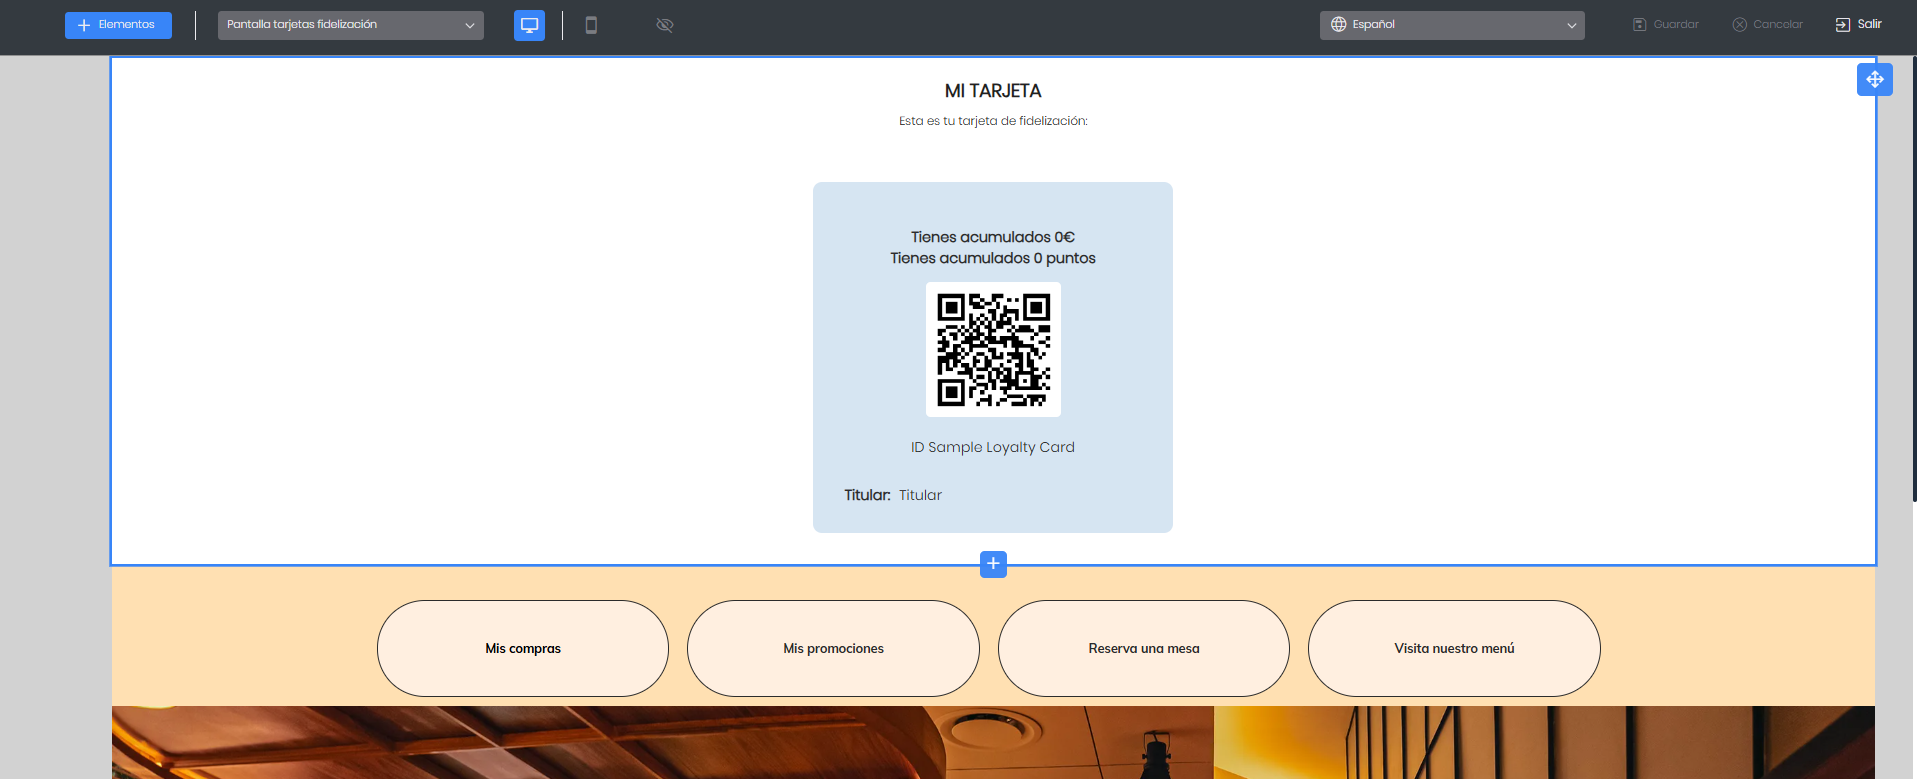
In the central part on the screen are shown:
The block of Loyalty Card with a QR code preview, balance and points accumulated on the card. (Not editable)
Block of Buttons: this block defaults to the buttons for 'My shopping' and 'My promotions’. This block can be edited for configuration; to do so, press the block and then the 3 dots on the side:
General: Background color, space between fields, horizontal alignment, and margins.
Buttonsallows adding translations (the literal text to display and the language). When the button is expanded, you can edit the background color, font, text color, text size, alignment, format (bold, italic, underline), button rounding, and border color and width. In addition to specifying the action to perform when the button is clicked, depending on the configured link type. For example, in a hospitality database, the button could redirect to its PortalRest. Additional buttons can be deleted if desired.
TIP: The configuration of the forms of Login/Register user they are not modifiable
Access as a customer
Customers will access our database's loyalty portal from the ticket or via QR code or link. Once there, they will be able to log in if they are already registered as customers, or register as new customers. The customer registration process is very simple and intuitive for the user. The steps are as follows:
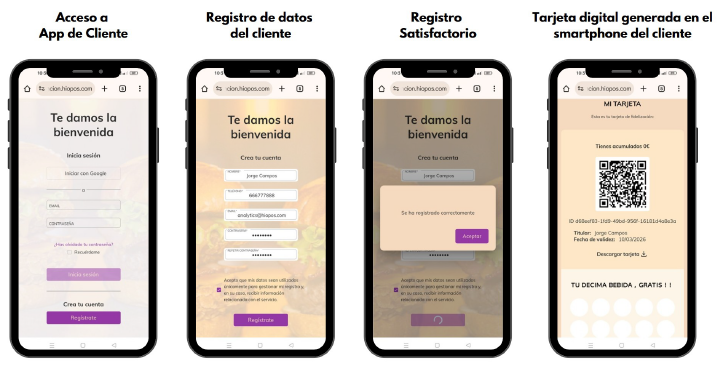
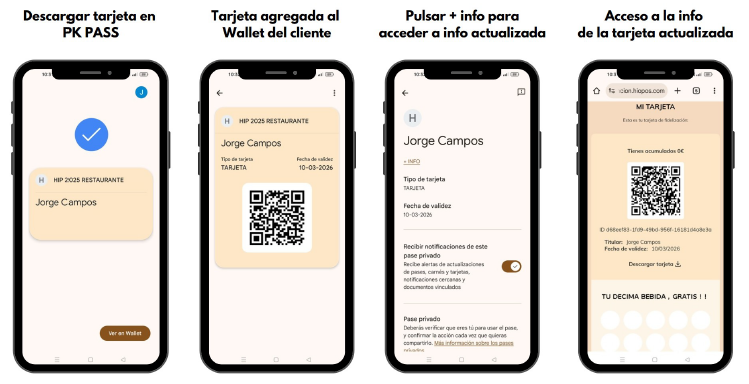
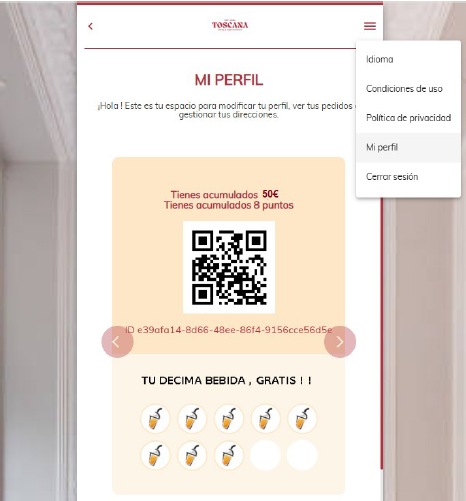
Once registered, the customer can download the card to add it to their Wallet with the option DOWNLOAD CARD, just as can be seen in the fourth image above.
Other options of the Client App
The following details the information displayed on the customer card for a hospitality business, according to the client's configuration.
My shopping: The customer will be able to view their purchases from this option, with product-level detail.
My promotions: The customer will be able to view the active and available promotions.
Book a table: In case we have integration with PortalRest, customers will be able to book a table directly from this button (if this button has been added in the Loyalty App settings).
Visit our menu: In this section, the restaurant's online menu will be displayed, (if this button has been added in the Loyalty App settings).

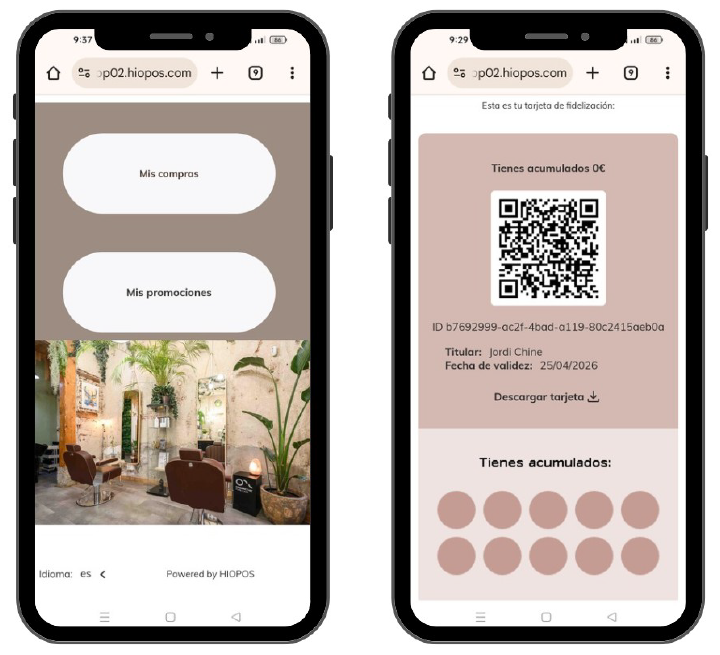
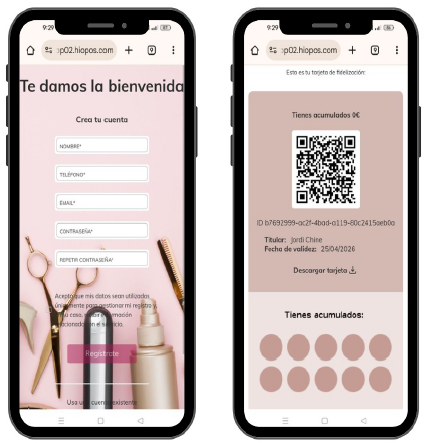
This client application will be available for the rest of business types: Retail, Supermarkets, Hairdressers…
The following is an example of a Hair Salon type client, with the ability to access their purchases and promotions, and the format of their digital loyalty card.
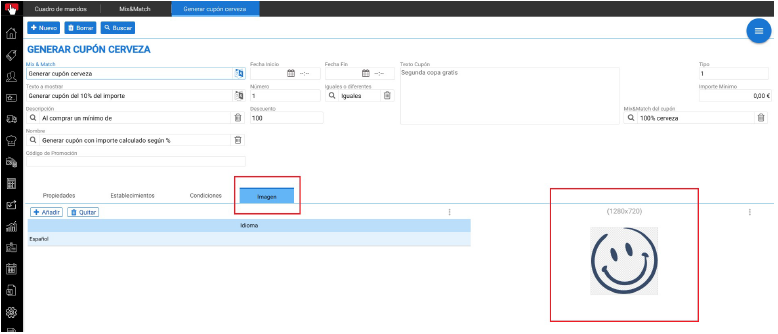
My promotions
Regarding Promotions, the customer will be able to check which promotions the store has active and that these are applicable to their card.
In the Mix and Match configuration, an IMAGE Tab has been included to define the image corresponding to the mix and match.
My cards in PortalRest
If in PortalRest, the 'My Cards' option is active, the customer who has a card will be able to view it from their profile in PortalRest.
Once the client accesses PortalRest With your credentials, you can consult your Digital card
From the My Profile option, you will be able to access My Wallet.

From this option, you will be able to view the card and check its transaction history.
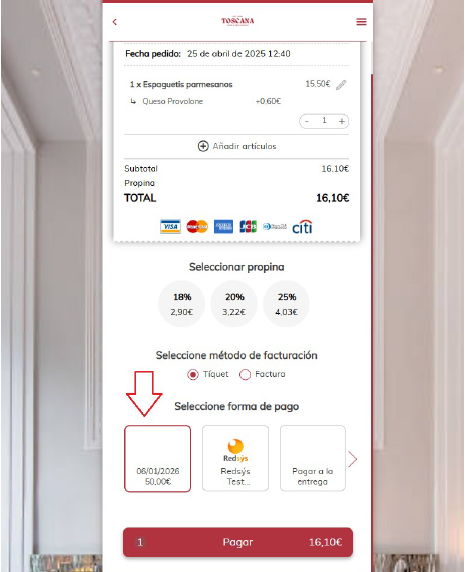
When completing the order, if the customer has a linked balance card, they can pay using the card's balance.
The image shows how the customer has a balance of €50 on the card available to spend on their order through PortalRest.
Customer Loyalty in E-Commerce
In the client's HIOPOS E-Commerce, it is possible to enable a button so that the client themselves can register and obtain their loyalty card. E-Commerce is available for any type of business (Hospitality, Retail, Hairdressers, Supermarkets…) so this option is valid for any client.
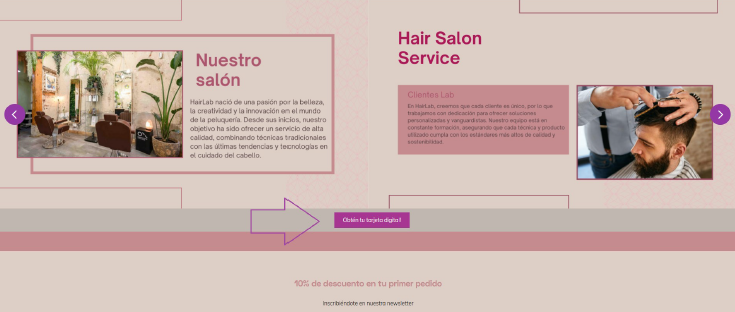
The button to be enabled on the website should launch the Loyalty Link so that they can register and obtain their digital card. Below is an example for a hair salon client type.
AI Assistant
Section summary
AI can generate inaccurate information; verify the results.