En esta sección
Discount
In the sales process, two different types of discounts can be applied: on the total or on a line item, that is, on a particular item. Additionally, discounts can have an associated reason.
Discount on the total
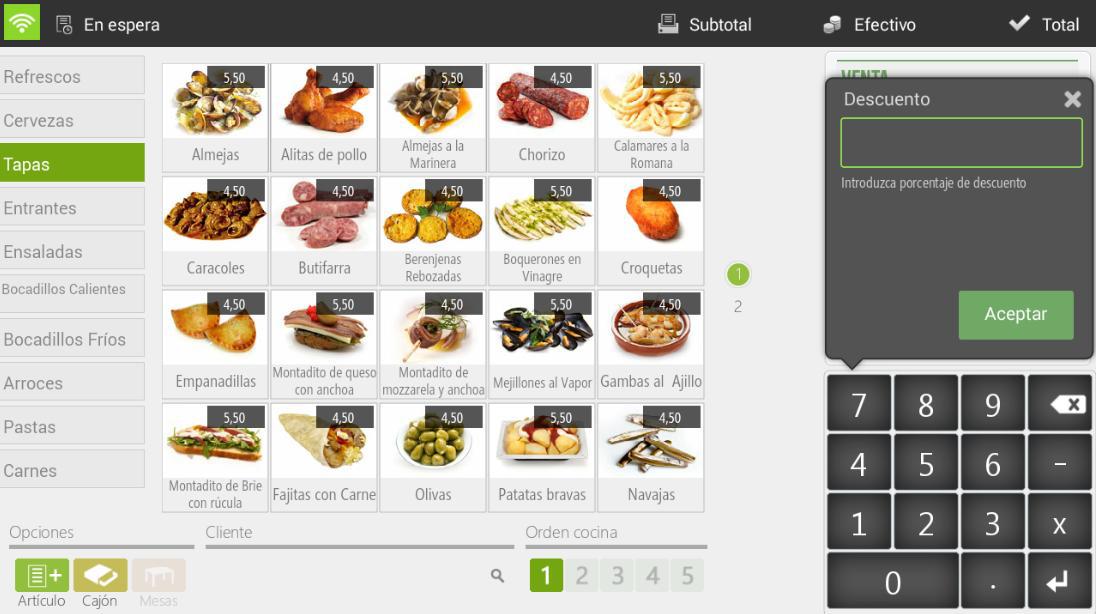
You can select this type of discount by tapping on the ticket header on the sales screen or by tapping on the ticket on the payment methods screen.
Applying a discount to the total will always involve assigning a discount reason, requiring you to select one from the list of existing discount reasons. Once the discount reason has been selected, we will enter the amount, as a percentage, to be discounted and press Accept.
To apply a new discount, you will need to remove the current discount. Tap on the ticket header (or on the ticket, depending on the screen) and select Remove discountYou can now apply a new discount.
Discount on the product
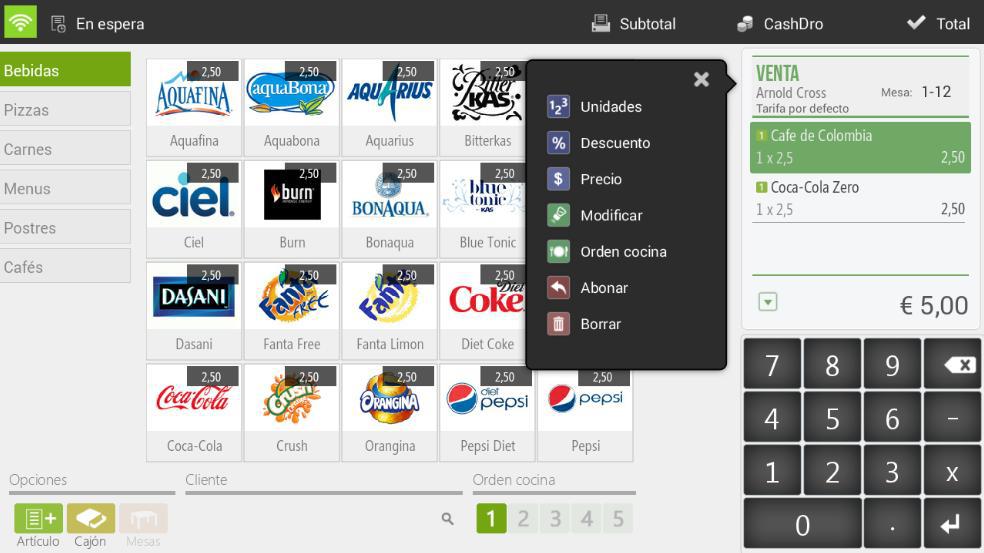
The product discount is applied per sales line. To apply a discount to one or multiple products, first select them from the ticket and from the dropdown, click on the option Discount.
The function Discount allows applying a percentage reduction on the item's price. Once we have entered the discount, we press Accept.
Assign sales to a customer
HioPOS Cloud allows working with clients, to whom you can assign sales, create invoices, and then track them.
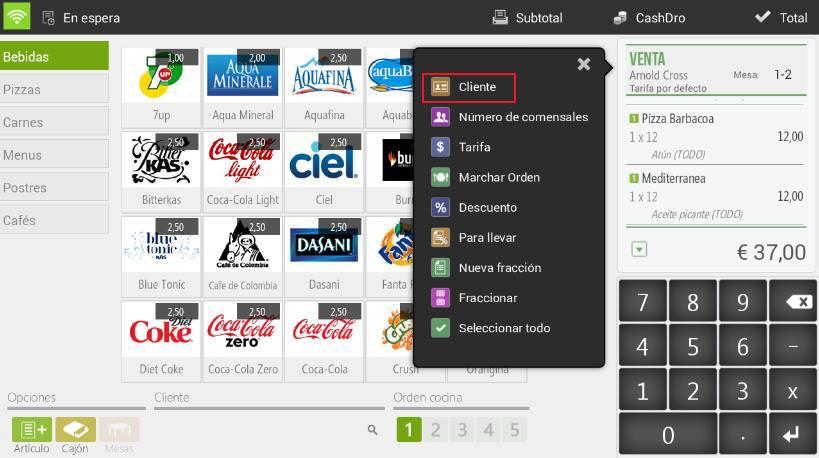
You can assign a customer to a sale from three different locations in HioPOS Cloud:
1. Tapping at the bottom of the sales screen (where it says customer).
2. Tapping the top of the ticket displayed on the sales screen.
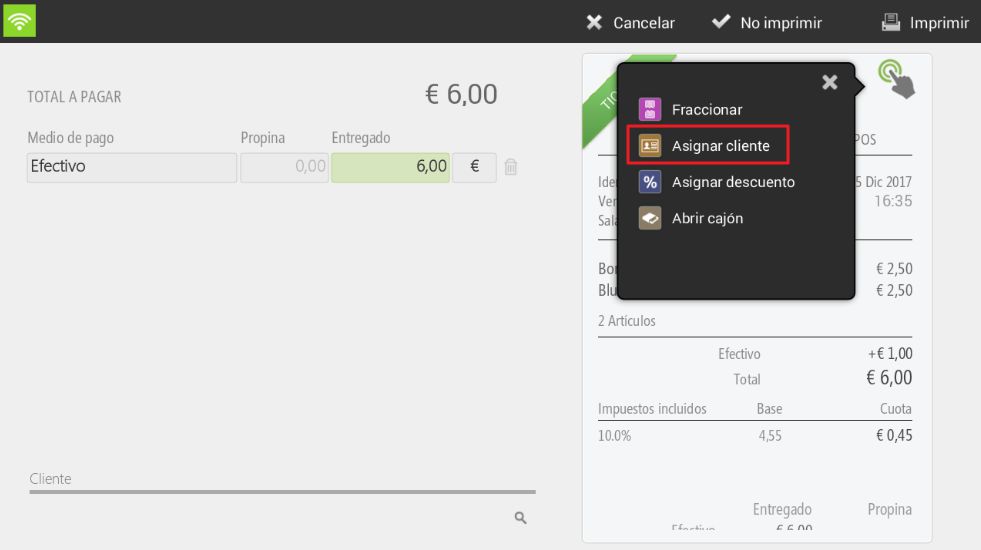
3. Tapping at the top of the ticket displayed on the total screen.
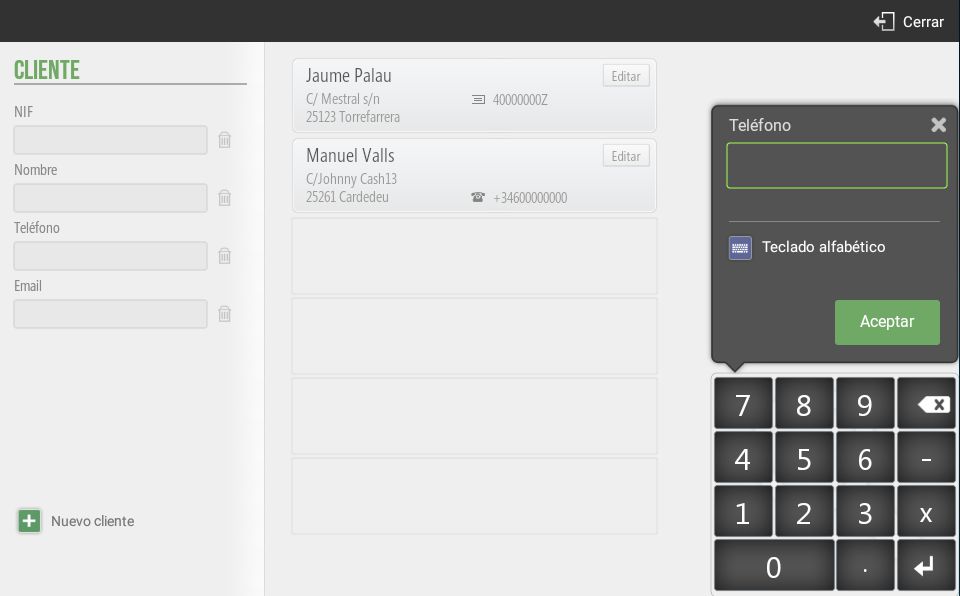
In all three cases, the customer inquiry screen will be displayed, where we can search by NIF, Name, Phone, or email.
The fastest way is to search for a customer by their phone number. Simply enter the phone number using the keypad on the right. If the phone number is not found, the following message will appear, and we can create a new customer record with the New button.
You can also view, modify, or create new clients in the Clients section within Settings.

Press the button New customer in the bottom left of the screen to create a new client record.
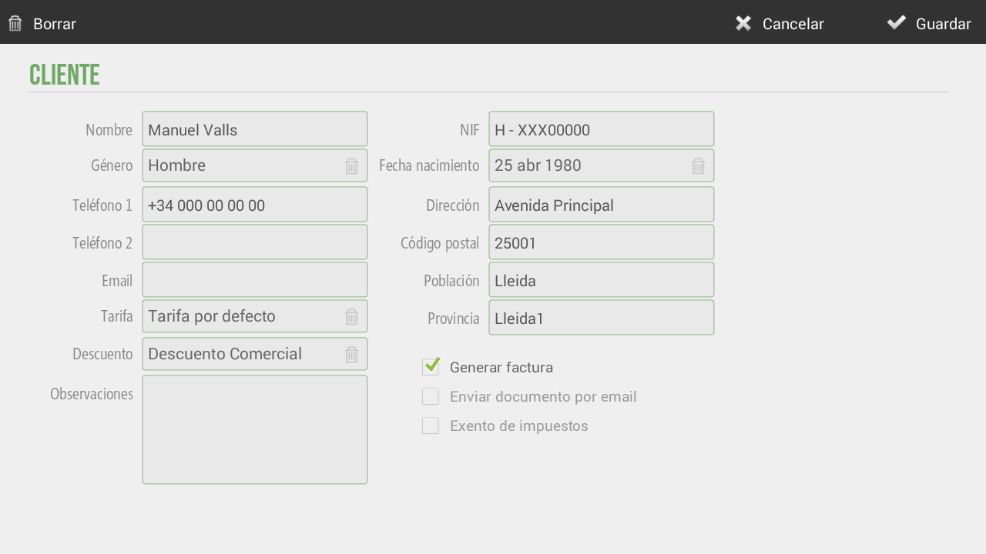
For each client, we can enter all their personal data (Name, gender, phone, email, date of birth, address, postal code, city…).
In addition to these options, there is also the possibility of selecting a specific default rate for this client, as well as a specific discount (selectable from the existing Discount Reasons). This way, when we make a sale and assign it to this client, the rate and discount will be directly applied.
If you want to assign more than one email address, to do so, in the Email field, you will need to enter all of them separated by a semicolon (;).
Generate invoices
On the same customer data modification screen, we can activate the "Generate invoice" option. This way, every time we make a sale to this customer, an invoice-type document will be generated instead of a ticket-type document.
Send documents by email
HioPOS Cloud can send invoices and tickets by email to the customer. For this, we need to have a valid email address assigned to the customer, and check the box Email document.
If the "Send document by email" option is activated, each time a sale assigned to a customer is made, it will be sent from no-reply@hiopos.com to the customer's email address.
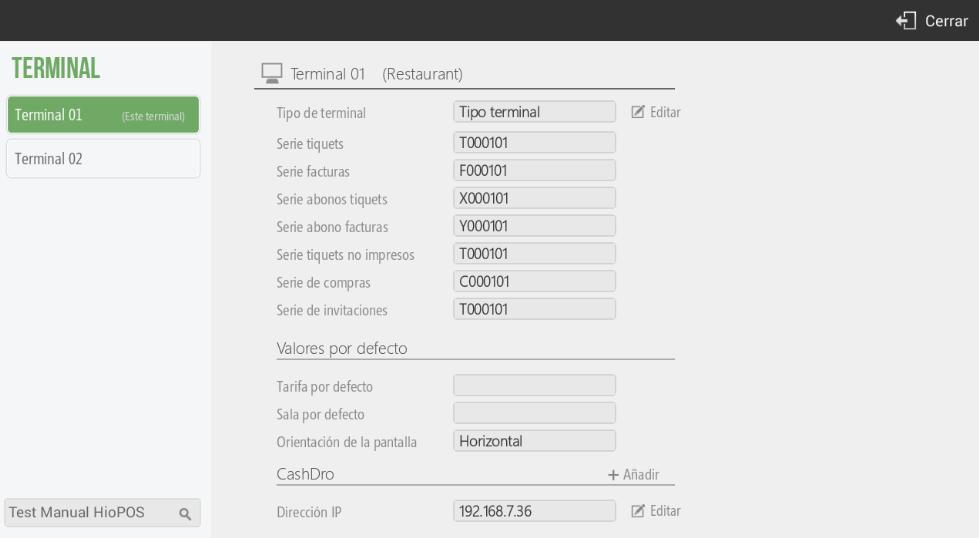
NOTE: HioPOS Cloud uses different numbering for ticket-type documents, invoice-type documents, and credit notes for tickets and invoices. You can set the series for each document type per terminal in the section Configuration Terminal.
As you can see, if a CashDro were configured, it would appear at the bottom of this screen:
AI Assistant
Section summary
AI can generate inaccurate information; verify the results.